¶ Local Storage Configuration
This page’s information applies only to Densu 2U models with local storage.
¶ Installing Disks
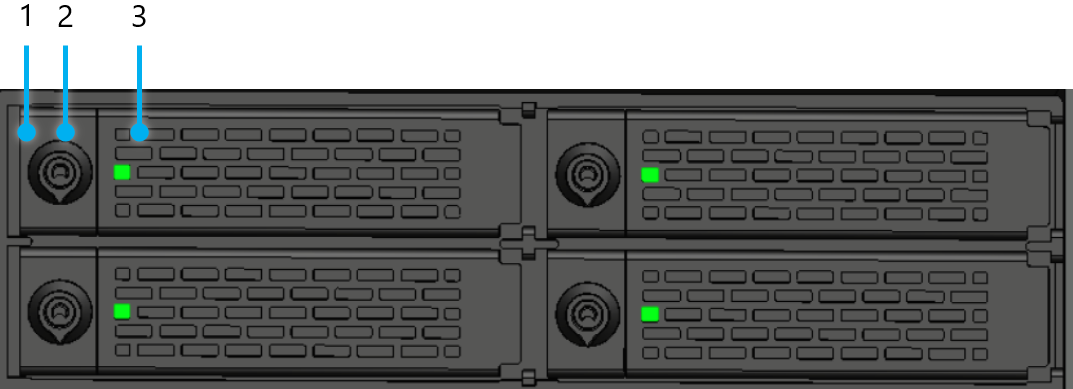
- Drive tray ejection button;
- Key lock (supplied in the spare box);
- LED indicator:
a. Green: the disk is idle;
b. Off: disk damage or no disk inserted;
c. Blinking: disk is being accessed.
¶ Adding a New Disk
To add a new disk, follow the next steps:
- Press the drive ejection button and remove the caddy;
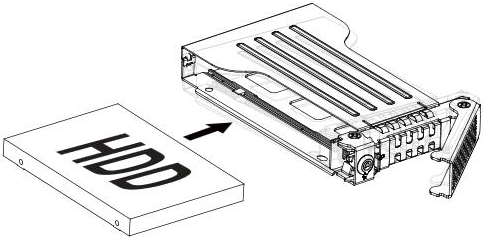
- Place the disk inside of the caddy;
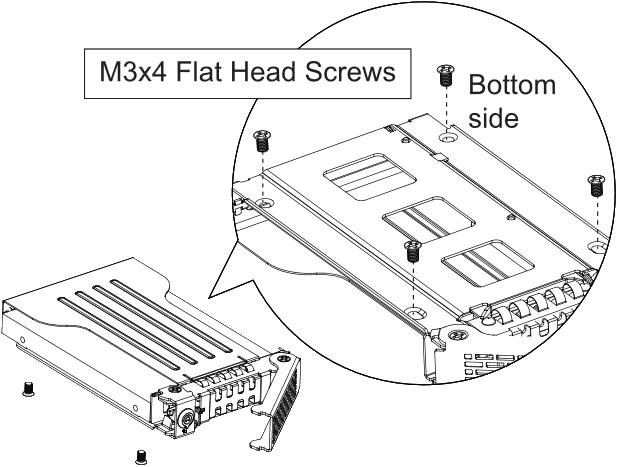
- Screw in the disk to the drive caddy;
- Place the caddy on the drive cage and close the caddy door.
¶ Configure RAID Disk Volume
Your system should be configured in RAID 0 by default. This section will help you either change your RAID configuration from RAID 0 to RAID 5, or vice-versa, or create a new RAID volume if any error has happened and the configuration is not correct.
IMPORTANT NOTE: any alteration to the RAID configuration will erase all the selected disks’ content. Be careful and backup all important data before following the next steps.
Pre-Requisite: this section assumes that “Intel® Rapid Storage Technology” software is installed on the server. If not, the software can be found in Intel®’s website.
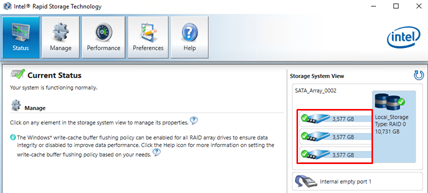
- Execute “Intel® Rapid Storage Technology”;
- Check if all disks are show in the status tab, under “Storage System View”. All disks connected to the system will appear. The next picture shows the default 3 units of 3,5 TB disks;
-
If a RAID disk is already configured, we must first delete the current volume. If not, then you can skip to step 5;
a. Navigate to the “Manage” tab and click “Advanced”;
b. From there click “Delete Volume”;
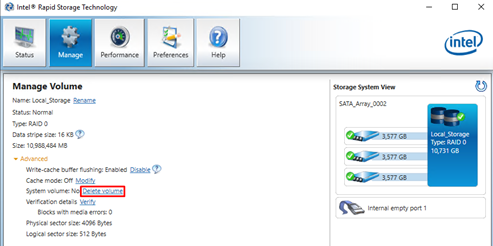
c. Click “Yes” to confirm that all disk data will be deleted;

-
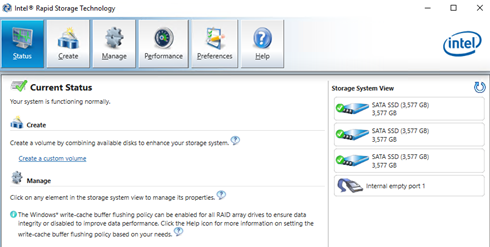
Your status should now appear like shown;
-
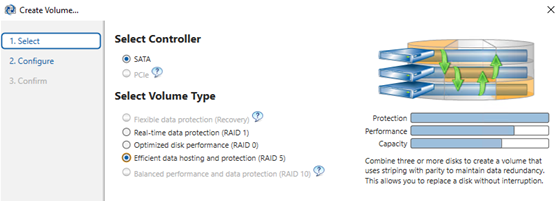
Open the “Create” tab. Select the “SATA” option and, depending on which RAID option you want, either select the option "Real-time data protection (RAID 0) or "Efficient data hosting and protection (RAID 5). Select next;
-
Choose a volume name, e.g.: “Local_Storage”. Select all SATA disks;
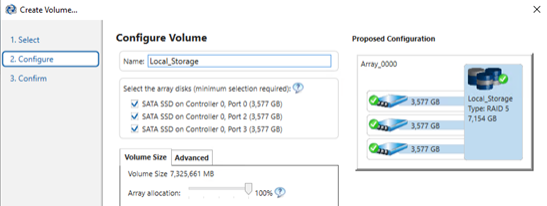
-
In the “Volume Size” tab, select 100% of “Array allocation”;
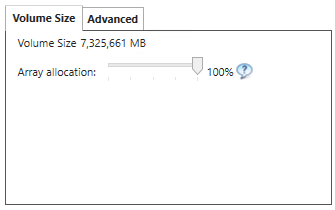
-
In the “Advanced” tab, uncheck the “Initialize Volume” option and hit Next;
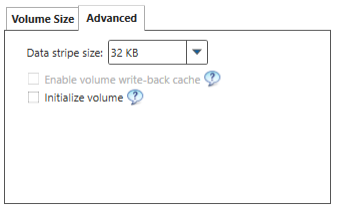
-
Check if the configuration is correct and click “Create Volume”;
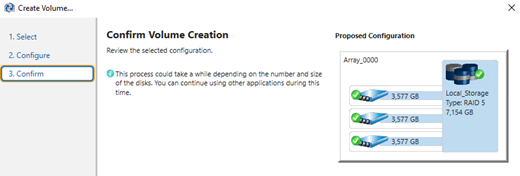
-
A confirmation message will appear. Press “OK”;

-
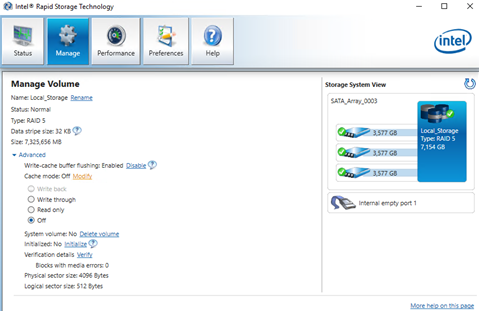
Select the “Manage” tab and expand the “Advanced” options;
-
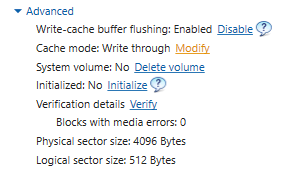
The configuration should be as follows:
a. Write-cache buffer flushing: enabled;
b. Cache mode: write through.
-
Click “Initialize”. A confirmation pop-up will appear. Click “Yes”;

-
The initialization will take a while, but the volume can already be used, and the next steps can be followed.
¶ Format the Volume
-
Open Windows “Disk Management” tool by typing “Create and Format hard disk partitions” using Windows search function;
-
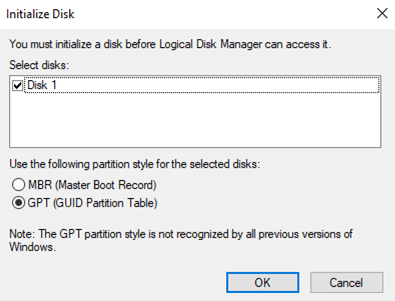
An “Initialize Disk” message will appear. Select “GPT (GUID Partition Table)” and click “OK”;
-
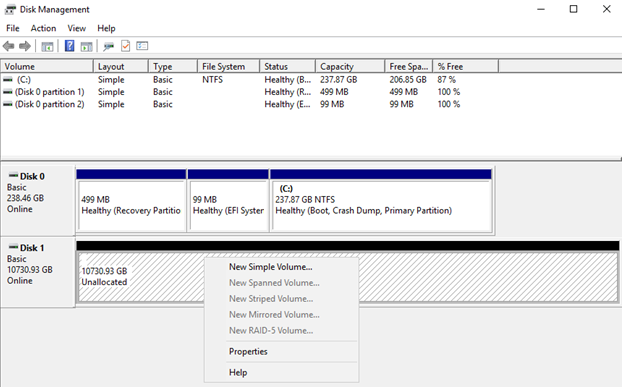
Right-click on the disk and select “New Simple Volume”;
-
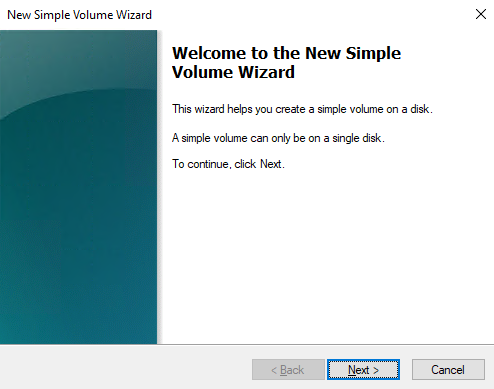
The “New Simple Volume Wizard” pop-up will appear. Click “Next”;
-
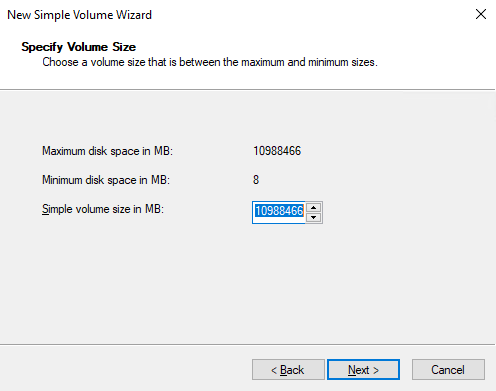
Select the maximum amount of available storage and click “Next”;
-
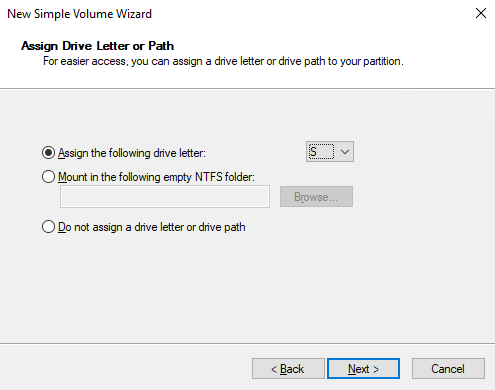
Select a drive letter to be assigned to the drive e.g.: “S:”. Click “Next”;
-
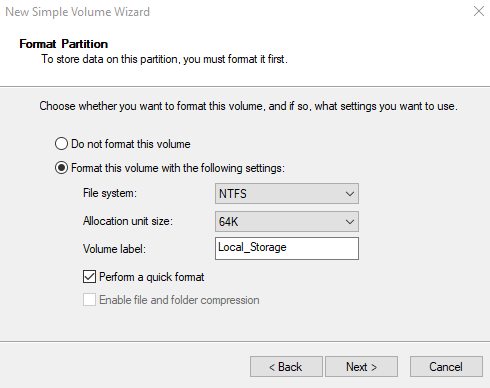
Select the “Format this volume with the following settings” option and choose:
a. File System: NTFS;
b. Allocation Unit Size: 64K;
c. Volume Label: “Local Storage”;
d. “Perform a quick format”;
e. Click “Next”.
-
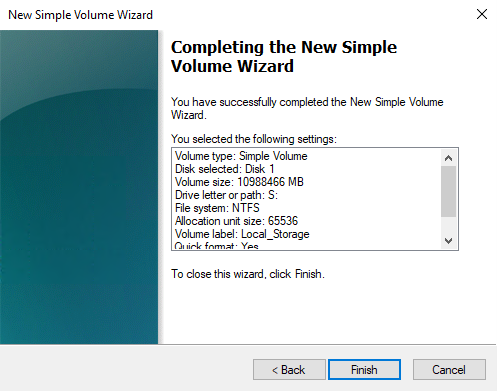
Verify the configuration options. Click “Finish”;
¶ Defining Warning and Error Alerts
-
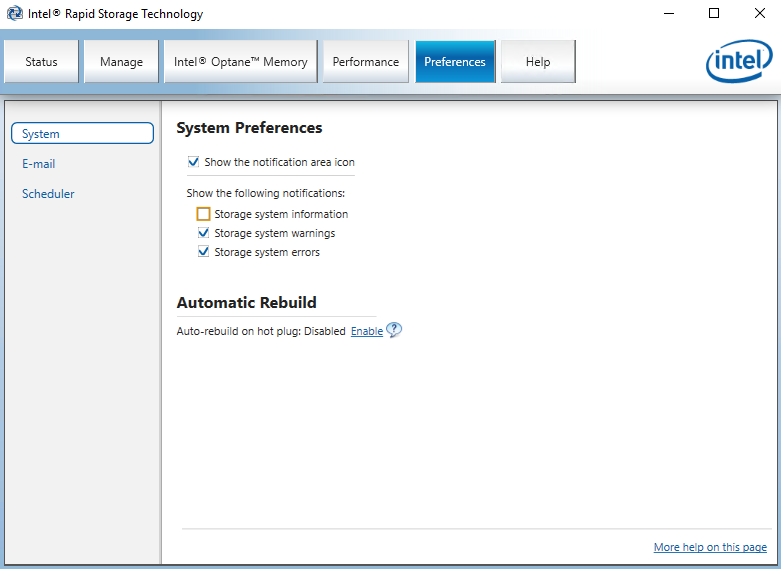
Open the “Intel® Rapid Storage Technology” tool and select the “Preferences” tab;
-
Under the “System” tab, uncheck the “Storage system information” option to avoid spam notifications and keep the other options checked;
-
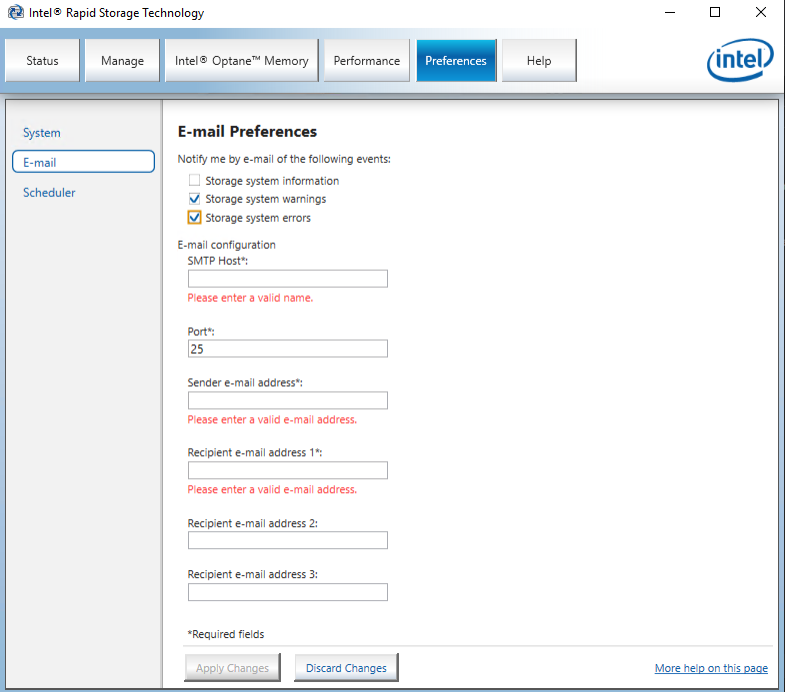
In the “E-mail” tab check the “Storage system warnings” and the “Storage system errors” options. Fill the required fields for e-mail configuration and apply the changes.
