¶ Local Storage Maintenance
This page’s information applies only to Densu 2U models with local storage.
Before you try to repair the RAID volume, it is highly recommended to first do a full back-up of the RAID volume data to avoid data loss. If you do not see the RAID volume available on the system, you may have lost all the RAID volume data.
¶ Check for and Replace a Failed Disk in RAID 0
To check the status of the RAID volume, open the “Manage” tab on the “Intel® Rapid Storage Technology” software. If the “Status” shows that the volume is “Failed”, it means one of the RAID disks has failed and needs to be replaced.
In a RAID 0 configuration, if one of the disks fails, the data from that disk is lost. You can change the failed disk and rebuild the RAID, but only the data from the working disks will remain.
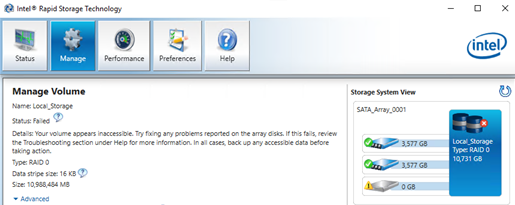
To identify and change a failed disk, follow the next steps:
-
Check which disk has failed:
a. Hover the mouse cursor over the failed disk and take note of the serial number;
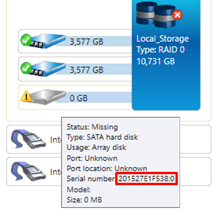
b. Turn off the server and remove the disk with the matching serial number;
c. Replace it with a new drive and turn the server back on. -
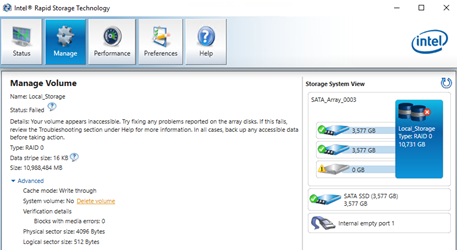
The new disk should appear, although not within the RAID volume;
-
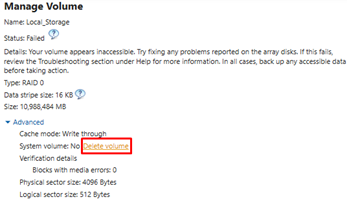
To rebuild the volume you should first backup your remaining data (if any) as we will need to delete the current volume and build a new one. To delete the volume, click on “Delete Volume” under the “Advanced” volume options;
-
A “Delete Volume” pop-up should appear, confirming you want to delete the volume and warning you that all volume data will be lost. Click “Yes” to confirm;

-
The next step should be to create the RAID volume again. To do this, follow the steps in the Configure RAID Disk Volume section.
¶ Check for and Replace a Failed Disk in RAID 5
To check the status of the RAID volume, open the “Manage” tab on the “Intel® Rapid Storage Technology” software. If the “Status” shows that the volume is “Degraded”, it means one of the RAID disks has failed and needs to be replaced.
In a RAID 5 configuration, if one of the disks fails there may still be a chance of getting all your data back.
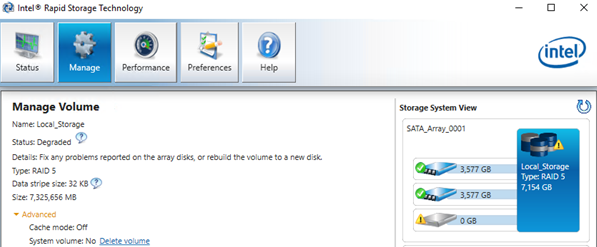
To identify and change a failed disk, follow the next steps:
-
Check which disk has failed:
a. Hover the mouse cursor over the failed disk and take note of the serial number;
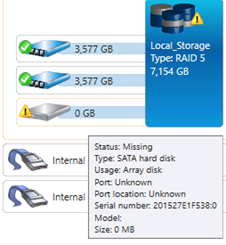
b. Turn off the server and remove the disk with the matching serial number;
c. Replace it with a new drive and turn the server back on. -
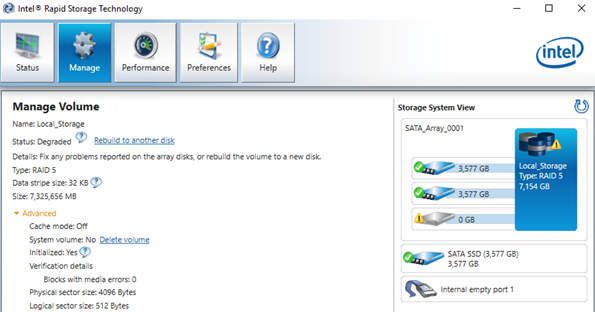
The new disk should appear, although not within the RAID volume. To rebuild the volume with the new disk click “Rebuild to another disk”;
-
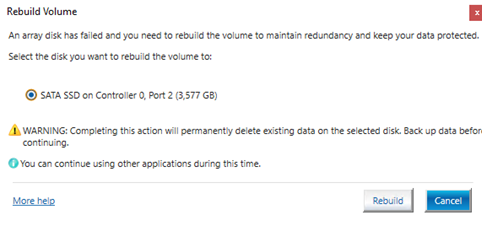
A “Rebuild Volume” pop-up should appear, confirming which disk is to be added to the RAID volume. Check the disk and click “Rebuild”;
-
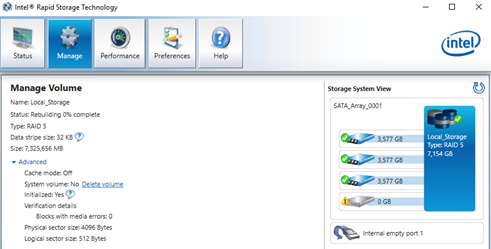
The rebuilding process should take a while. While the rebuild is happening, the volume should appear with three “Normal” disks (the new disk should be in there) and the failed disk should appear as missing;
-
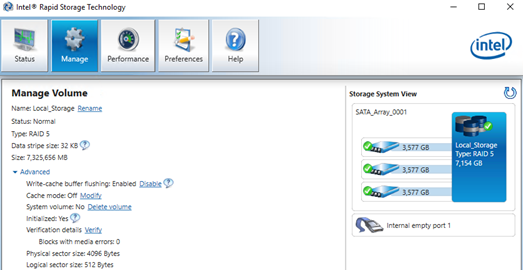
After the rebuild is complete, the RAID volume should appear as follows.
¶ Supported Disks
For TL model, the disks may be any enterprise HDD or SSD with these technical specs:
- Capacity higher than 240GB;
- SATA interface;
- 2.5” form factor and up to 7mm height;
- Write performance higher than 100MB/s.
For all other models, if you wish to change the provided disks, the new disks must meet the following criteria:
- Capacity higher than 240GB;
- SATA interface;
- 2.5” form factor and up to 15mm height;
- Write performance higher than 100MB/s.
Warning: when performing a record operation to local storage, be careful when performing any other read/write operation to these disks, as it may negatively impact the capture operation.