¶ System and Workgroup Configurations
MOG servers use a customized distribution of Microsoft® Windows® 10 Enterprise LTSC. This version comes with optimizations, Windows updates, and fixes. All the modifications were done to offer the best product performance and user experience.
As this windows is LTSC, it will have extended support up to 10 years from his release date:
- Windows 10 Enterprise LTSC 2015 (1507) has support up to 2025.
- Windows 10 Enterprise LTSC 2016 (1607) has support up to 2026.
- Windows 10 Enterprise LTSC 2019 (1809) has support up to 2028.
For more information about LTSC, please refer to the official Microsoft® documentation.
Important notices regarding the Operating System and other software:
- Windows updates: do not install any Windows update or fix unless necessary and authorized by MOG. Please ask MOG to check if there is any qualified update pack;
- Windows upgrades: If the installed license was an LTSC, you cannot do upgrade the version by Microsoft limitation. If you need upgrade the feature version, you need to ask MOG for a license upgrade pack. For more information, please refer to this Microsoft® documentation.
- Third-party software: MOG is not responsible for any third-party software that is installed on the server, except for the necessary drivers and other important software directly related with the main product proposal. If you do wish to install any other software, including not previously qualified drivers or software from MOG, our support team must be contacted first;
- Anti-virus usage: MOG recommends that you do not use anti-virus software on servers. If you do use anti-virus software, you should contact MOG first to get a qualified anti-virus list.
If any of the above points are void, the product features and performance cannot be assured, and the limited warranty may be considered broken.
¶ Change Machine Name
If there is the need to change the machine name, please follow the steps below:
-
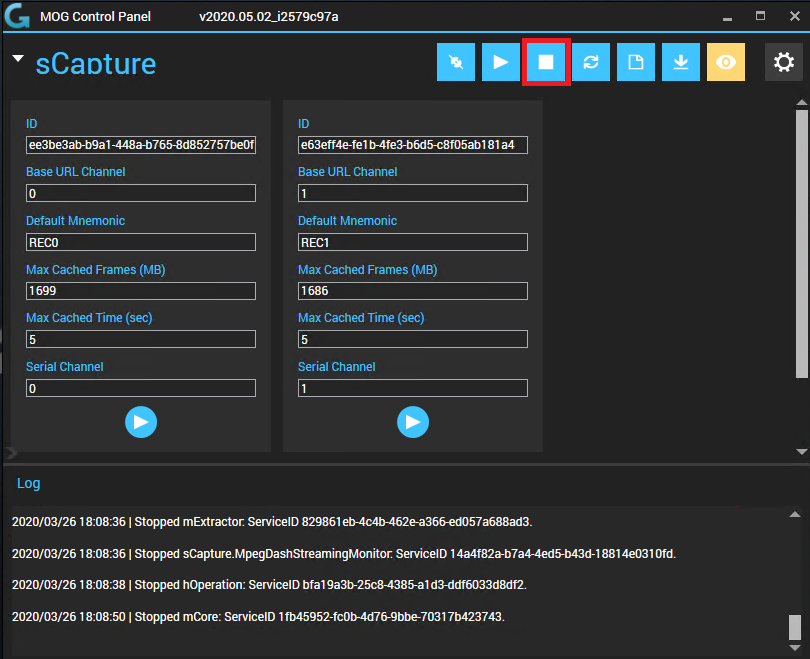
On the MOG Control Panel, click the “Stop” button to stop all system services (if they are running);
-
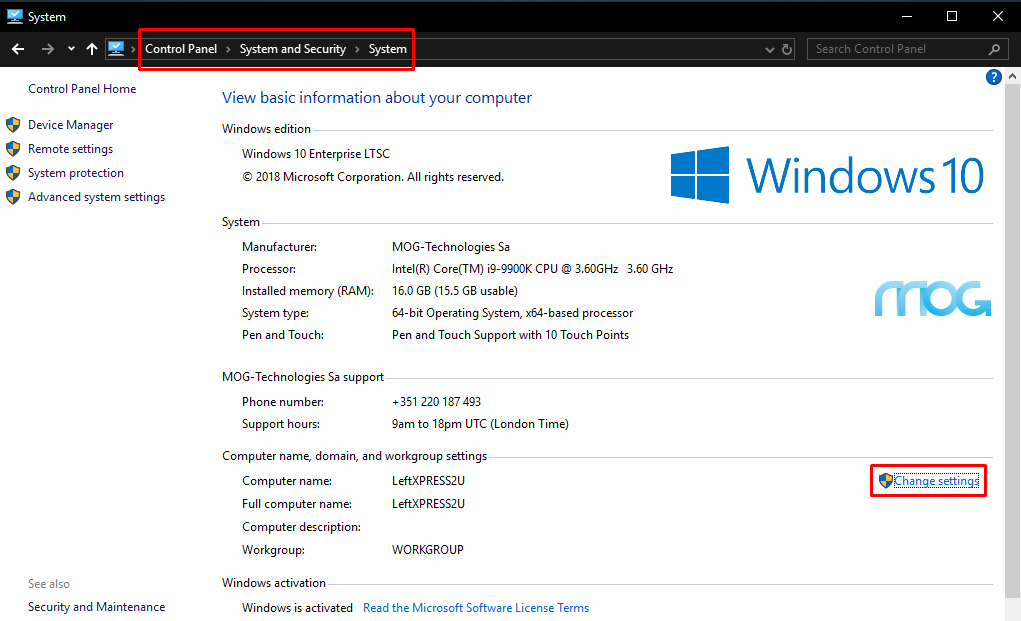
In the Windows control panel, navigate to “System and Security” > “System” and click on “Change Settings”;
-
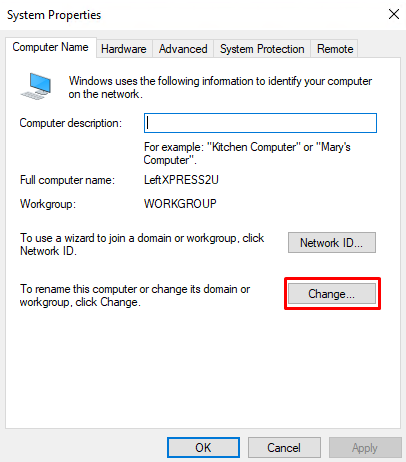
A “System Properties” pop-up window will appear. Click on “Change”;
-
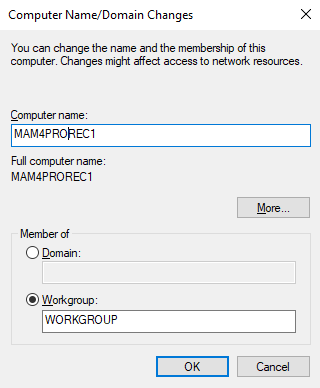
A new pop-up window ("Computer Name/Domain Changes”) will appear. Enter the new name under “Computer name:” and press “OK” to confirm;
-
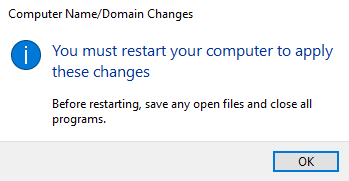
Press “OK” to confirm the message stating that you must restart the machine to apply the name change;
-
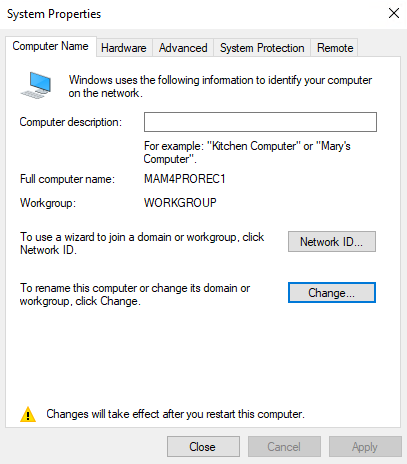
Close the “System Properties” window;
-
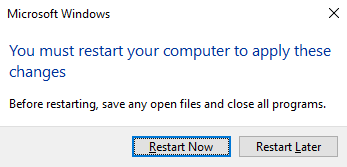
A pop-up will prompt you to restart the computer. Press “Restart Now” if the machine can be immediately restarted. Otherwise, press “Restart Later”, save the important work, and manually restart the machine;
-
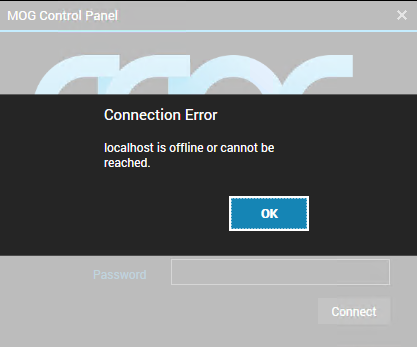
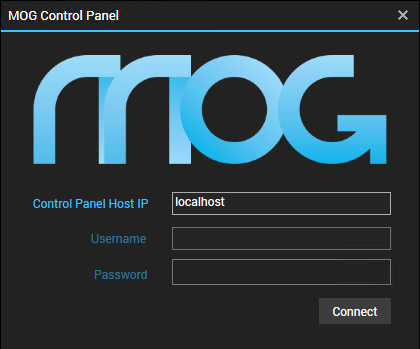
After the machine restarts, the MOG system will fail to start the “MOG Control Panel”, which is expected. Press “OK” on the “Connection Error” pop-up;
-
Click “Connect” on the “MOG Control Panel” window;
-
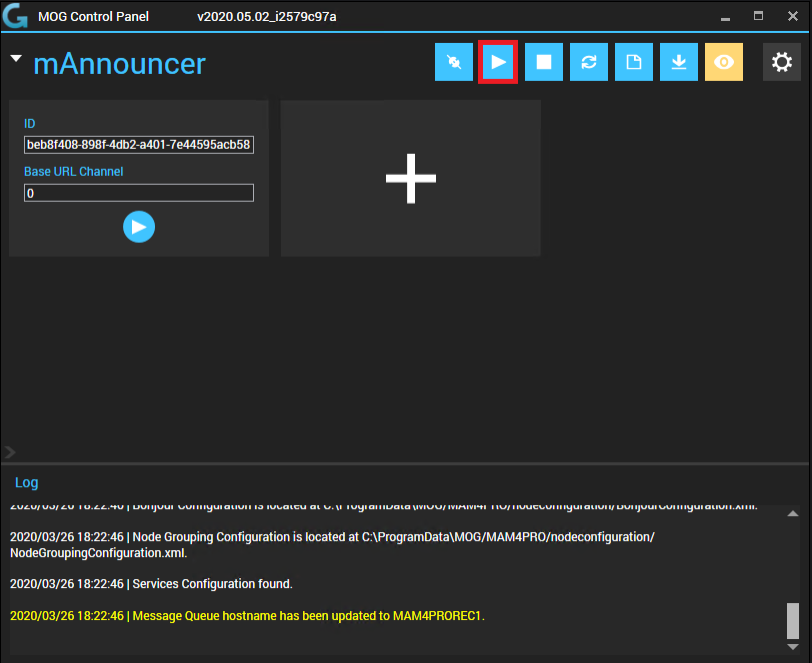
The MOG system will automatically update the name where it is needed. Press the “Start All Services” button to start all services.
¶ Workgroup and Domain Settings
¶ Precautions Before Modifying Domain
Before modifying the server’s domain, there are some settings and configurations that must be kept and not forced by the domain rules, as they are necessary for the correct functioning of the MOG system.
¶ Firewall ports
Some firewall ports must remain open for the MOG system to work correctly. Please refer to the Network page for the list of all ports and their protocols.
¶ Windows services
By default, some Windows Services are disabled on the machine. If the domain rules force these Windows Services to be enabled, some MOG system’s features may stop working correctly. The services are:
- Windows Updates
- Windows Defender:
- Real-Time Protection
- Security Centre
- Controlled Folder Access
- Notifications
- Action Centre
- Windows SmartScreen
- FIPS-compliant Encryption
¶ Insert Server on a Domain
-
On the MOG Control Panel, click the “Stop” button to stop all system services (if they are running);

-
In the Windows control panel, navigate to “System and Security” > “System” and click on “Change Settings”;

-
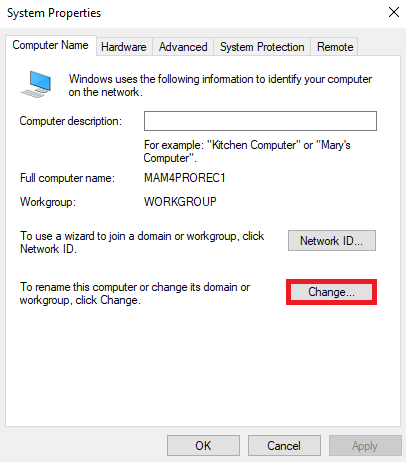
A “System Properties” pop-up window will appear. Click on “Change”;
-
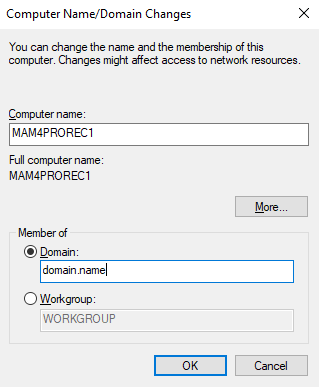
A new pop-up window ("Computer Name/Domain Changes”) will appear. Change the “Member of” selection from “Workgroup” to “Domain” and enter the desired domain name. Press “OK” to confirm;
-
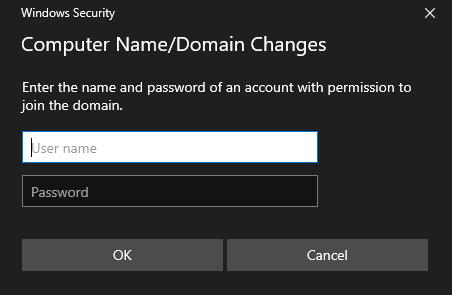
A pop-up prompting to input new credential will appear. Enter valid credentials for the new domain and press “OK”;
-
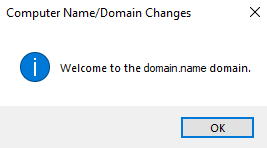
A new pop-up will appear. Press “OK”;
-
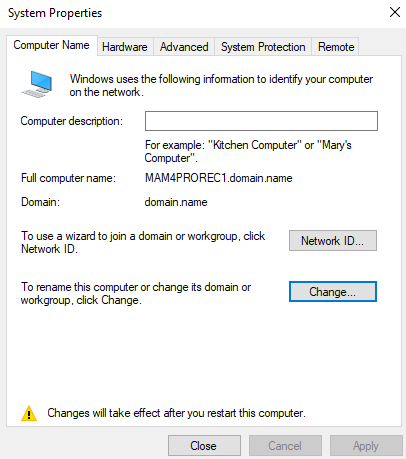
Press “OK” to confirm that you must restart the machine to apply the name change;

-
Close the “System Properties” window;
-
A pop-up will prompt the user to restart the computer. Press “Restart Now” if the machine can be immediately restarted. Otherwise, press “Restart Later”, save the important work, and manually restart the machine;

After restarting, the server will be on the new domain.
¶ Remove Server from a Domain
-
On the MOG Control Panel, click the “Stop” button to stop all system services (if they are running);

-
In the Windows control panel, navigate to “System and Security” > “System” and click on “Change Settings”;

-
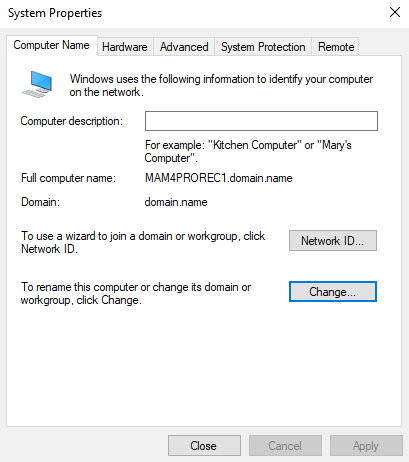
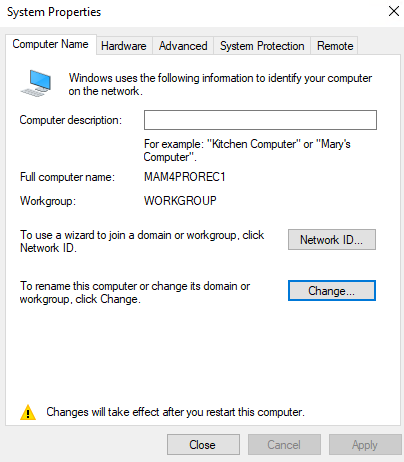
A “System Properties” pop-up window will appear. Click on “Change”;
-
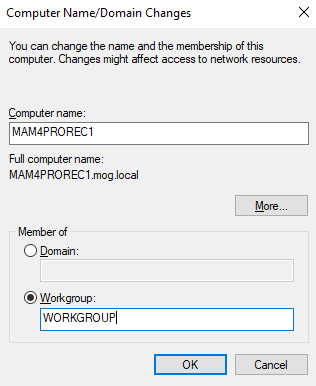
A new pop-up window ("Computer Name/Domain Changes”) will appear. Change the “Member of” selection from “Domain” to “Workgroup” and enter the desired workgroup name. Press “OK” to confirm;
-
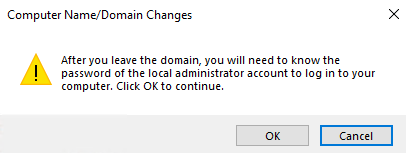
A new prompt will appear with a warning that the previous administrator credentials will be needed. If they were not changed in the meantime, they are back to being:
- User: MOG;
- Password: admin.
-
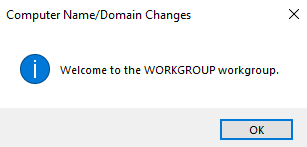
A new pop-up will appear. Press “OK”;
-
Press “OK” to confirm that you must restart the machine to apply the name change;

-
Close the “System Properties” window;
-
A pop-up will appear prompting the user to restart the computer. Press “Restart Now” if the machine can be immediately restarted. Otherwise, press “Restart Later”, save the important work, and manually restart the machine;

After restarting, the server will be back on the workgroup.