¶ Dante Audio Capture
Revision date: 17/apr/2024
Software version: 2024.04.00_22356087_dev
The compatible products with this feature are MAM4PRO, mDECK, mPORT, mREC, and mLIVE.
Keeping up with the industry’s innovations, MOG products now features integration with the Dante Audio Network. This software enables straightforward connections to audio devices within the system and allows for multichannel audio to be routed anywhere on a standard network using regular Ethernet cables, overcoming the limitations and rigidity of traditional point-to-point connections, enhancing flexibility, and streamlining audio management.
With Dante and MOG products, your audio editing becomes easier, simpler, and even more powerful and efficient. Access your content and work on it from anywhere, at any time.
¶ Dante Configuration (since 2024.04.00)
Before you can take advantage of this exciting feature, you must meet a few requirements.
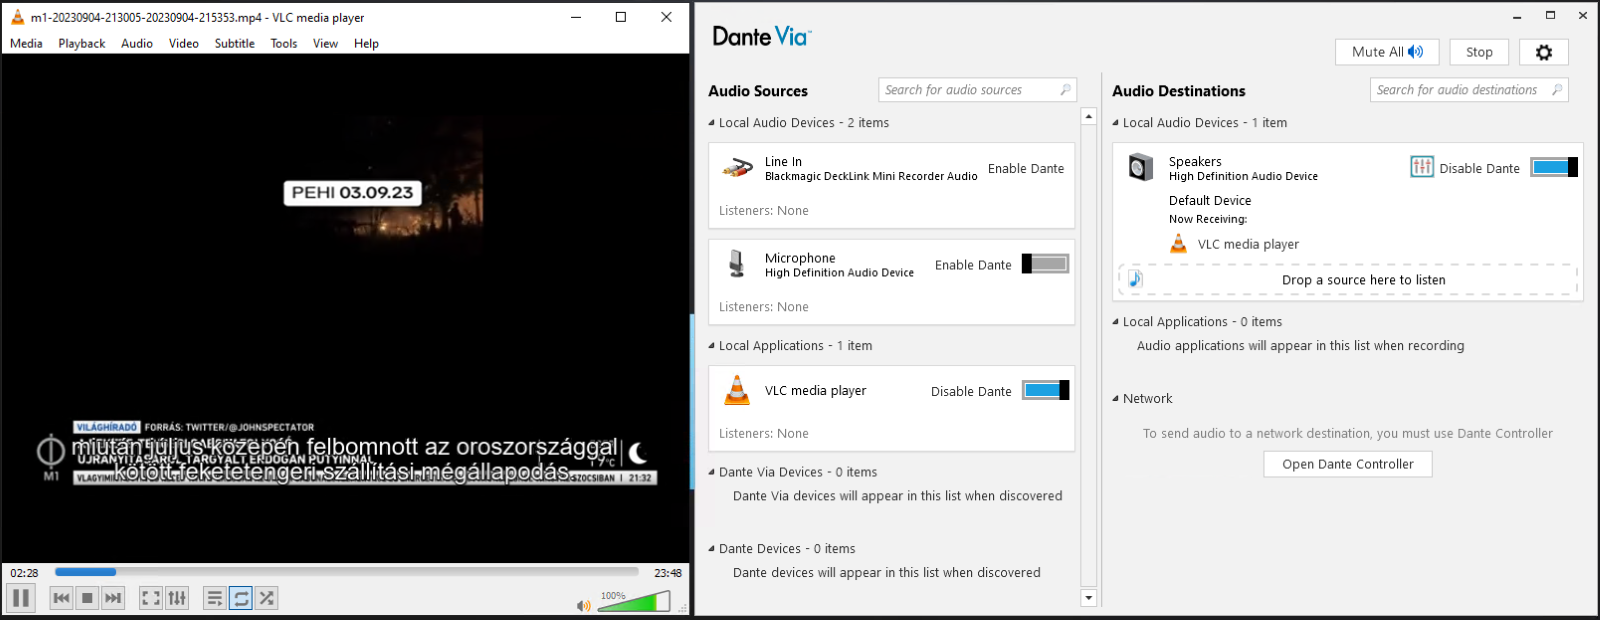
First, install Dante Via, a software that turns applications into virtual Dante devices. Please take note that although this software can be installed with no errors, it won’t work on virtual machines.
Also keep in mind that while Dante Via can run side-by-side with Dante Controller and MOG products, it cannot run side-by-side with Dante Virtual Soundcard:
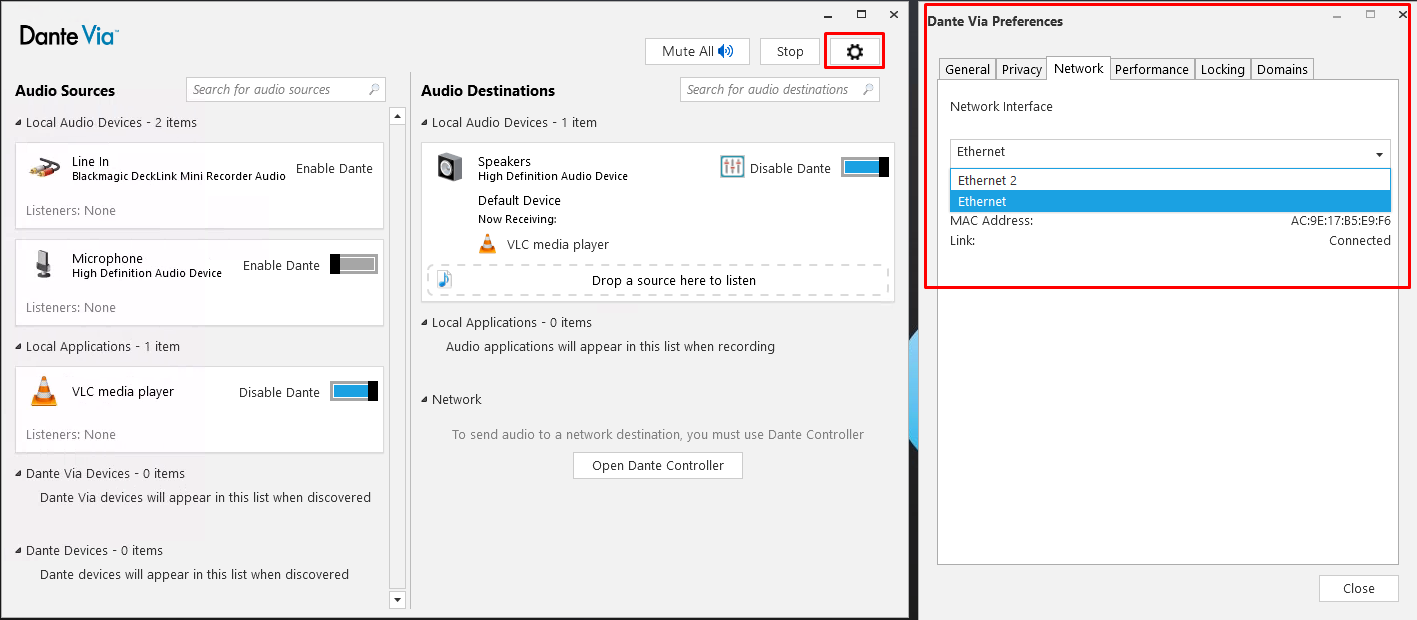
Ensure that Dante Via has a selected/configured Network Interface. This network configuration will persist throughout the entire workflow:
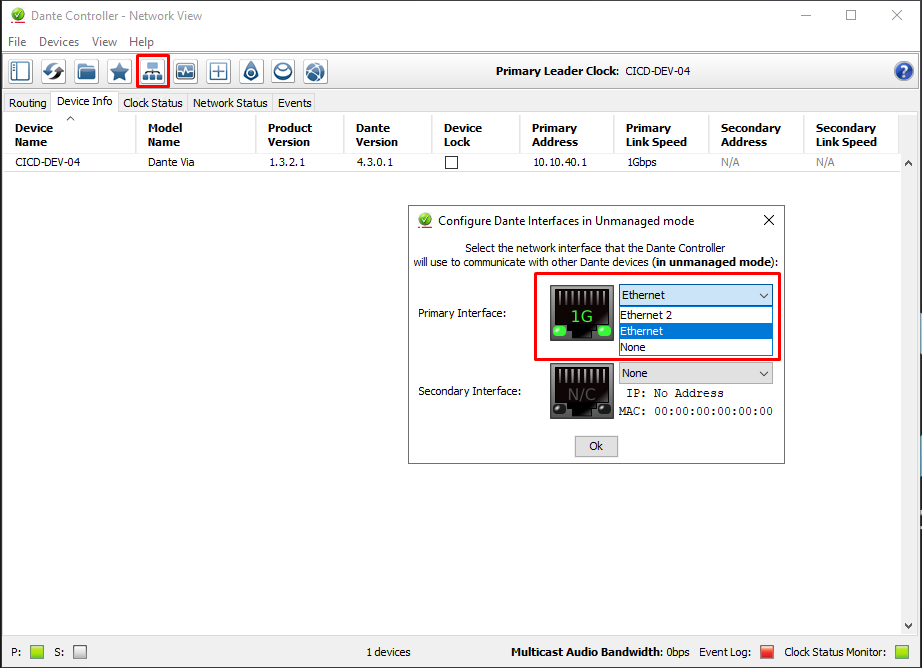
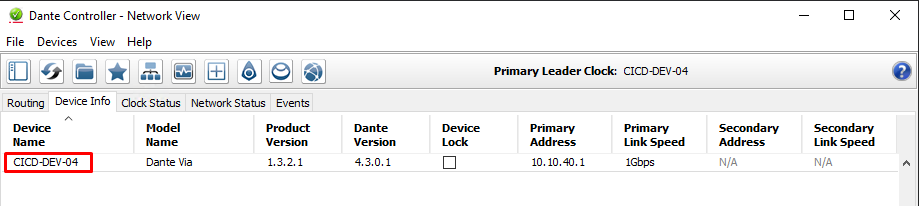
You will also need to install Dante Controller. It is the primary tool to configure Dante AV networks and route Dante-enabled devices. In addition, it provides essential monitoring tools to quickly identify and resolve any potential network issues.
Make sure it has the same Network configuration as your Dante Device, as shown below:
¶ MOG Products Configuration (since 2024.04.00)
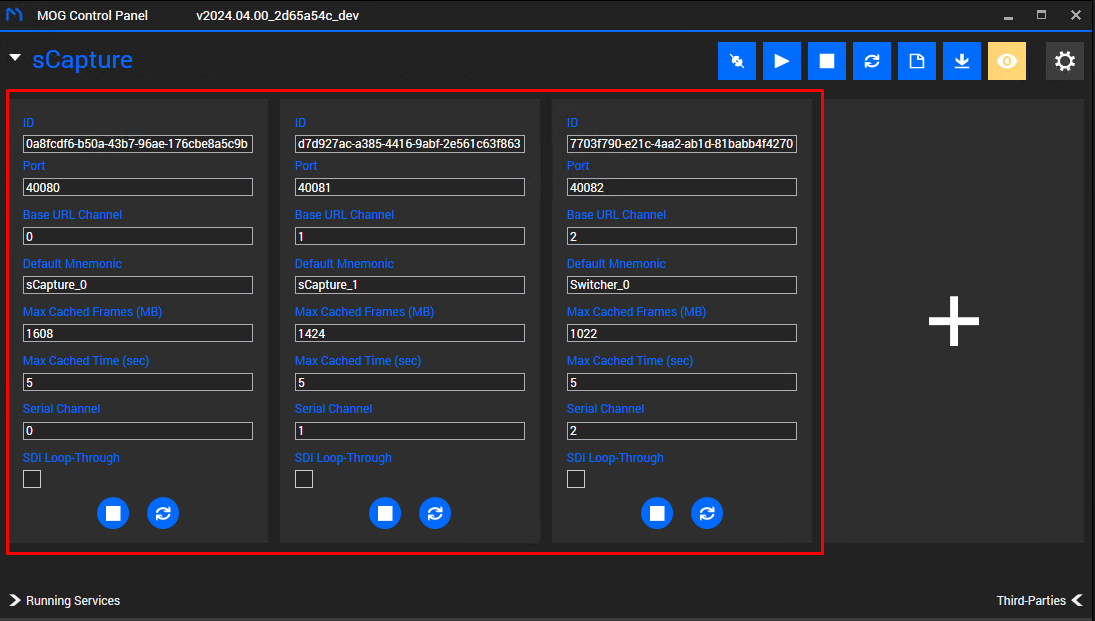
Now that Dante is configured, let’s move on to setting up MOG products. In the MOG Control Panel, create the necessary sCapture Instances:
Then, create a Dante Input Signal where you intend to receive the signal. To do so, go to the “Input/Output” menu and select “SDI/HDMI/IP”:
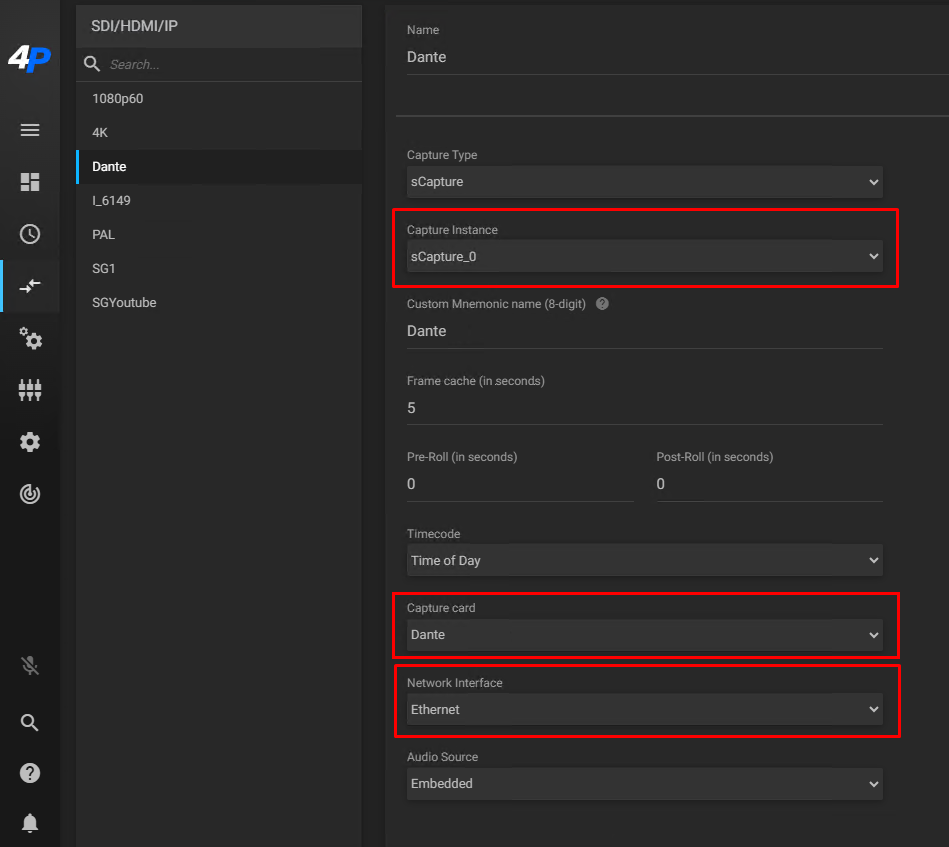
Please confirm that your “Capture Card” option has the “Dante” option selected and that the “Network Interface” option is within the same subnet as your Dante device and Device Controller.
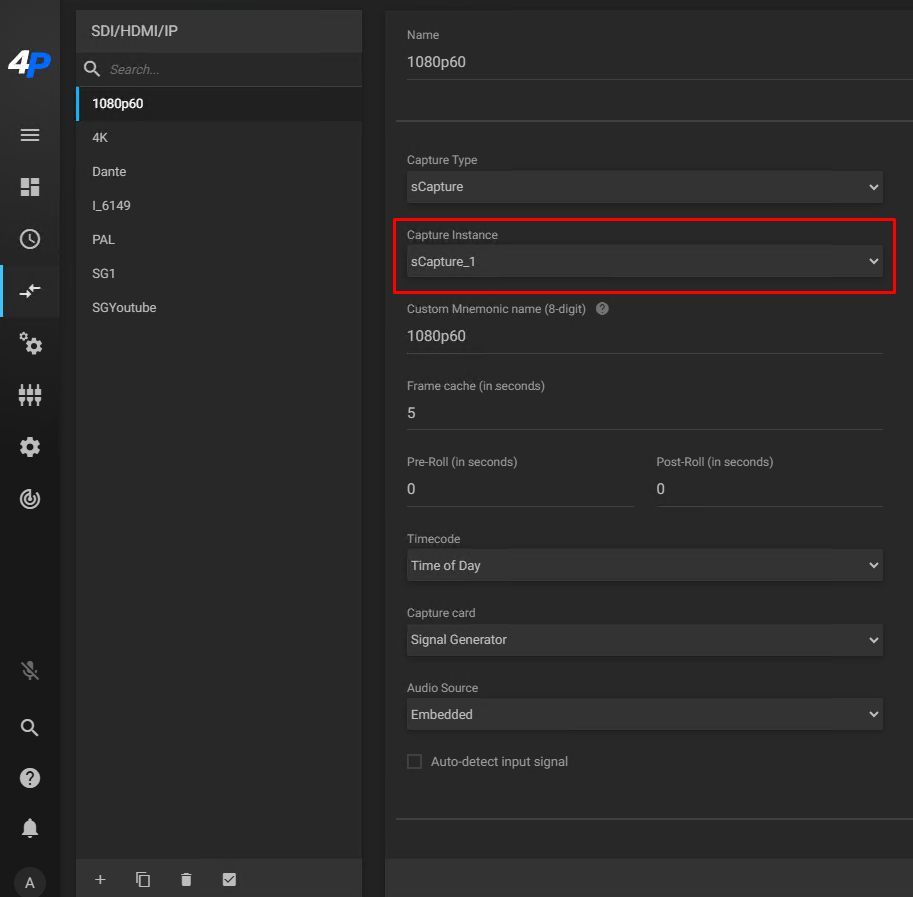
Now, let’s add a Video Input Signal using the same instance:
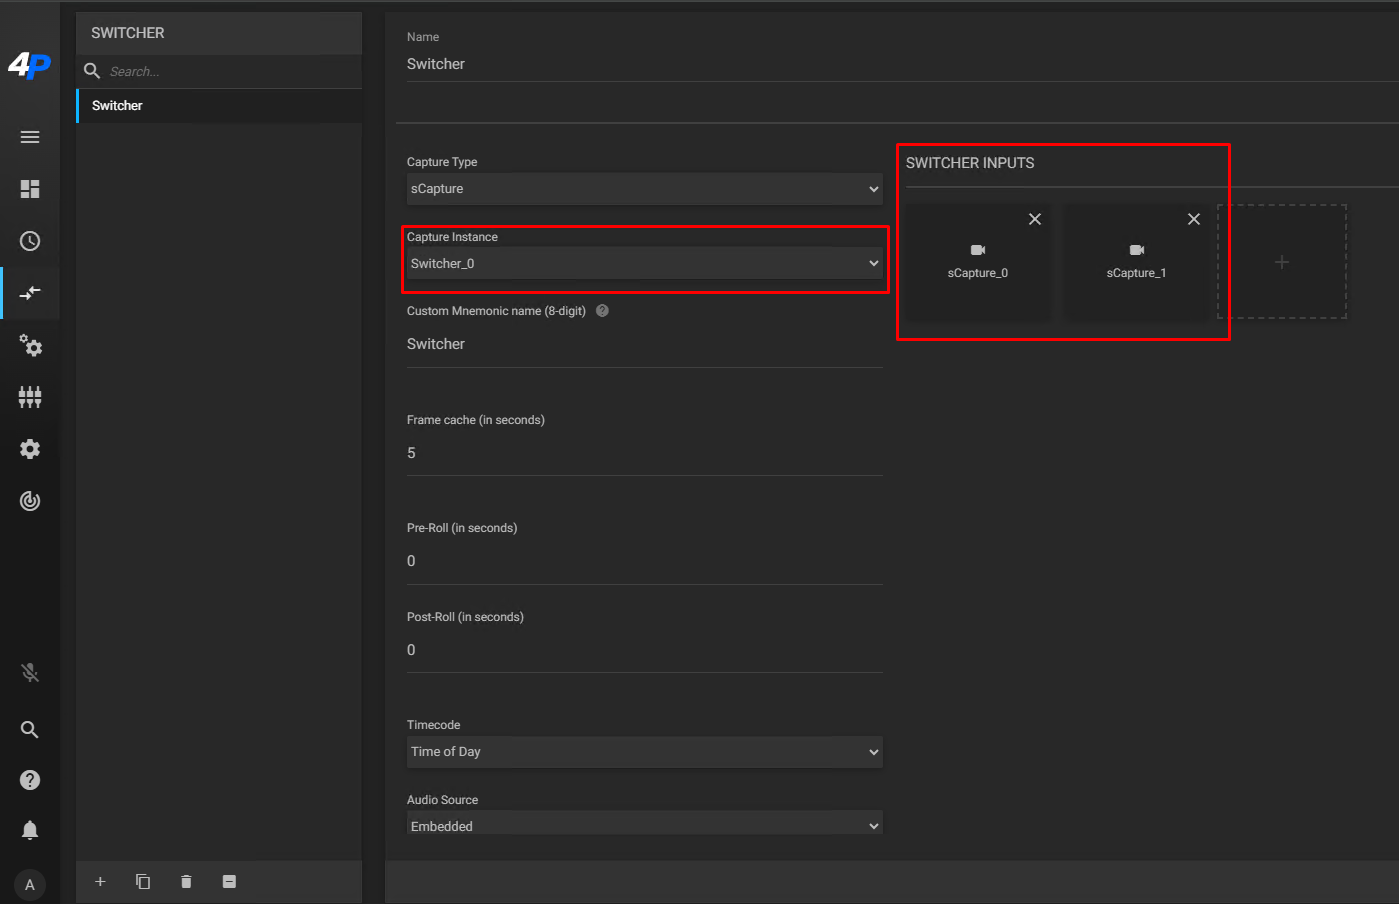
Still on “Input/Output” menu, let’s move to “Switcher” and repeat the previous step, adding the Dante and Video Inputs we have just created:
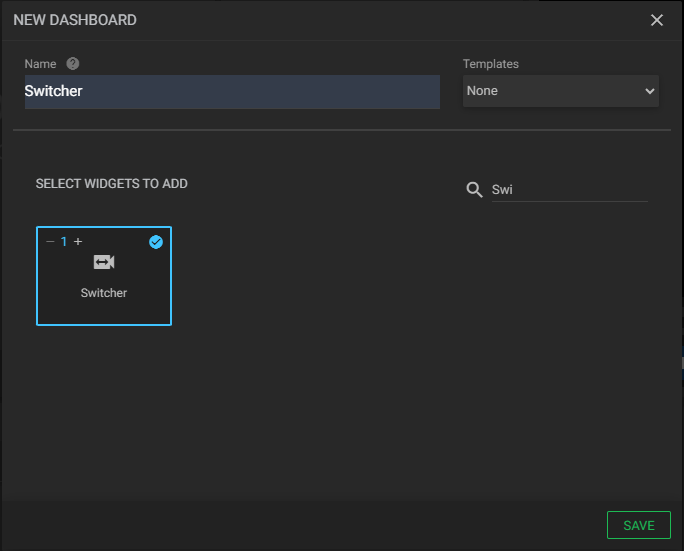
Return to your Dashboard and create a new one, looking for the Three dots (⋮) icon:

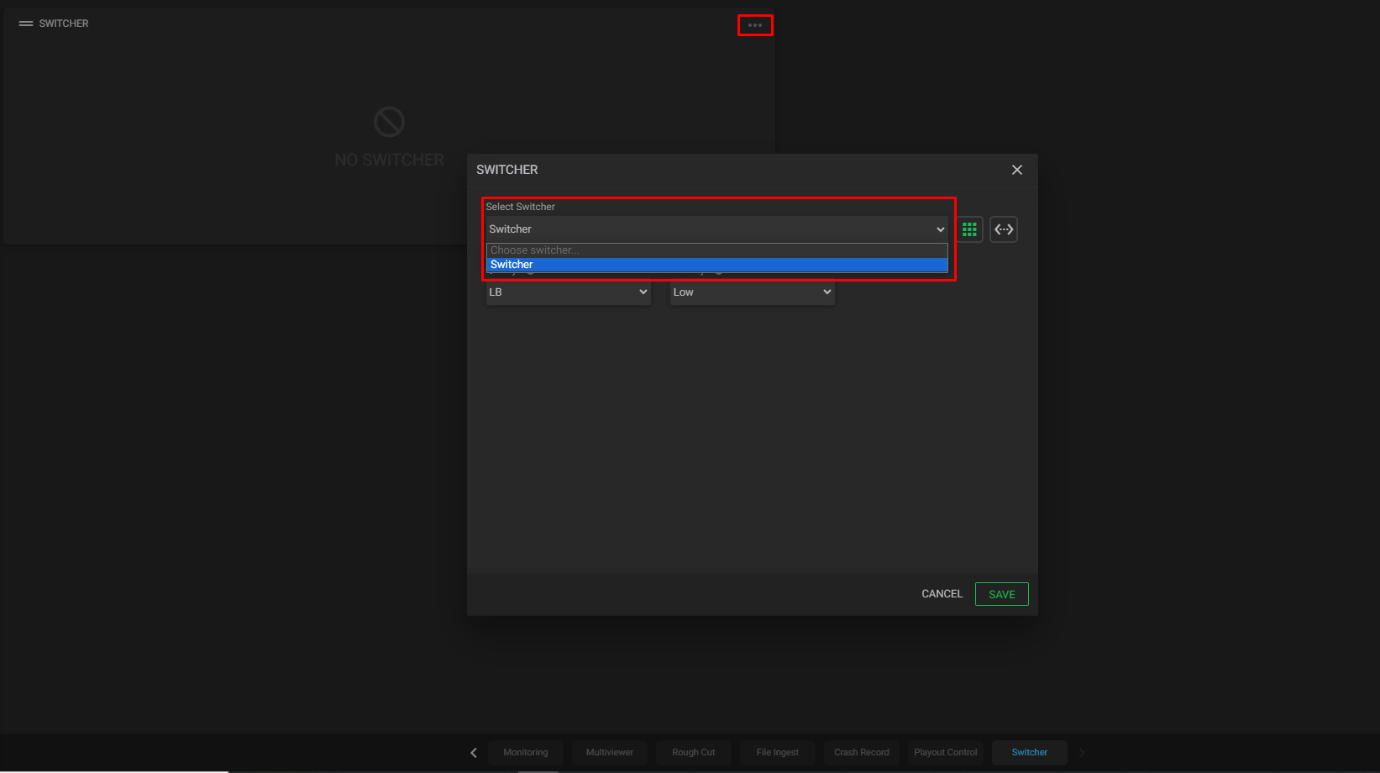
In this new Dashboard, let us first add a Switcher Widget and configure it according to our previous setup:
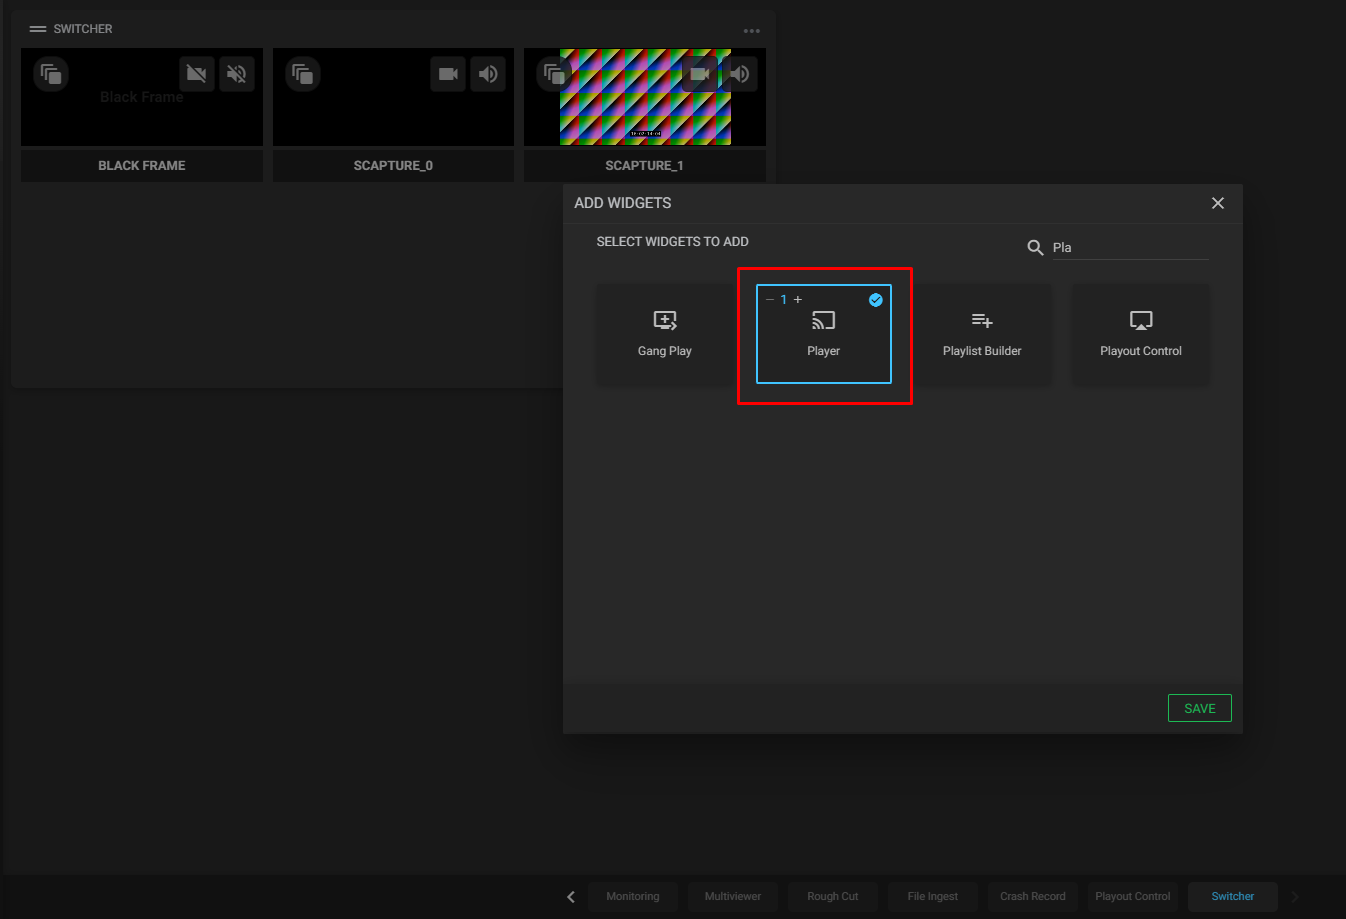
Now, we will add a Player Widget to the Dashboard. To do so, click on Three dots (⋮) icon again, but select the Add (+) button instead:

In the player settings, set the Switcher previously created as the Input:
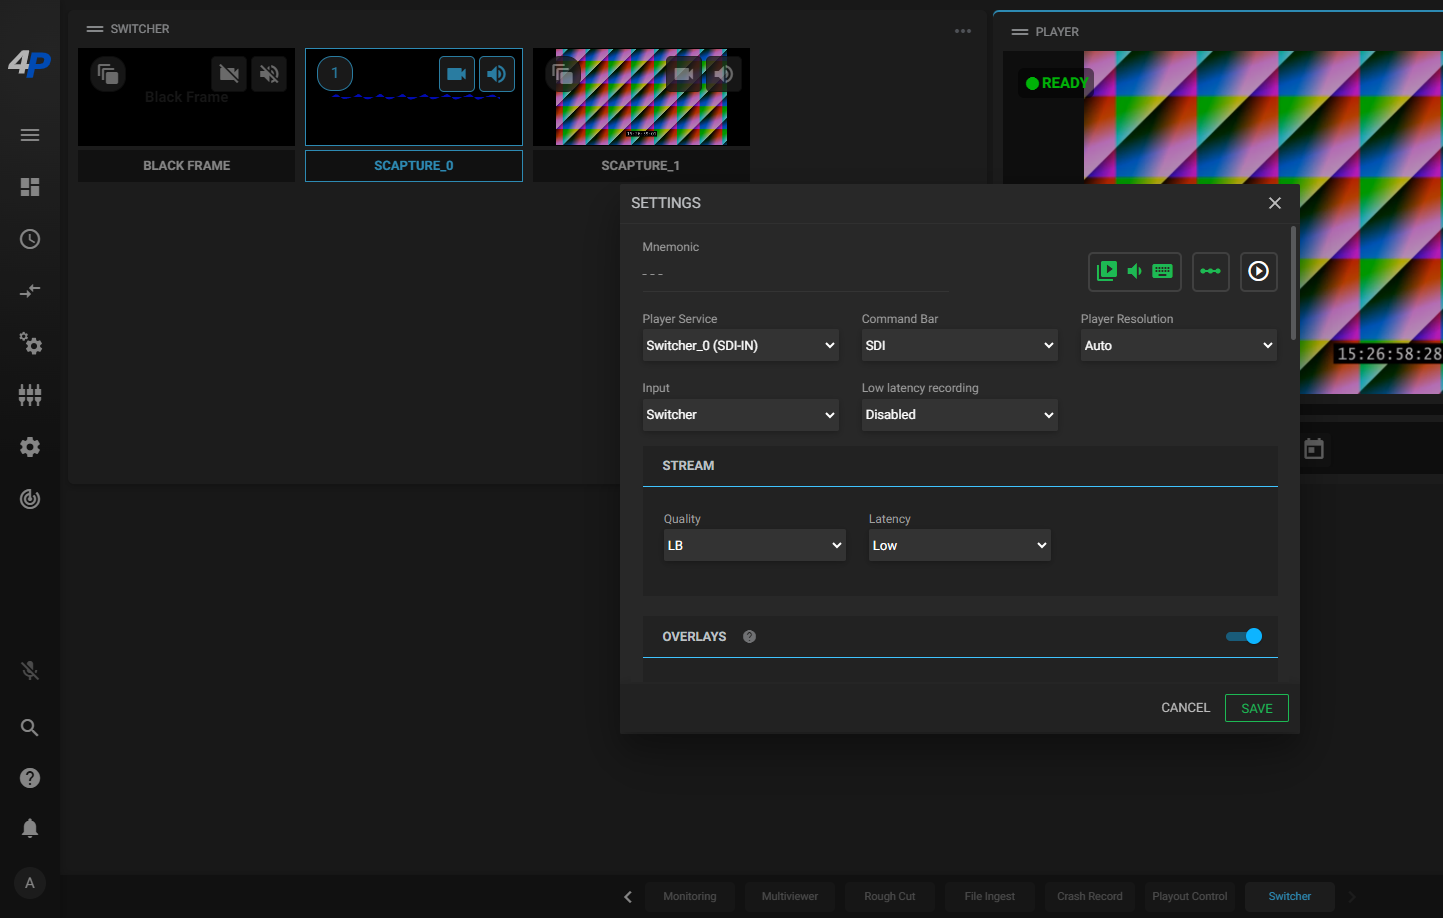
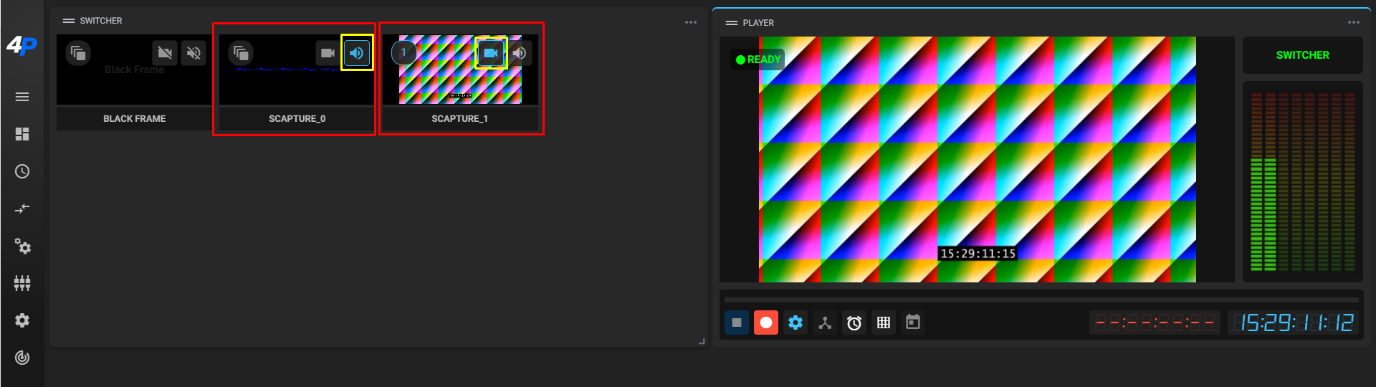
Finally, back at the Switcher Widget, we will select scapture_0 as Audio Input (Dante Audio Source), and scapture_1 as Video Input:
Congratulations! We have successfully implemented Dante software into your MOG system. Now you’re ready to enjoy its advantages with our straightforward solutions.
Take advantage of these solutions to simplify your day-to-day media tasks, allowing you to focus on what matters most: your content.