¶ Configuring Campaigns
Tip: a valid URL starts with http:// or https://
- Click the “Campaigns” tab in the navigation menu (left of the screen);

- In the content toolbar click the “Create” button (top right corner of the screen) to create a new campaign;

- In the "GENERAL" tab the "Name" is required;

- Name: enter the campaign name;
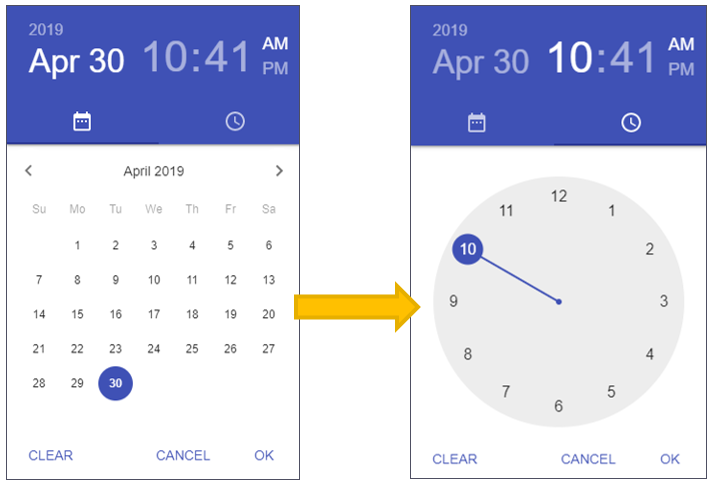
- Start: campaign start date and time;
Clicking "Start" will display a calendar for start date selection. After selecting the date, the calendar will be changed to choose the start time. After the selections click the "OK" button in the calendar (pictures below).
- End: campaign end date and time.
- Follow the same steps as Start (above) to select the campaign end date and time.
- [OPTIONAL] In the "ADS" tab add the advertising that will appear in the campaign;
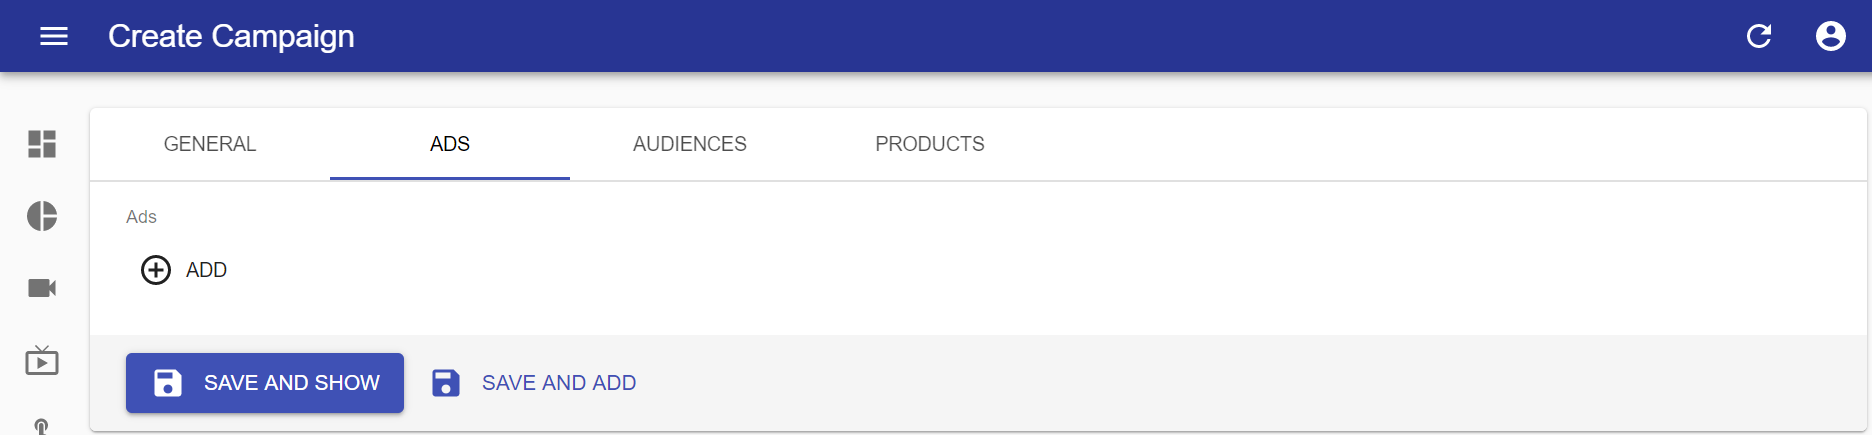
- Click "ADD" to add the advertisement and "REMOVE" if you want to remove it.

- Name: enter a name for the advertisement;
- VAST/VMAP URL: enter the URL for an advertisement from a third-party app or, if you'd like to add a call to a VOD as an advertisement, click the "FROM VOD" button and the screen below will be displayed:
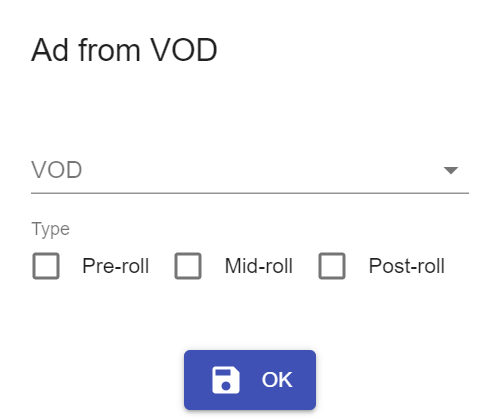
VOD: select a previously created VOD;
Type: select one of the display types below:
- Pre-roll: the advertising VOD will be displayed before the video starts;
- Mid-roll: the advertising VOD will be displayed while the video is playing. Selecting this option will display the field "Time (seconds)" to be informed about how long (in seconds) of video advertising displays. The time you enter must be less than the duration of the video being displayed, otherwise, the advertisement will not be displayed and at the end of the video an error message will appear;
- Post-roll: the advertising VOD will be displayed after the video ends.
Click "OK" to finish configuring VOD as advertising.
- Click "ADD" to add the advertisement and "REMOVE" if you want to remove it.
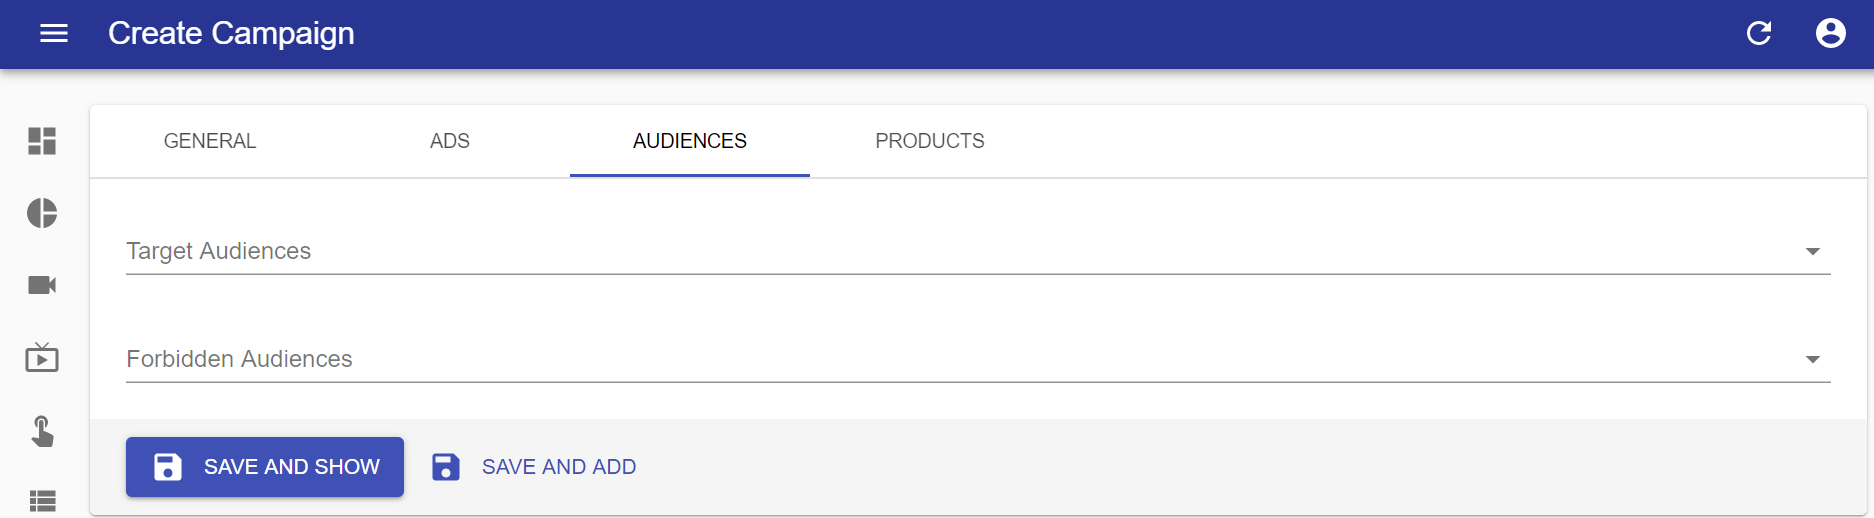
- [OPTIONAL] In the "Audiences" tab set the audience who can view the advertisement and / or set which audience will not be able to see it;
- [OPTIONAL] In the "Products" tab select in which products the campaign will be displayed;
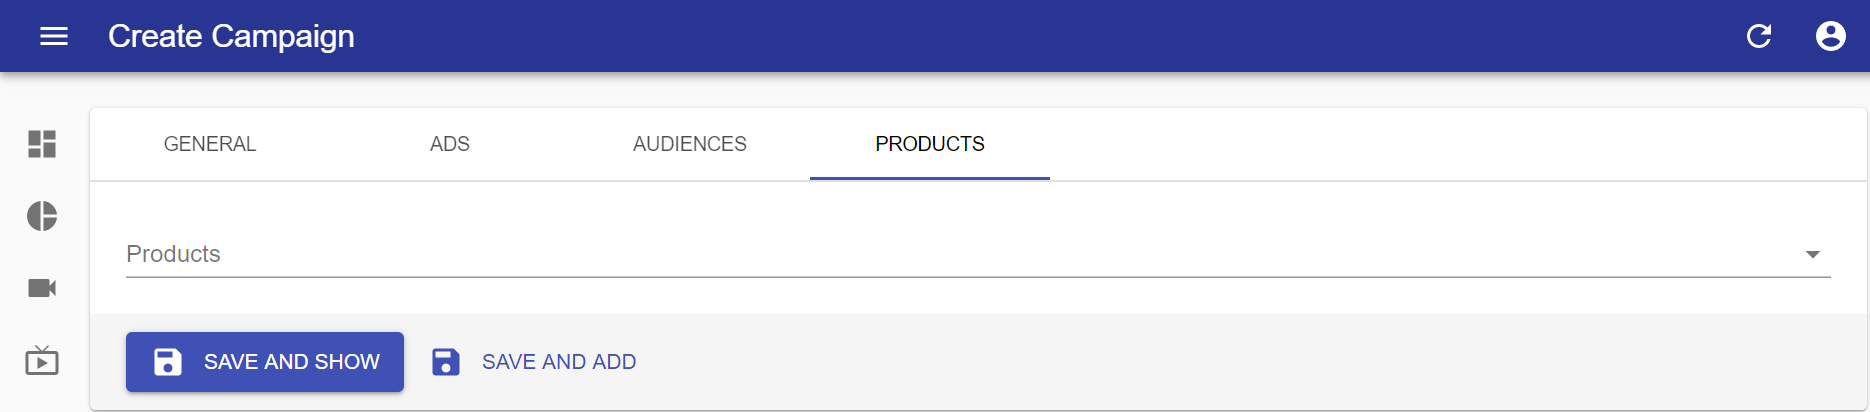
- Products: clicking on this field will display a list of the Products previously configured to select in which of them the campaign can be displayed.
Note: if no product is selected the advertisement will appear in all published videos.
- Click "SAVE AND SHOW" to save and go to the preview of the created item, or "SAVE AND ADD" to save and continue adding more items.