¶ Integration with AVID Interplay
Revision date: 25/jun/2024
Software version: 2024.05.00_016e8adf_dev
The compatible products with this feature are MAM4PRO, mDECK, mPORT, mCODER, and mREC.
For a media-focused environment, it’s important to expertly manage your assets in between production and post-production processes. With our products’ valuable integration with AVID Interplay, you’ll be able to achieve just that with little to no effort.
Let’s see how to take advantage of it:
Video Tutorial Instructions
Step-by-step Instructions
¶ Check-in Into Interplay
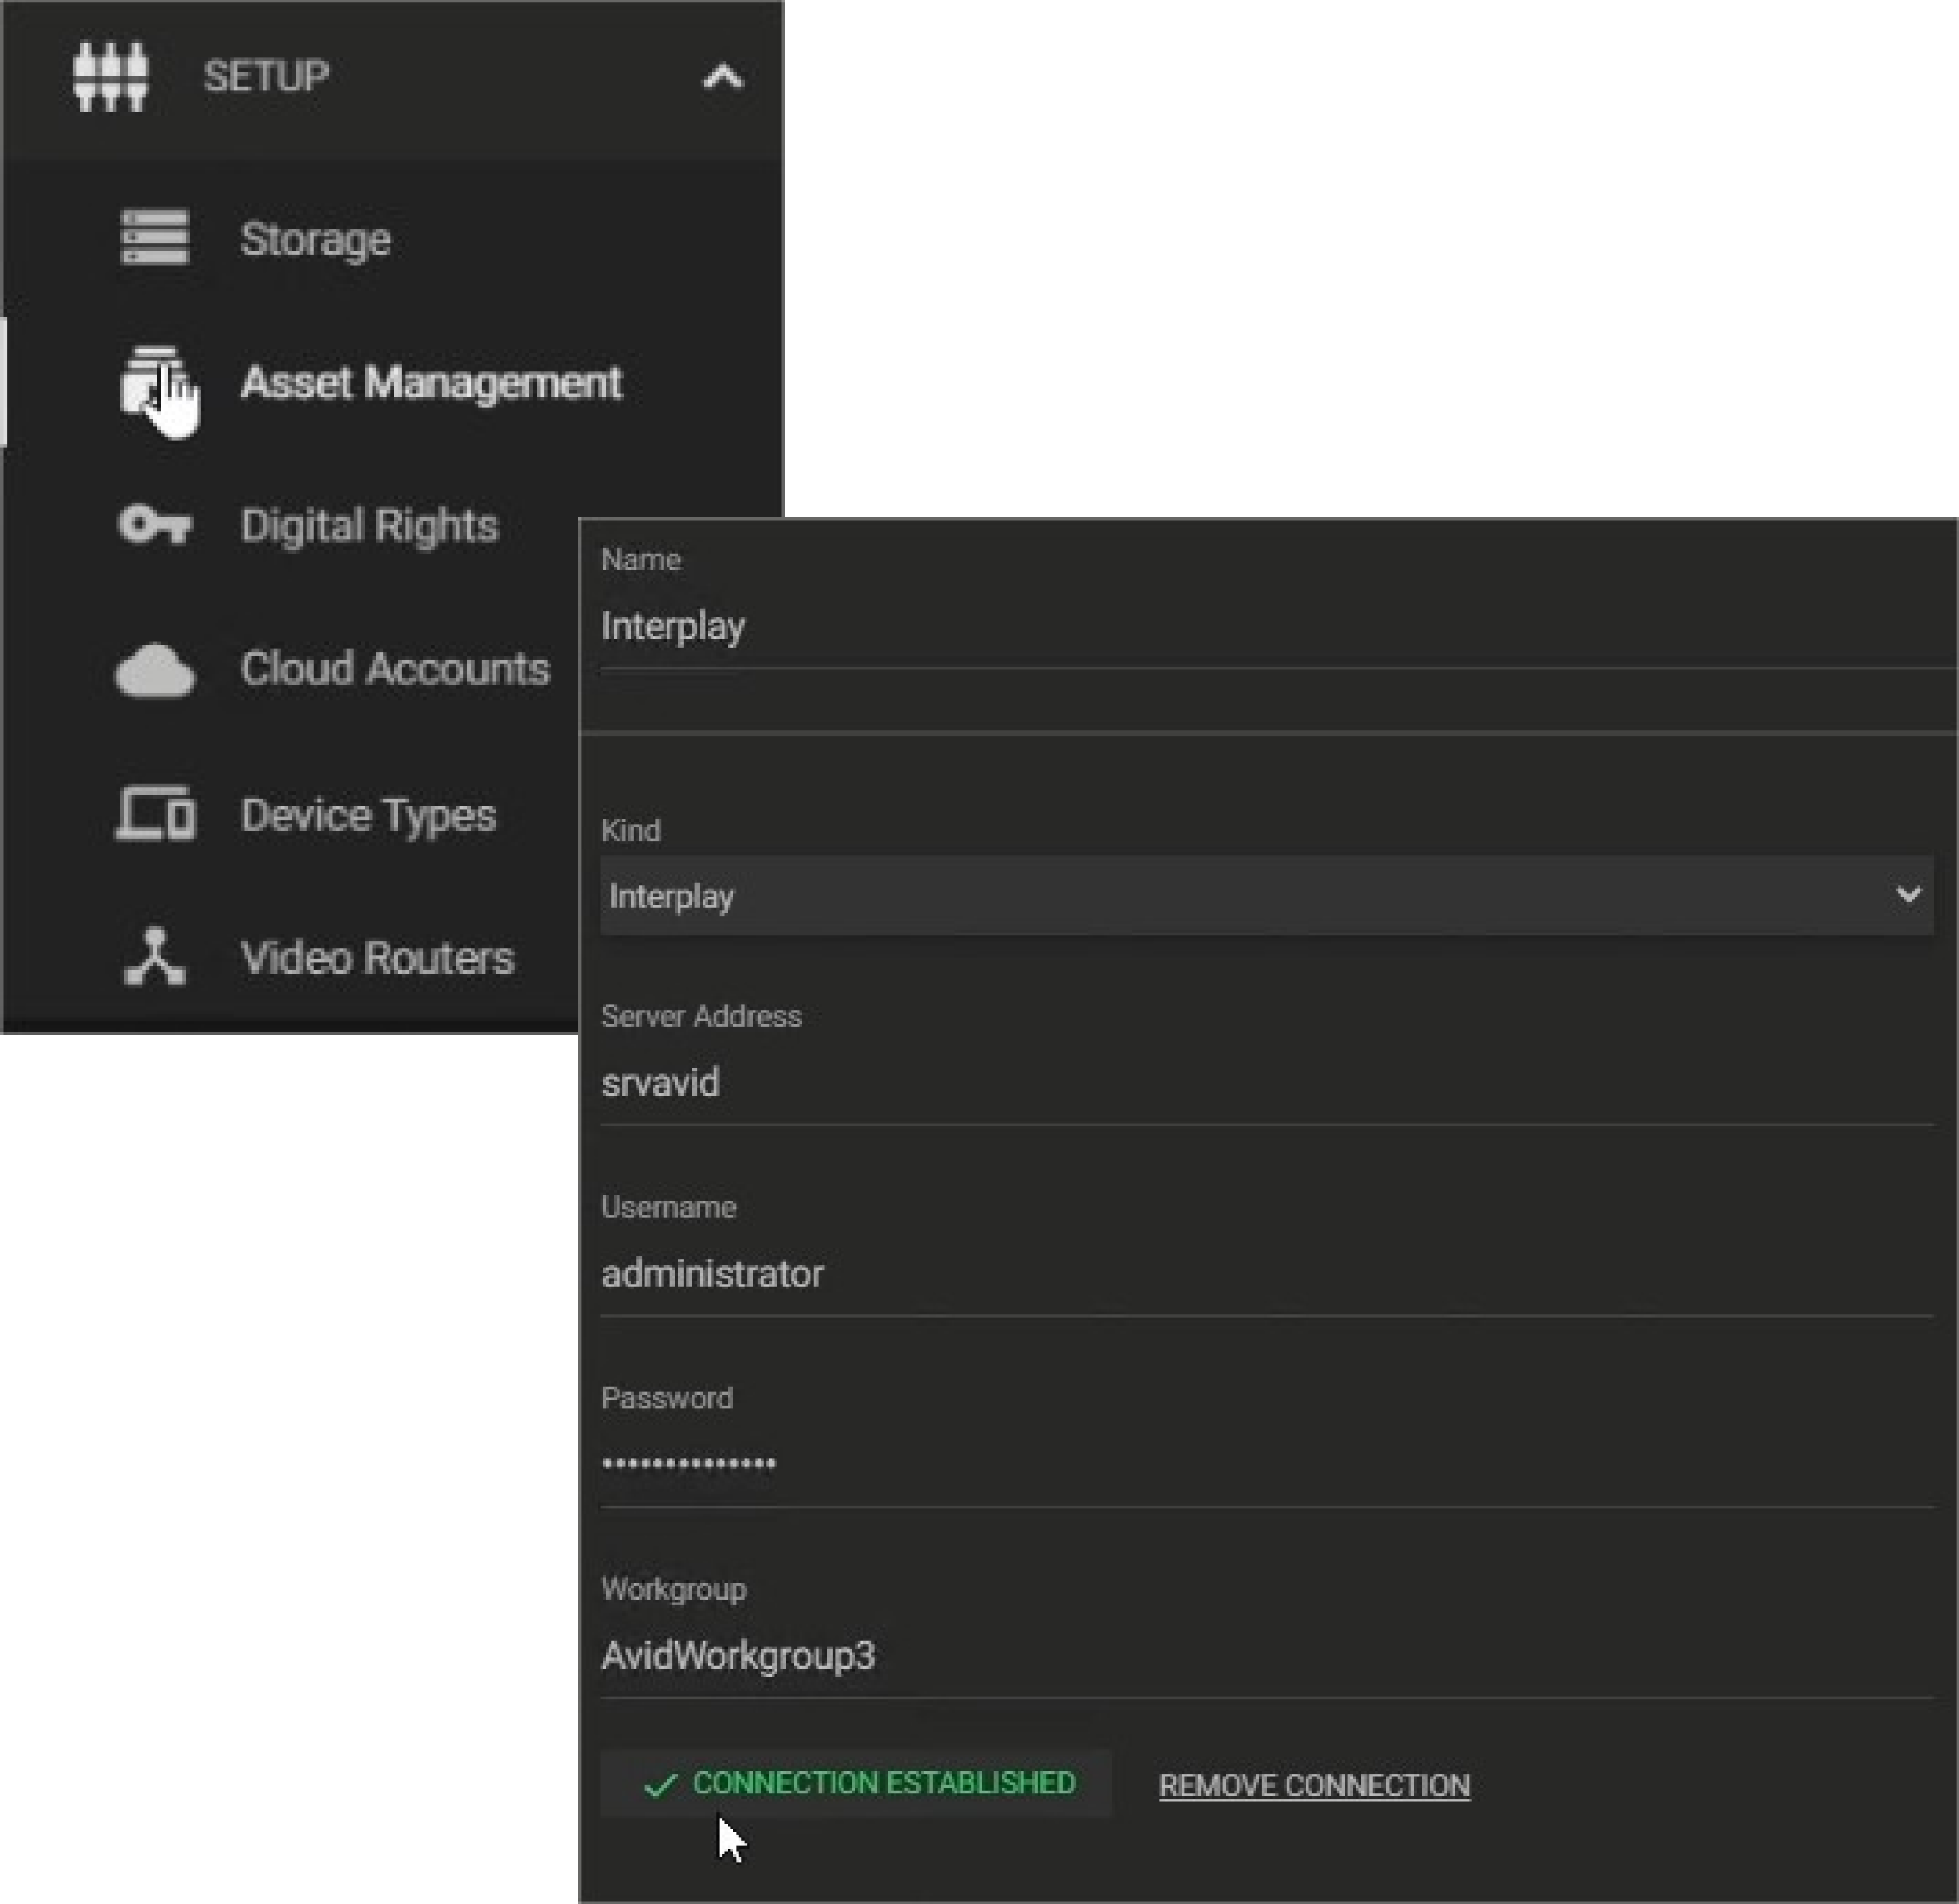
Go to “Setup” and then on “Asset Management”, where we’ll configure a new MAM server of the Interplay kind. Enter your credentials accordingly, and verify your connection by clicking on the “Test Connection” button.
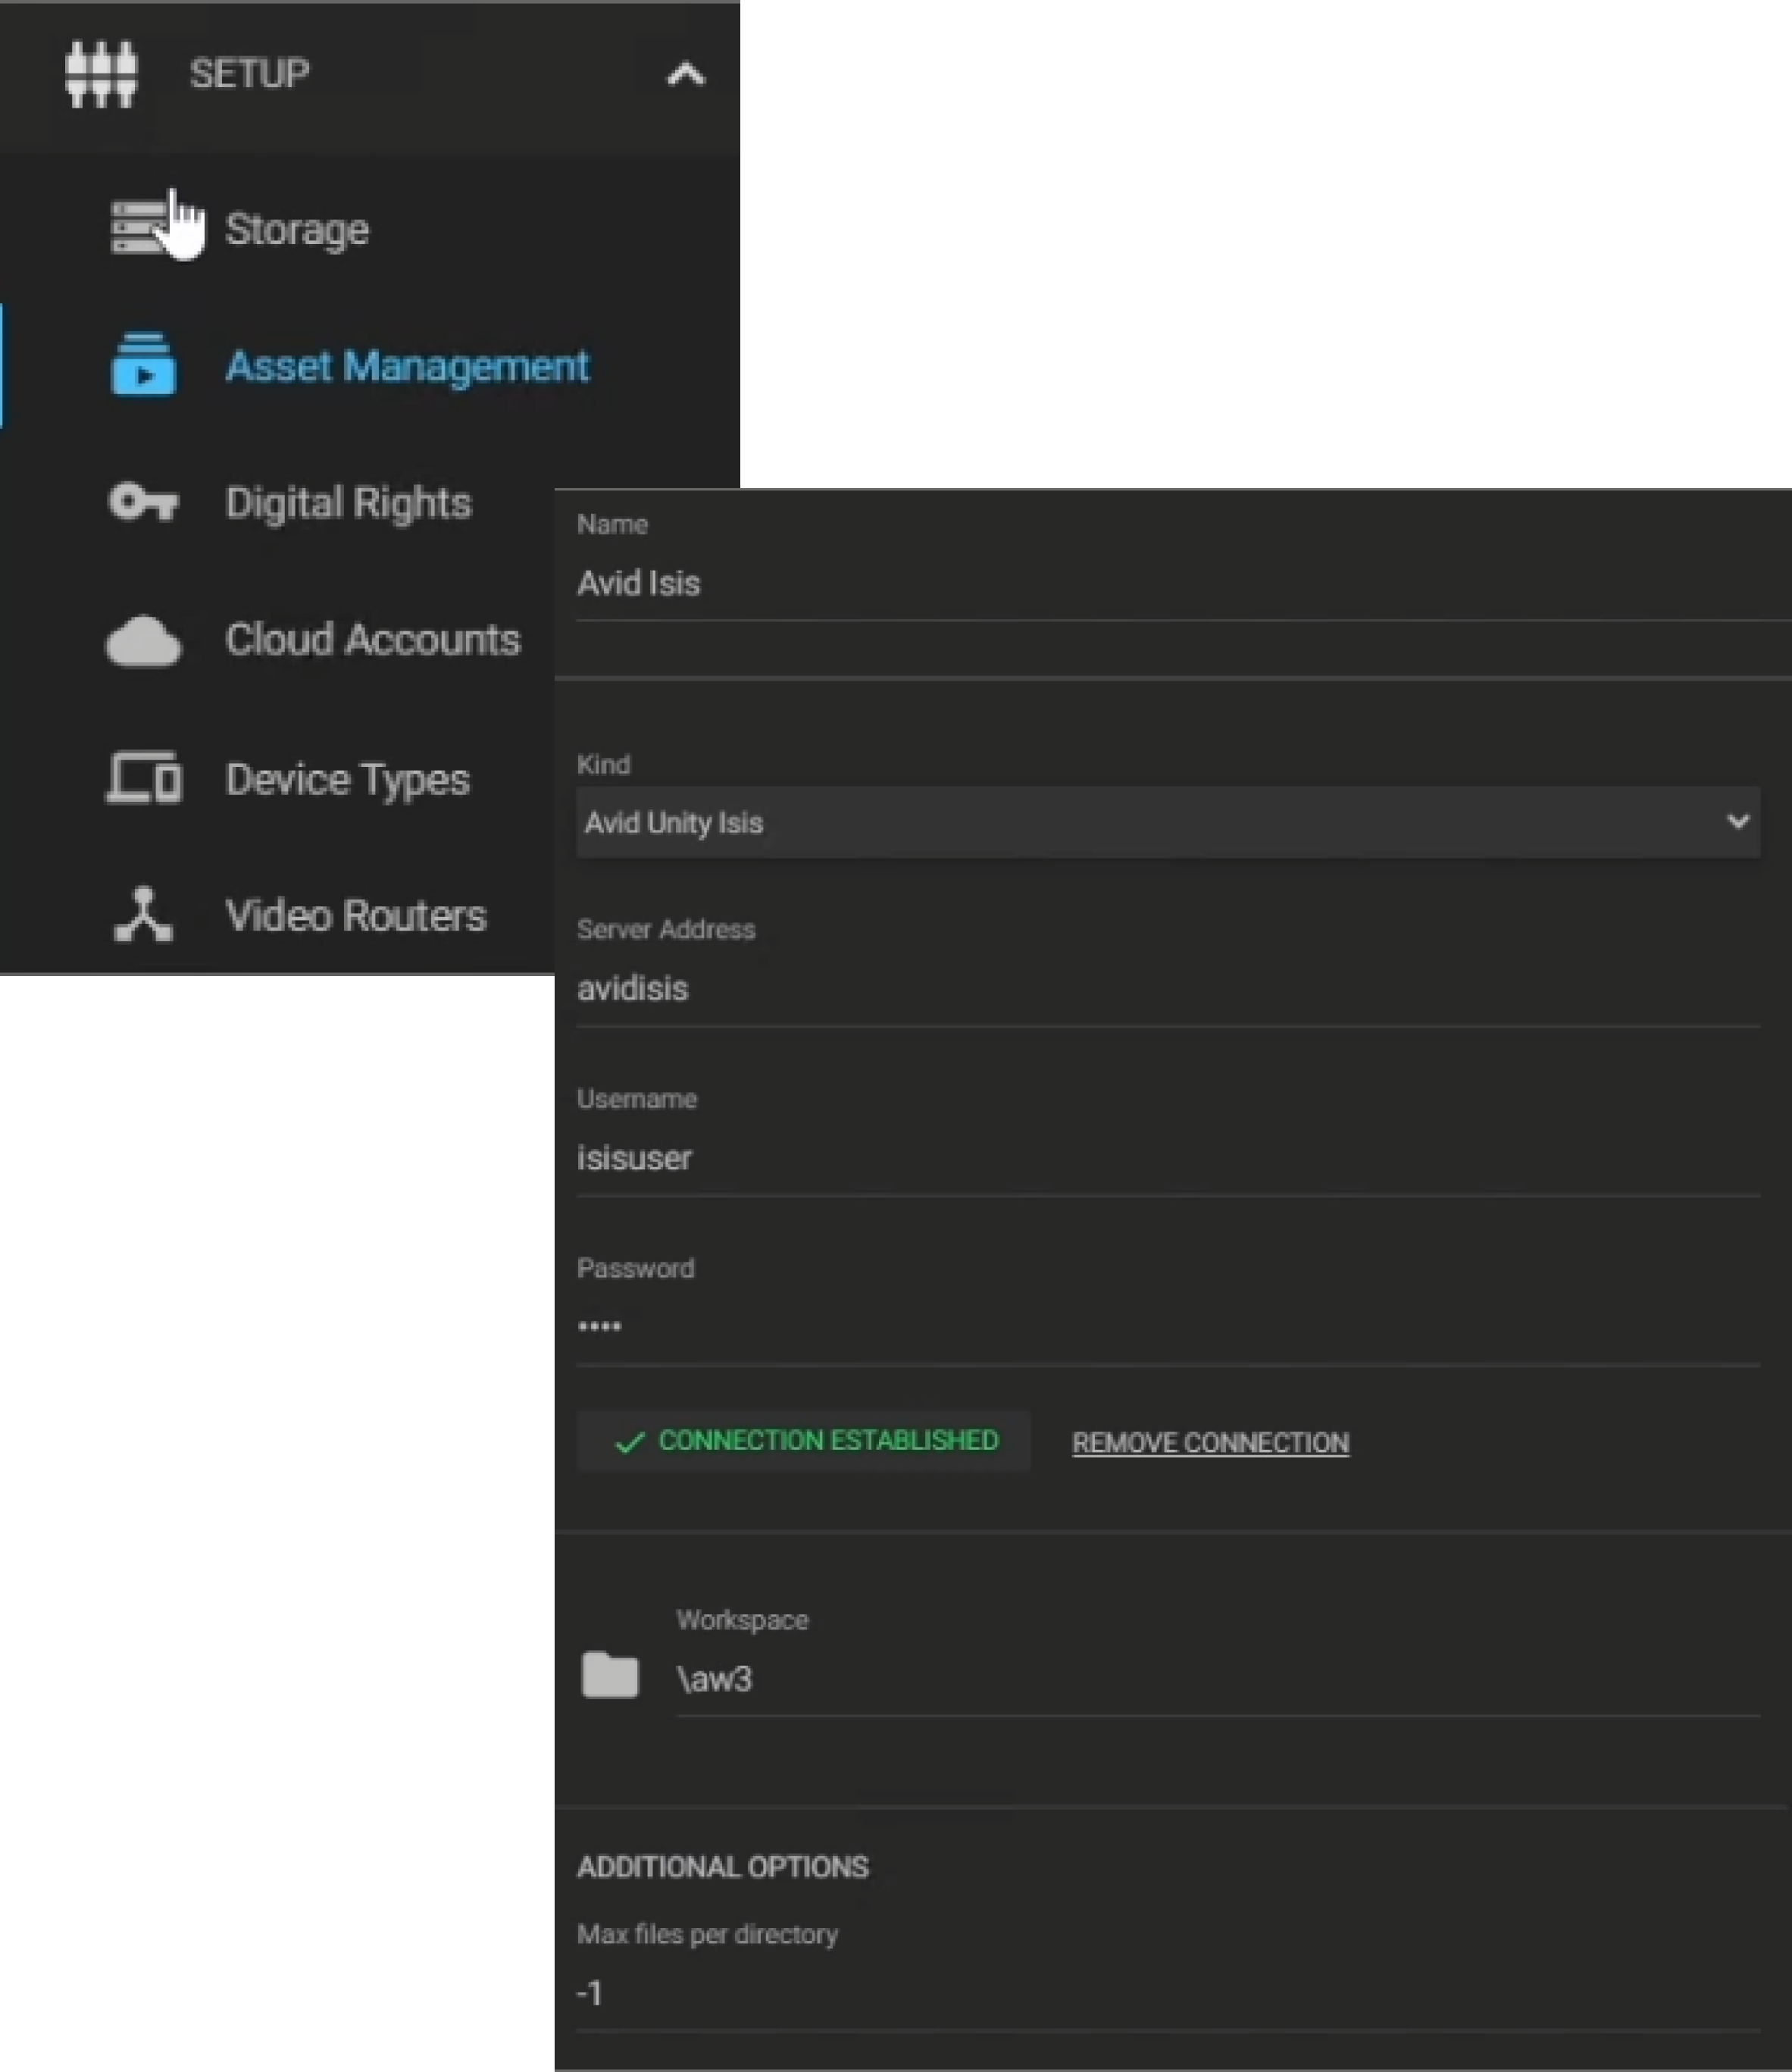
Go now to “Storage”, where you must set up a desired Storage Point of the AVID Unity Isis / Nexis type, selecting the workspace to where the files will be sent to.
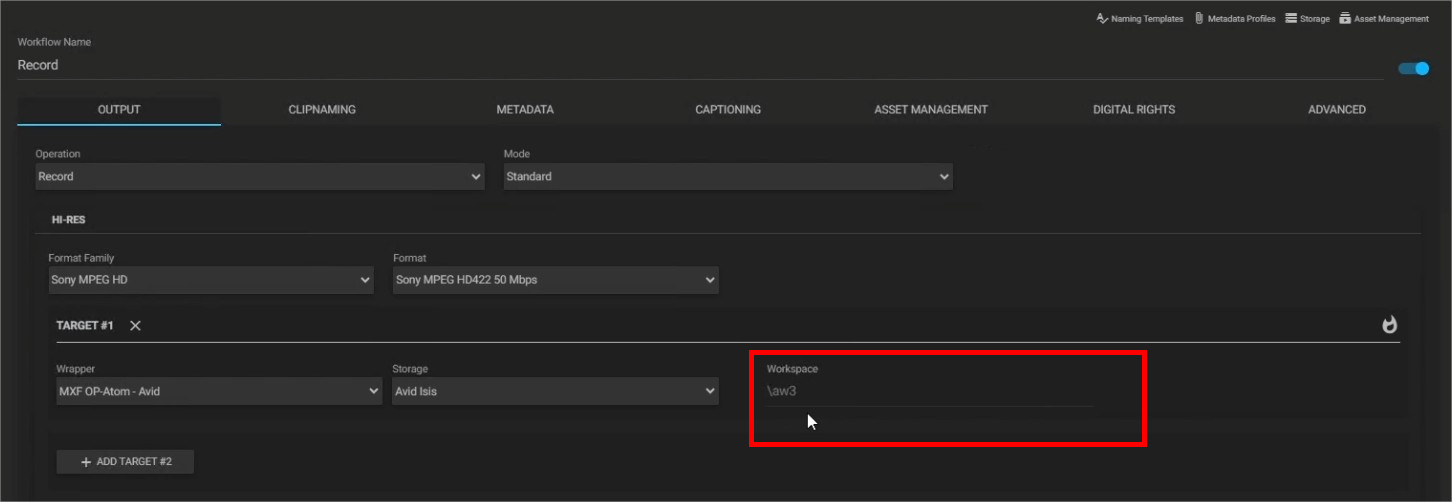
Let’s test this configuration by running a workflow, checking-in a desired file into our Interplay server. Create a Record or Ingest workflow with your preferred configurations. On Storage, select the Isis or Nexis storage you’ve just added.
Take note that you cannot select any further than the workspace “aw3” defined on the pre-configured storage as AVID automatically divides your media into different folders.
Now, in the “Asset Management” tab, add your Interplay server as the MAM Output, selecting a desired location in your catalogue.

On your Dashboard, select an asset and run the workflow.
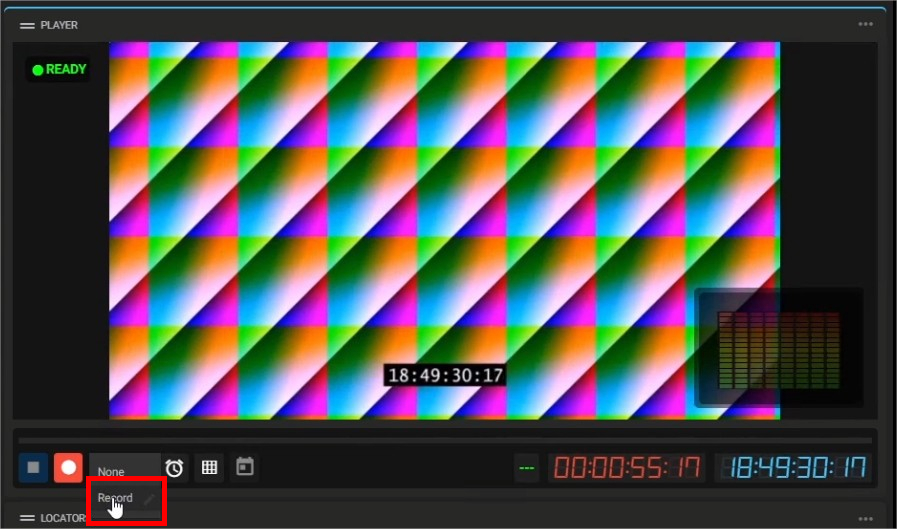
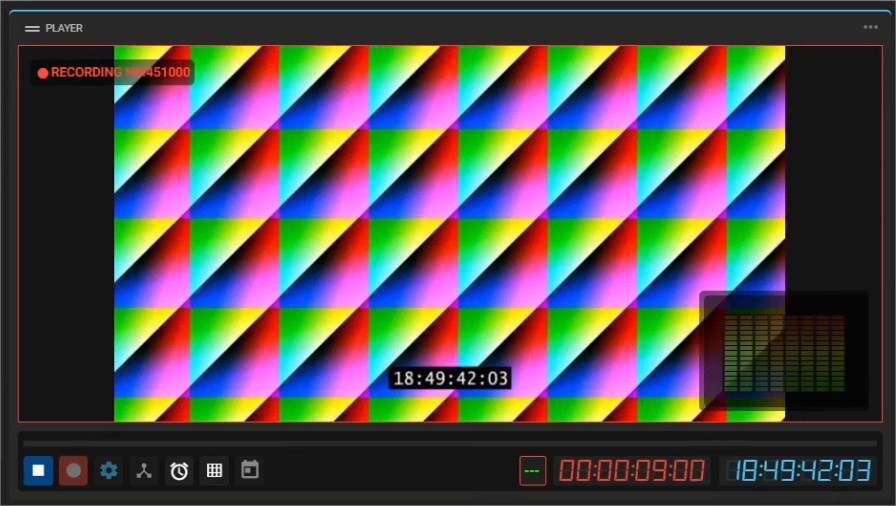
Once the operation begins, open your Interplay server and see that the file has checked-in into the MAM, just as configured!
Notice that the film tape icon on the top left corner of the file’s thumbnail is open, meaning that the file is growing.

¶ Check-out of Interplay
Now that we have successfully checked-in media to our Interplay server, let’s try to read it from our product.
Go to “Input/Output” then “Files”. Add a new Input of the MAM type using the Interplay server we configured, also selecting the catalogue in which your media is stored.
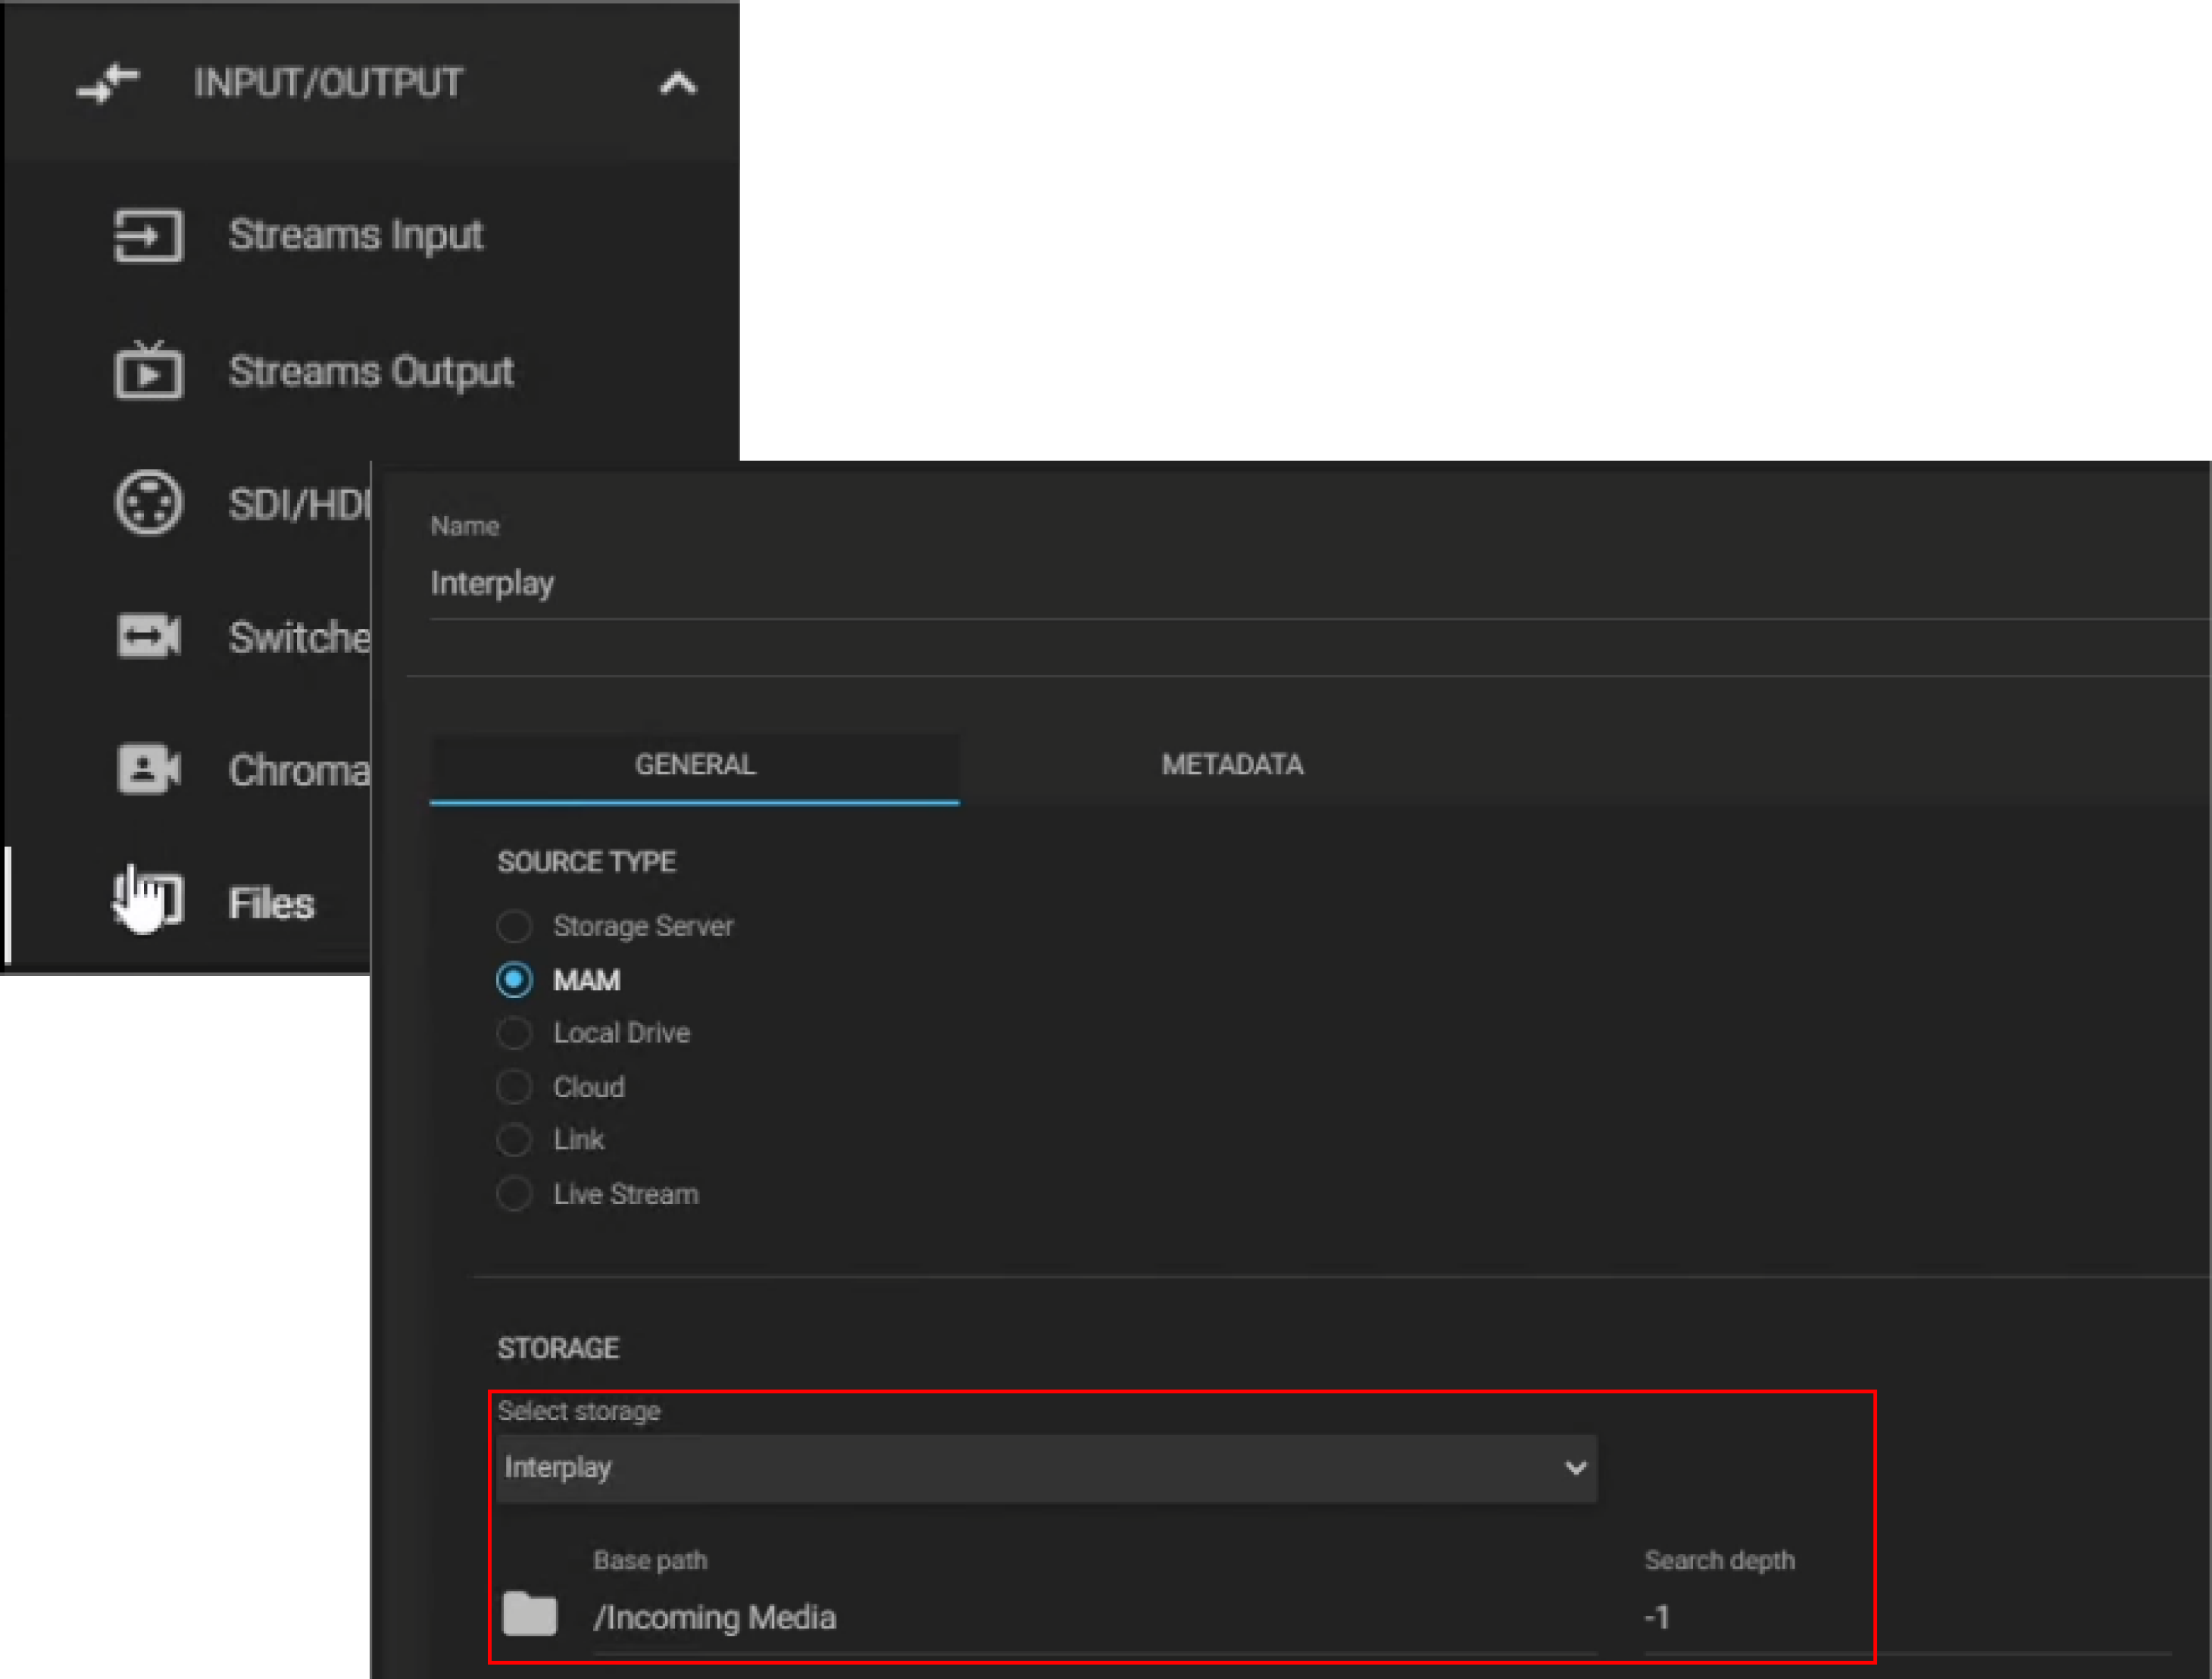
Please, make sure the “Asset Kind” is set as “Avid Clip” before saving the configuration!

Back to the Dashboard, search for this newly created input on the “Asset Browser” widget, under the “MAM” section. Click on it to begin indexing.
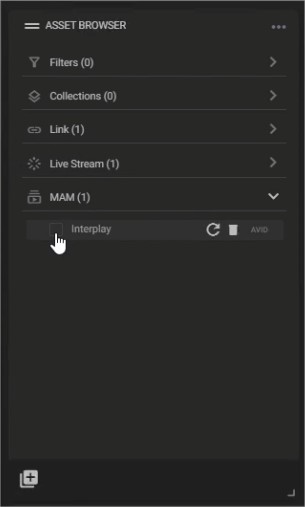
After your media has been indexed, simply select it! You can playback it, or begin editing and other processes already! Our product has correctly read the information stored in the Interplay server!

