¶ Adding Chroma Key
To configure the chroma key, two inputs are needed. One to receive the signal with a colored background and another to receive the stream that will be superimposed by the first, but with the cancellation of the pre-established background color. Follow the next steps to configure the channel receiving the stream with a colored background:
- In the Navigation menu (left of the screen) click the “INPUT/OUTPUT” module and then on “Chroma Key";

- In the options list area (lower-left corner) click the “Add”
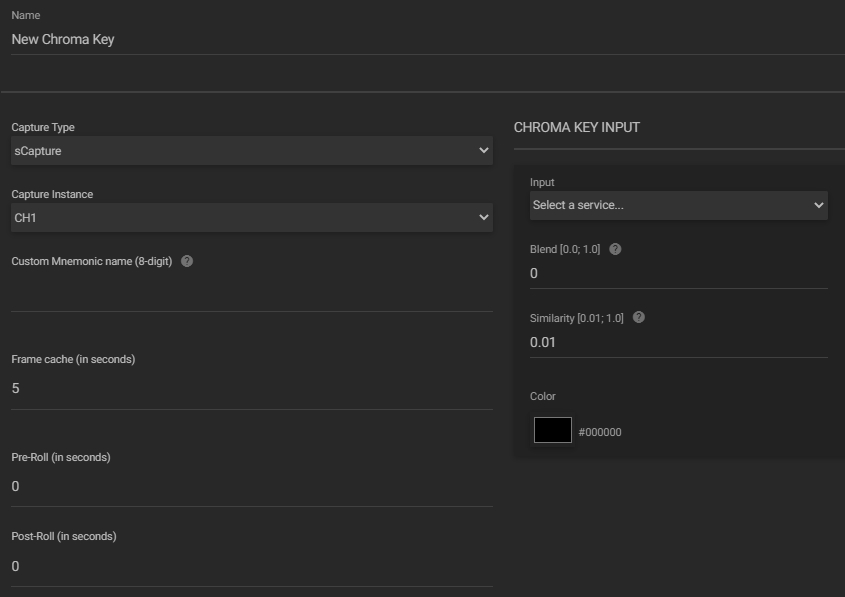
 button to configure the input channel and fill in the form with the information below:

- Name: enter the input name;
- Capture type: click to choose the type of capture;
- Capture instance: click to select the capture instance that will output the stream without the background;
- Custom mnemonic name: assign a custom mnemonic name;
- Frame cache (in seconds): configure how many seconds does a frame stay in cache;
- Pre/Post-Roll (in seconds): set the number of seconds that will elapse, before and after pressing the start and stop recording buttons, when a video is being recorded. Both values cannot be more than the number of frame cache seconds;
- Input: click to select the input that contains the video with the background to be removed;
- Blend: set how the value for pixels that fall outside the similarity radius is computed. 0.0 makes pixels either fully transparent or fully opaque. Higher values result in semi-transparent pixels, with greater transparency the more similar the pixel color is to the key color;
- Similarity: enter the radius from the key color within which other colors also have full transparency. The default value is 0.01. This value corresponds to a very small radius around the exact key color, while 1.0 corresponds to everything;
- Color: click to select or enter a hexadecimal value that will represent the background color that will be made transparent. If color is not specified, no chroma key will be applied and the output will be a mirror of the input.
- In the action toolbar (bottom right corner) click the “SAVE” button to save the settings.
Note: after configuring the input and output of the chroma key, it is necessary to use the switcher to combine the superposition of the chroma key signal over another video. See page Switcher to know how to do this.