¶ Creating a Naming Template
In the naming template panel, you can create and configure naming templates for the various types of operations. These templates can be used to name and/or rename assets by running the workflow.
- In the Navigation menu (left of the screen) click the “WORKFLOWS” module and then on “Naming Templates”;

- In the options list area (lower-left corner) click the “Add”
 button to configure the naming template;

The options available for configuring a naming template are:
-
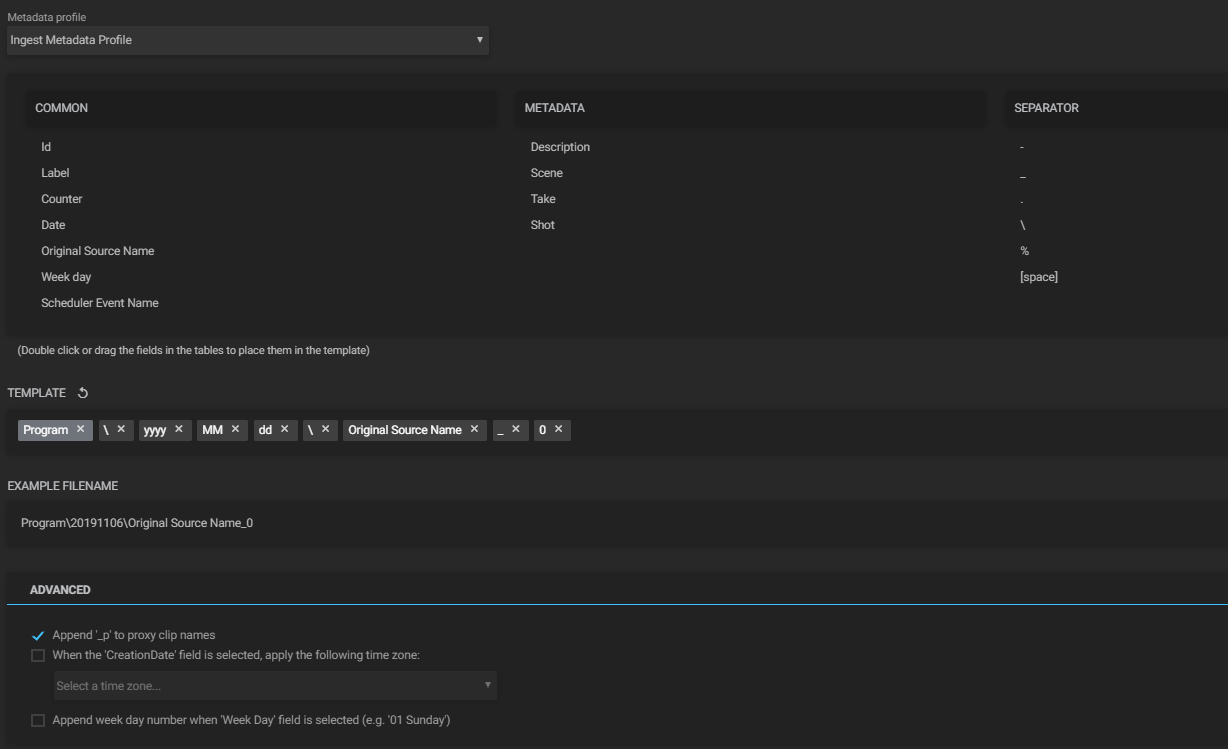
Metadata Profile: click here to select one of the pre-configured metadata profiles that will provide metadata fields to be used as a part of the naming template. Check chapter “Creating a Metadata Profile” to learn how to configure a metadata profile;
-
Common: presents some of the most used naming template fields;
-
Metadata: displays the options that have been set as “Available in naming template” in the Metadata Profile selected above, in the “Metadata Profile” field;
-
Separator: present some file name separators. For example, “\” creates a subfolder and places the file inside the created subfolder;
-
Template: use this field to mount the naming template by dragging and dropping or double-clicking the fields in the “Common”, “Metadata”, and “Separator” columns.
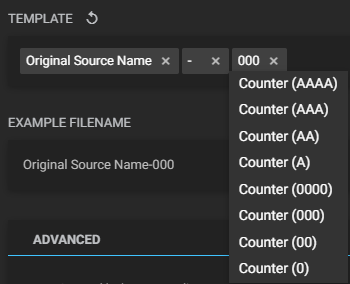
Some of the fields have other options to be used. To consult and change them, go to the “Template” area, click on one of the fields to open a list of options, and select the one that best suits you;

To change the order of the pieces, just click, drag and drop the fields wherever you want.
To delete a field, click on the “Delete”
 option to the right of the desired field. If you want to delete all fields, click the “Reset”
  option to the right of the template section.
 -
Example file name: shows an example of a template filename;
-
Advanced:
a. Append ‘_p’ to proxy clip names: check this box to enable the automatic appending of the string “_p” to the end of a proxy file name;
b. When the ‘CreationDate’ field is selected, apply the following time zone: check this box to use a custom time zone on the naming template;
c. Select a time zone: select the custom time zone. This option is enabled if the previous option is selected.