¶ System Settings
Revision date: 14/may/2024
Software version: 2023.12.00
This page focuses on a series of parameters to configure to make your system works in a way that best meets your objectives.
In the Navigation menu (left of the screen) click the “SETTINGS” module, then on “System” and navigate between the available tabs to configure your system, as shown in the sections below:

¶ General
In the “GENERAL” tab you can configure the following settings:
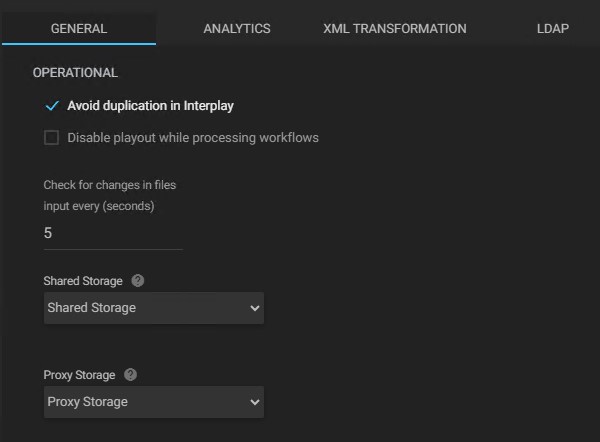
- Avoid duplication in Interplay: this setting is used in workflows that have the “preserve relation to original” option enabled;
- Disable playout while processing workflows: check this box to disable video playout, when a workflow is being processed;
- Check for changes in files input every (seconds): enter the time interval, in seconds, that an input file is checked for changes;
- Shared storage: select from the pre-configured storages, which will be used for caching files. This is required for internal operations such as the management of content from cloud accounts. This network storage should be accessible by all nodes in the ecosystem;
- Proxy storage: select from the pre-configured storages, which will be used to manage video proxies.
¶ Analytics
In the “ANALYTICS” tab, you can enable and disable the analytics of your MAM4PRO instance and consult our privacy policy. The available settings are:
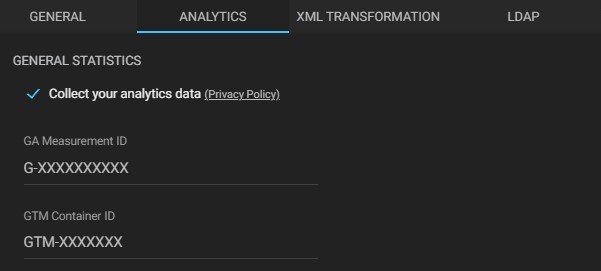
- Collect your analytics data: to enable analytics on MAM4PRO, please read the privacy policy and check this option;
- GA measurement ID: enter Google Analytics ID;
- GTM container ID: enter Google Tag Manager ID.
To start using the analytics, you first need to activate your Google Analytics and Tag Manager accounts, as shown in the following chapters. After that, you are ready to check your MAM4PRO metrics.
¶ Google Analytics
-
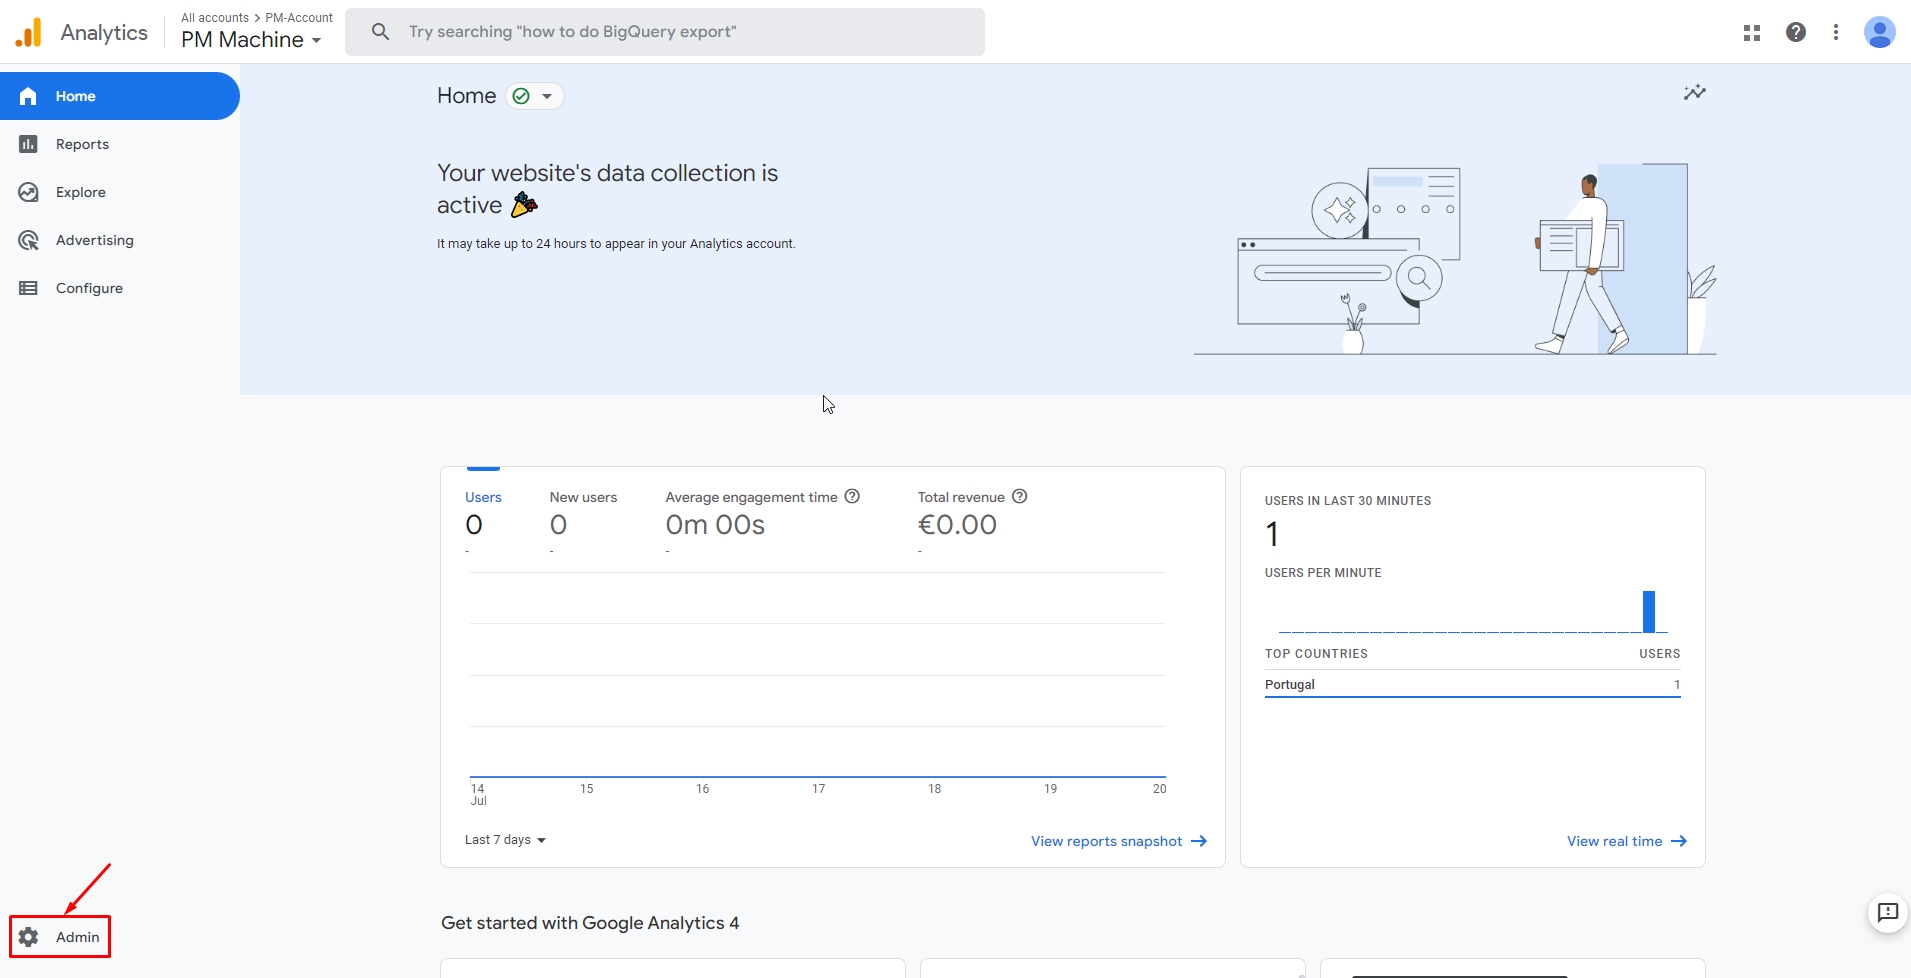
Log in with your Google account on the Google Analytics page. After logging in, a page like this below should be displayed. Click on the “Admin” button in the lower left corner of the page:
If this is your first-time using Google Analytics, a page like the one below will appear:

Click “Start Measuring” and follow the instructions from step 3 to set up your account. If you already have an account, go to step 6. -
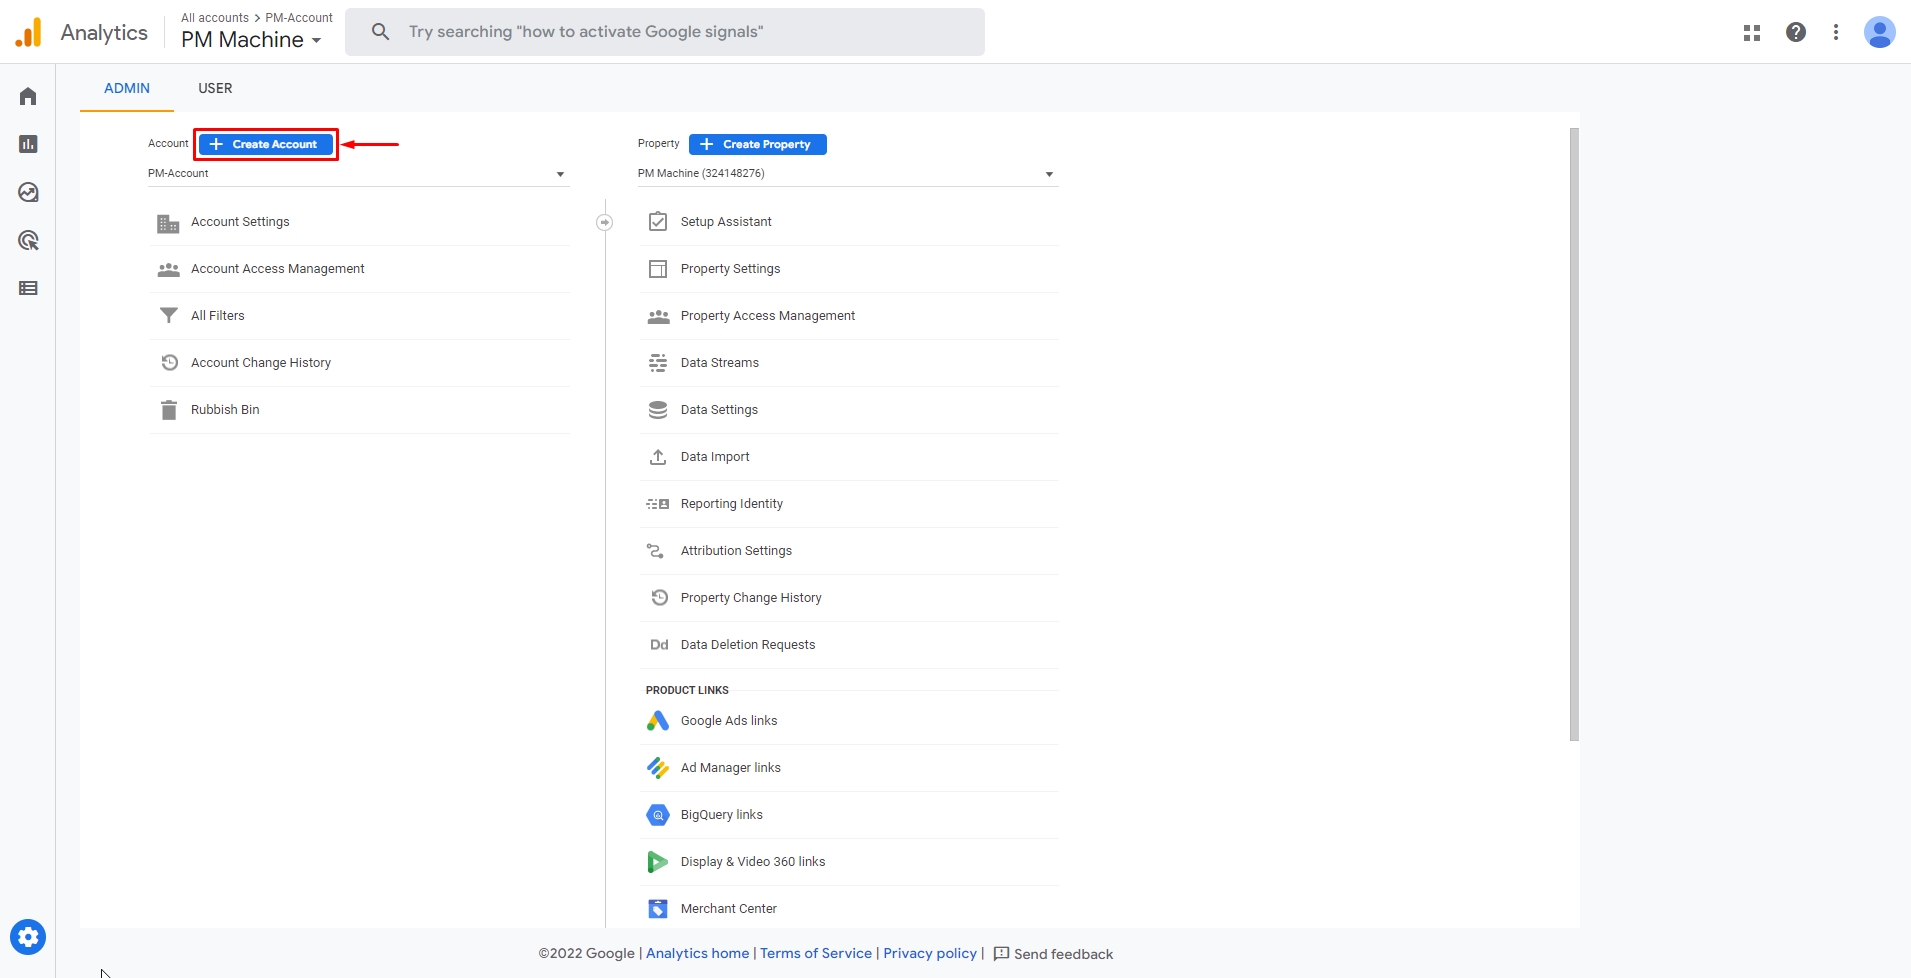
If you don’t have an Analytics account or want to add another one, click the “Create Account” button in the top left corner of the page:
-
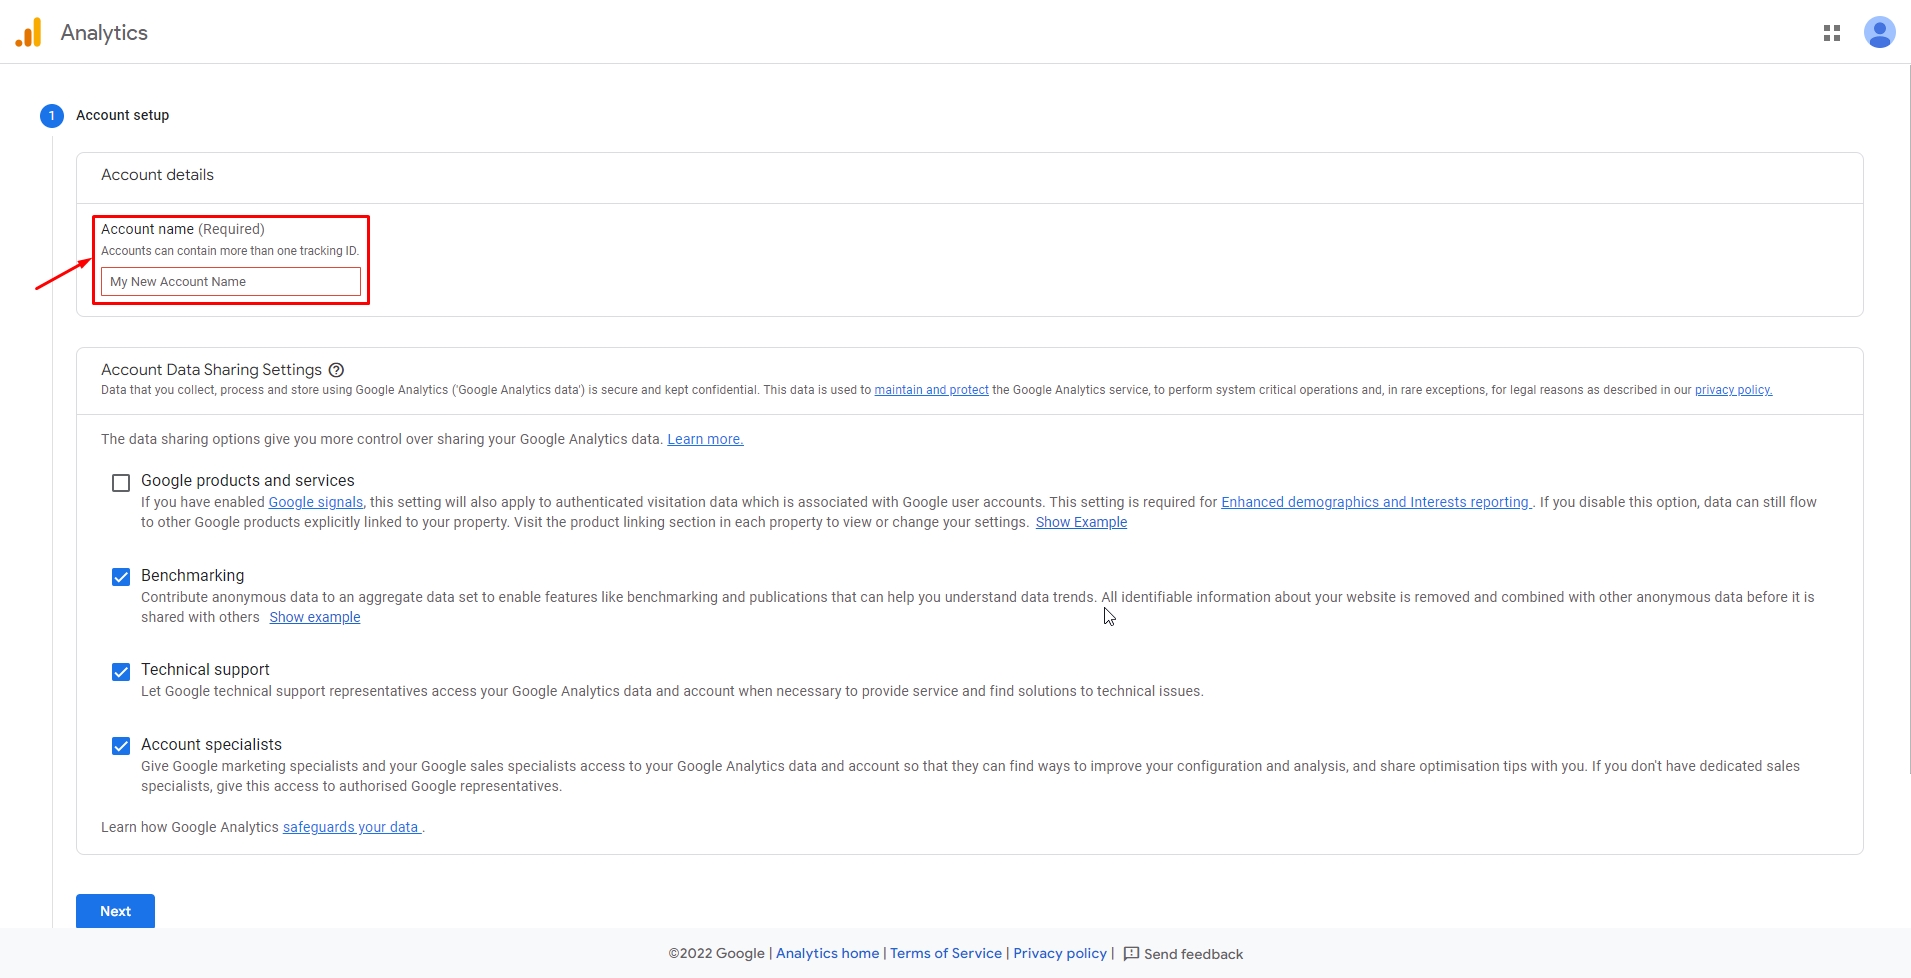
Enter a name for the account in the highlighted field and click “Next” at the bottom of the page:
-
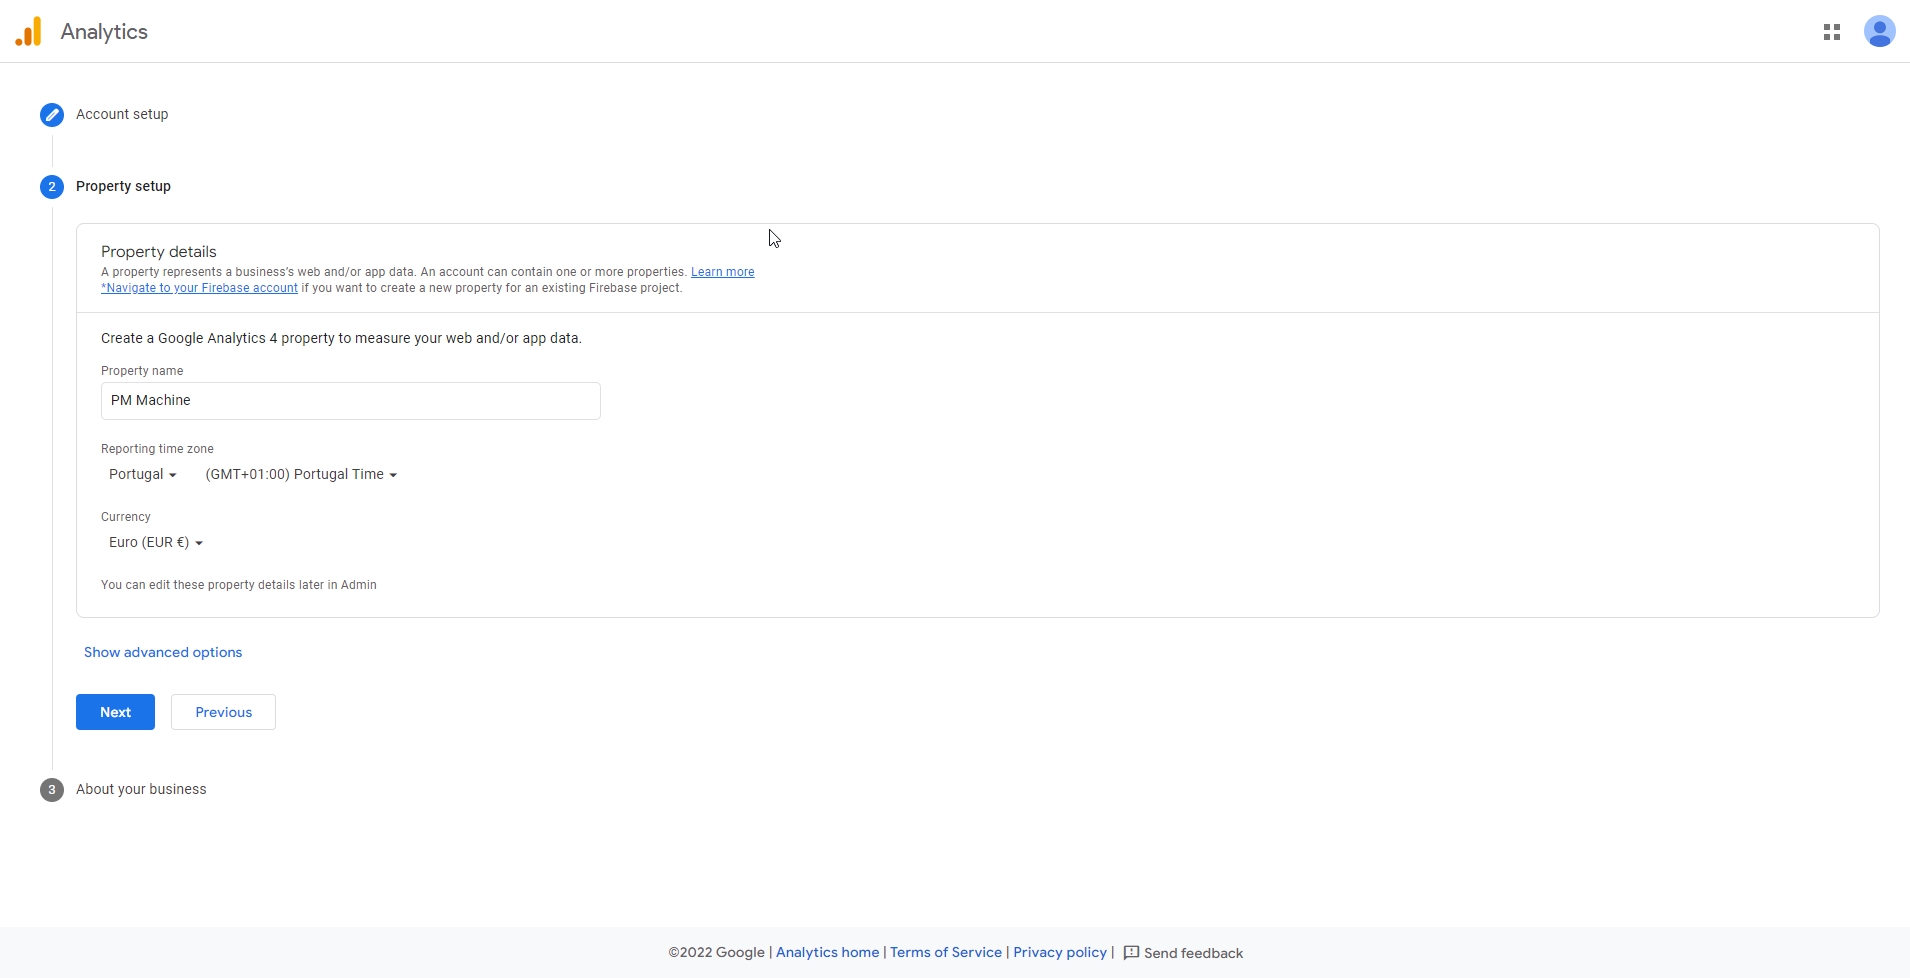
Fill in the account name, time zone, and currency and click “Next” at the bottom of the page:
-
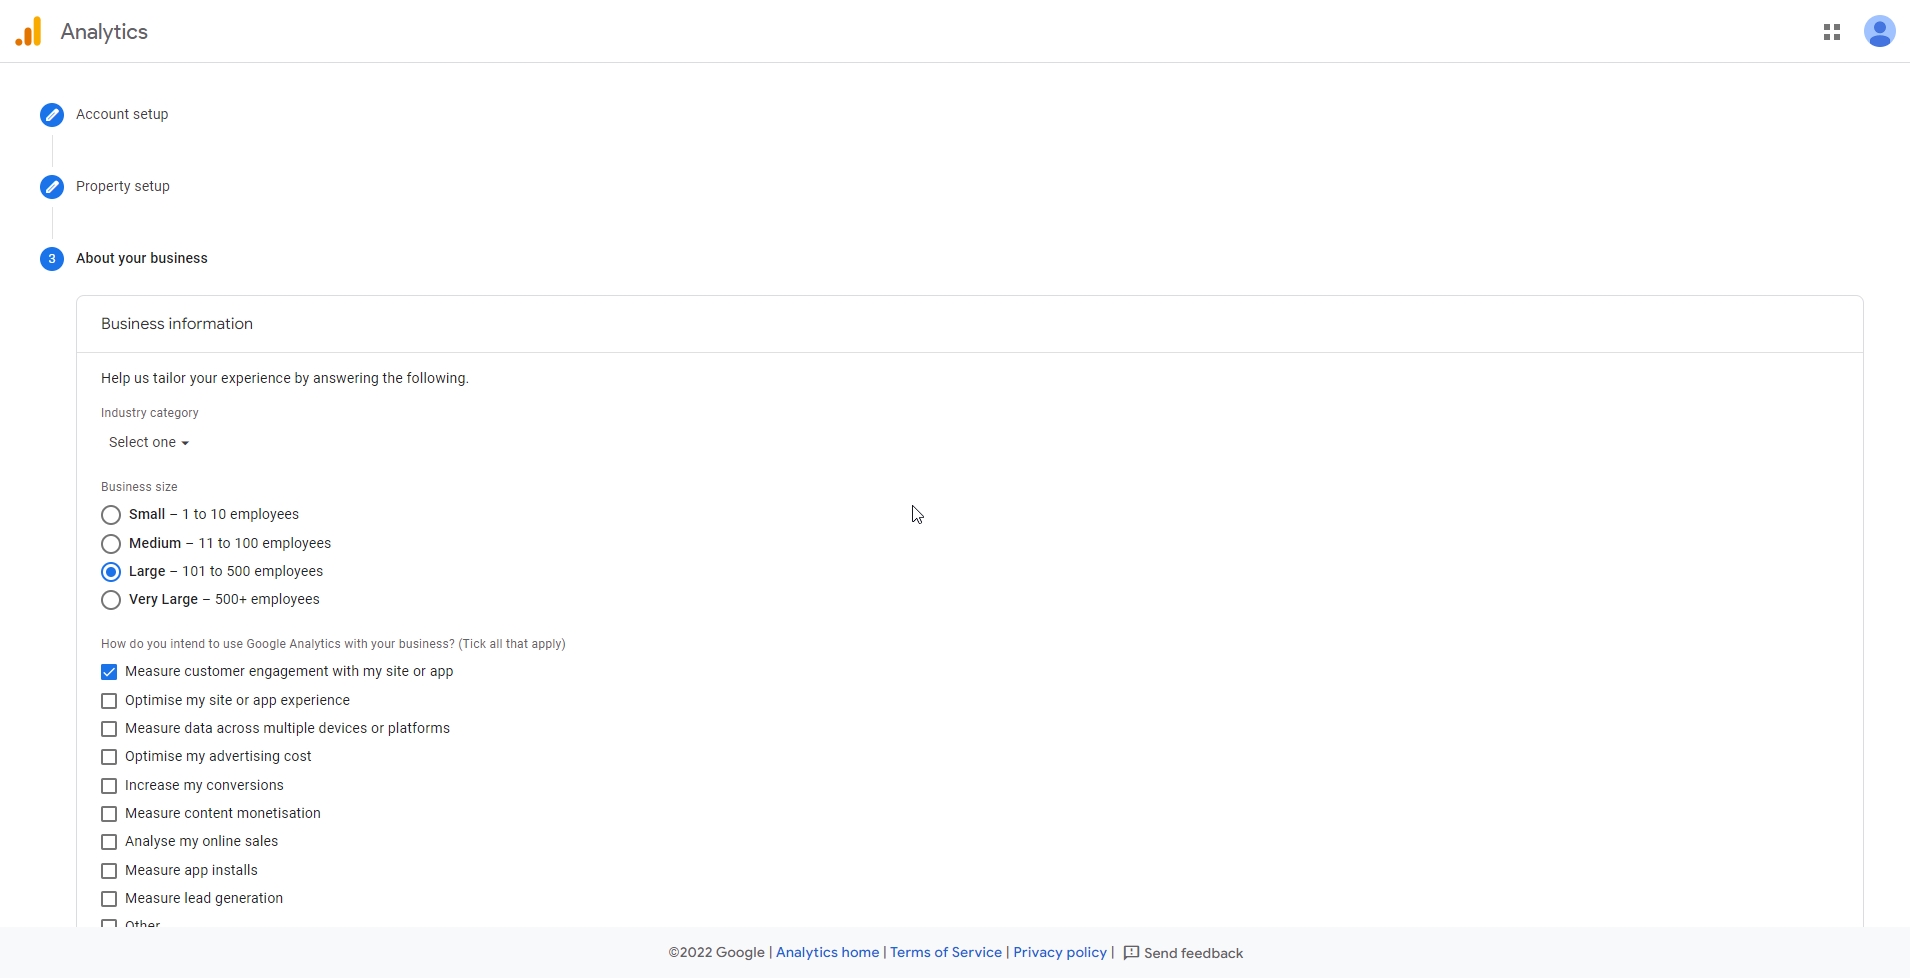
Then enter some information about your company and click “Create” at the bottom of the page:
-
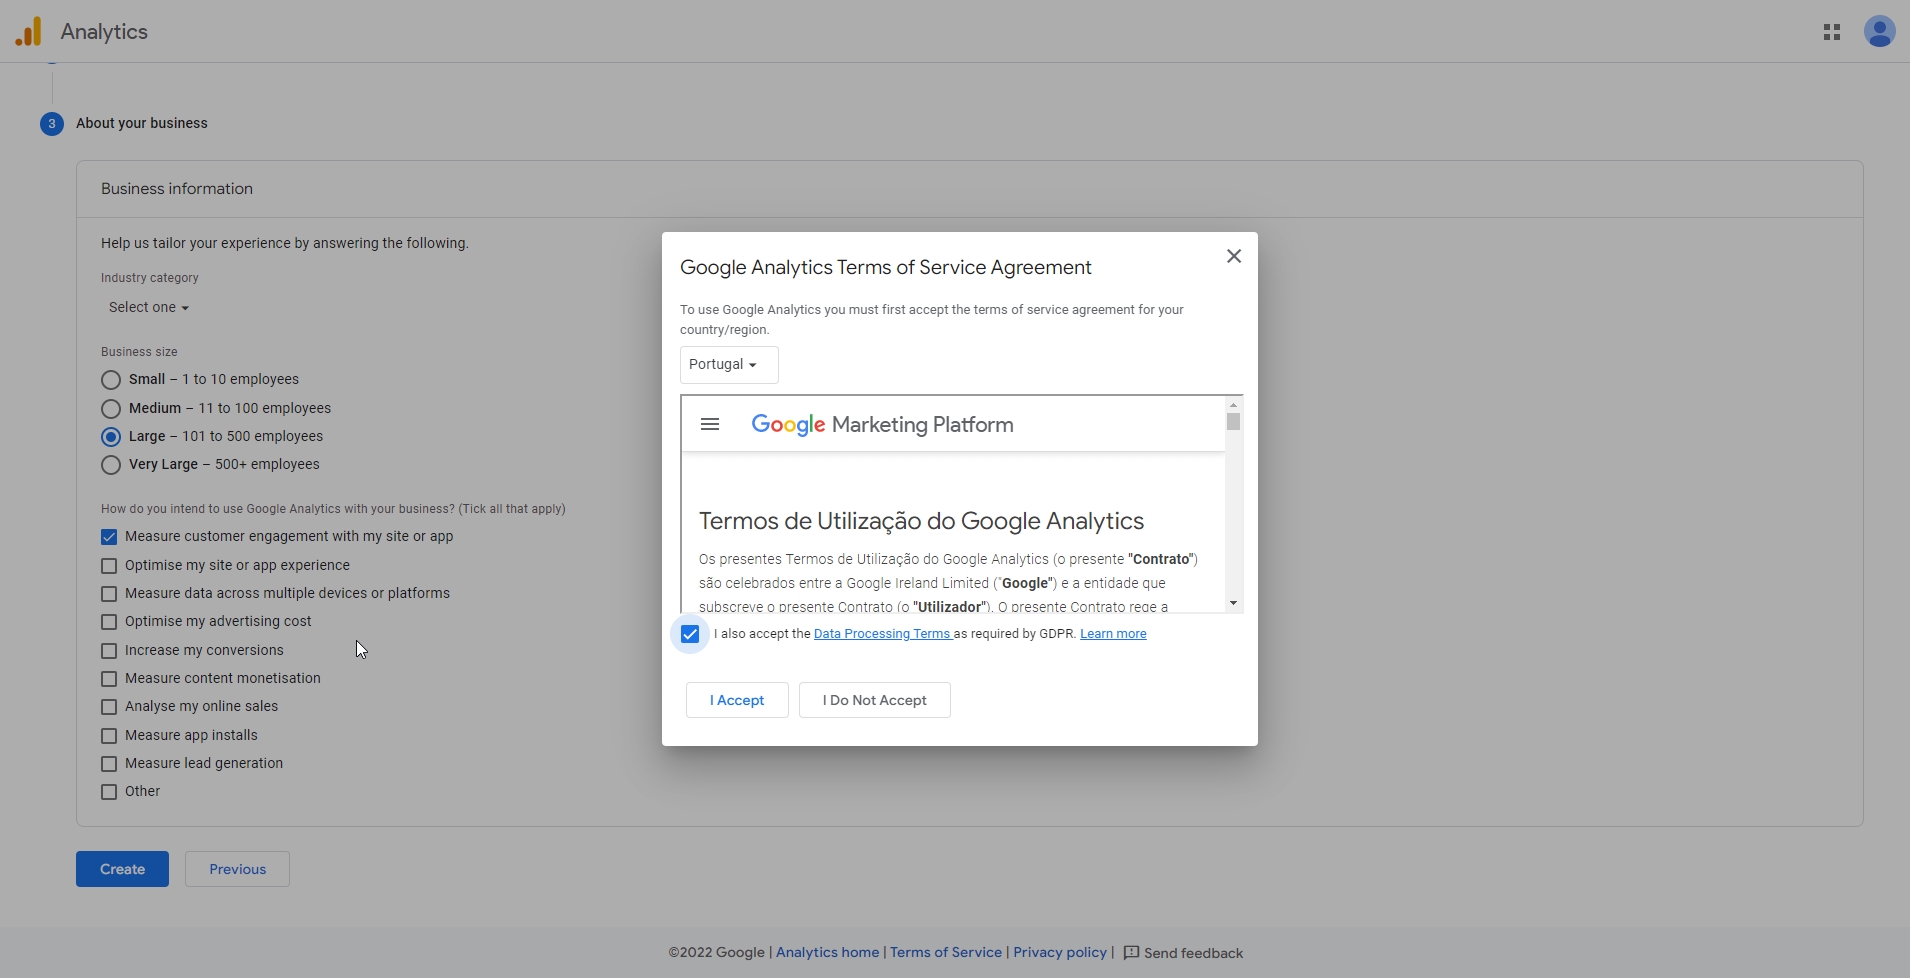
After that, the terms of service will be presented for reading. If you agree, select the GDPR option and click “I Accept”:
-
Now that the account is created, choose the type of platform that will be used to access MAM4PRO:
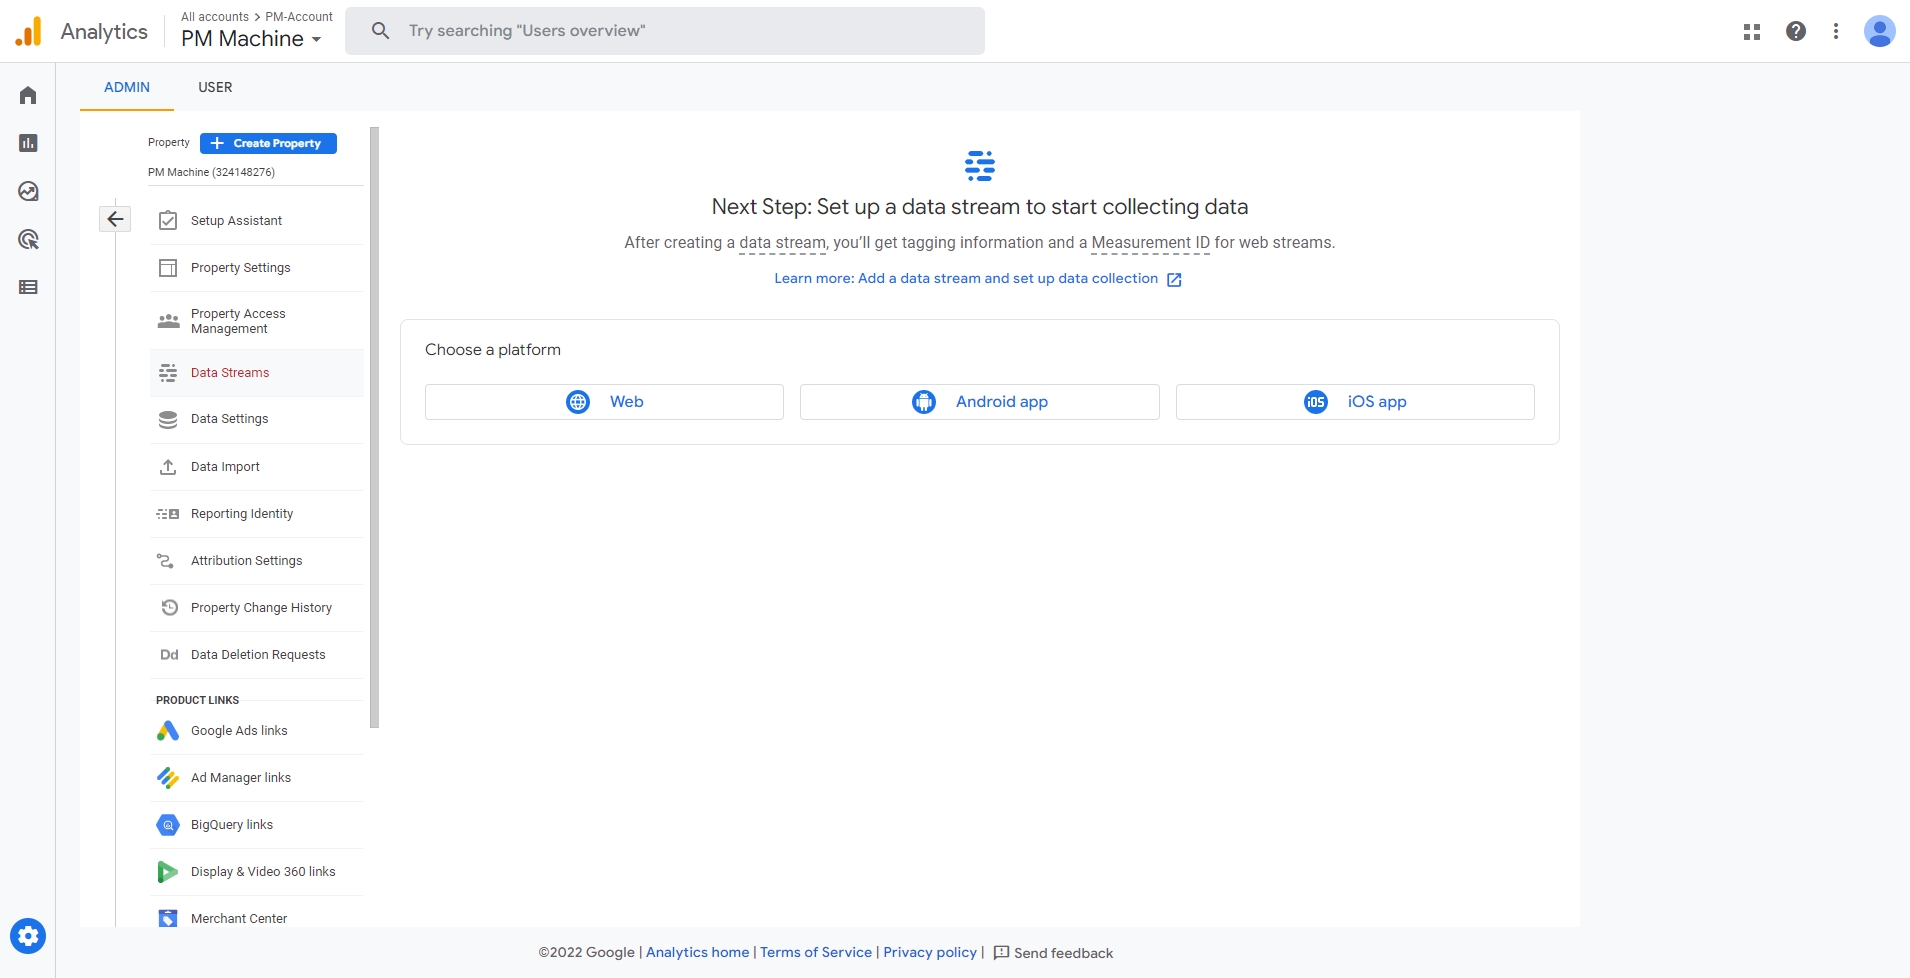
-
Enter the MAM4PRO URL for monitoring and give it the stream name:
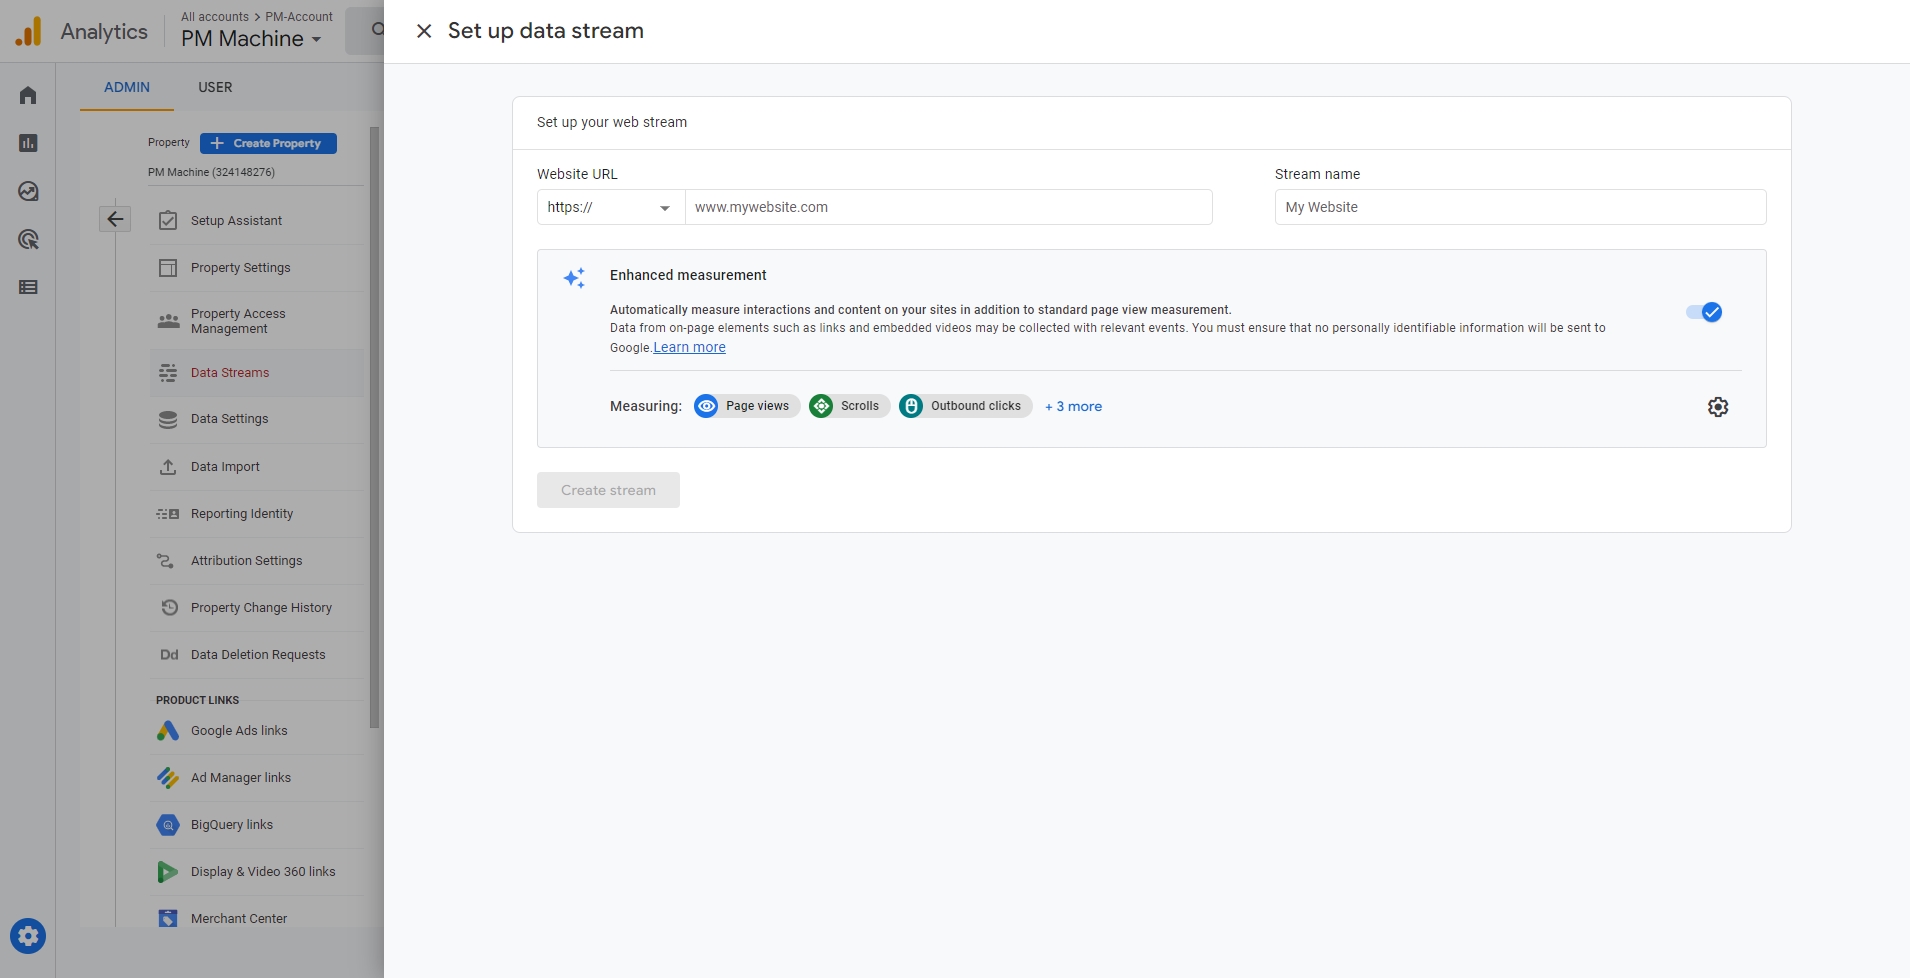
If you wish, you can remove some things that are not meant to be monitored (e.g., scrolls and file downloads) -
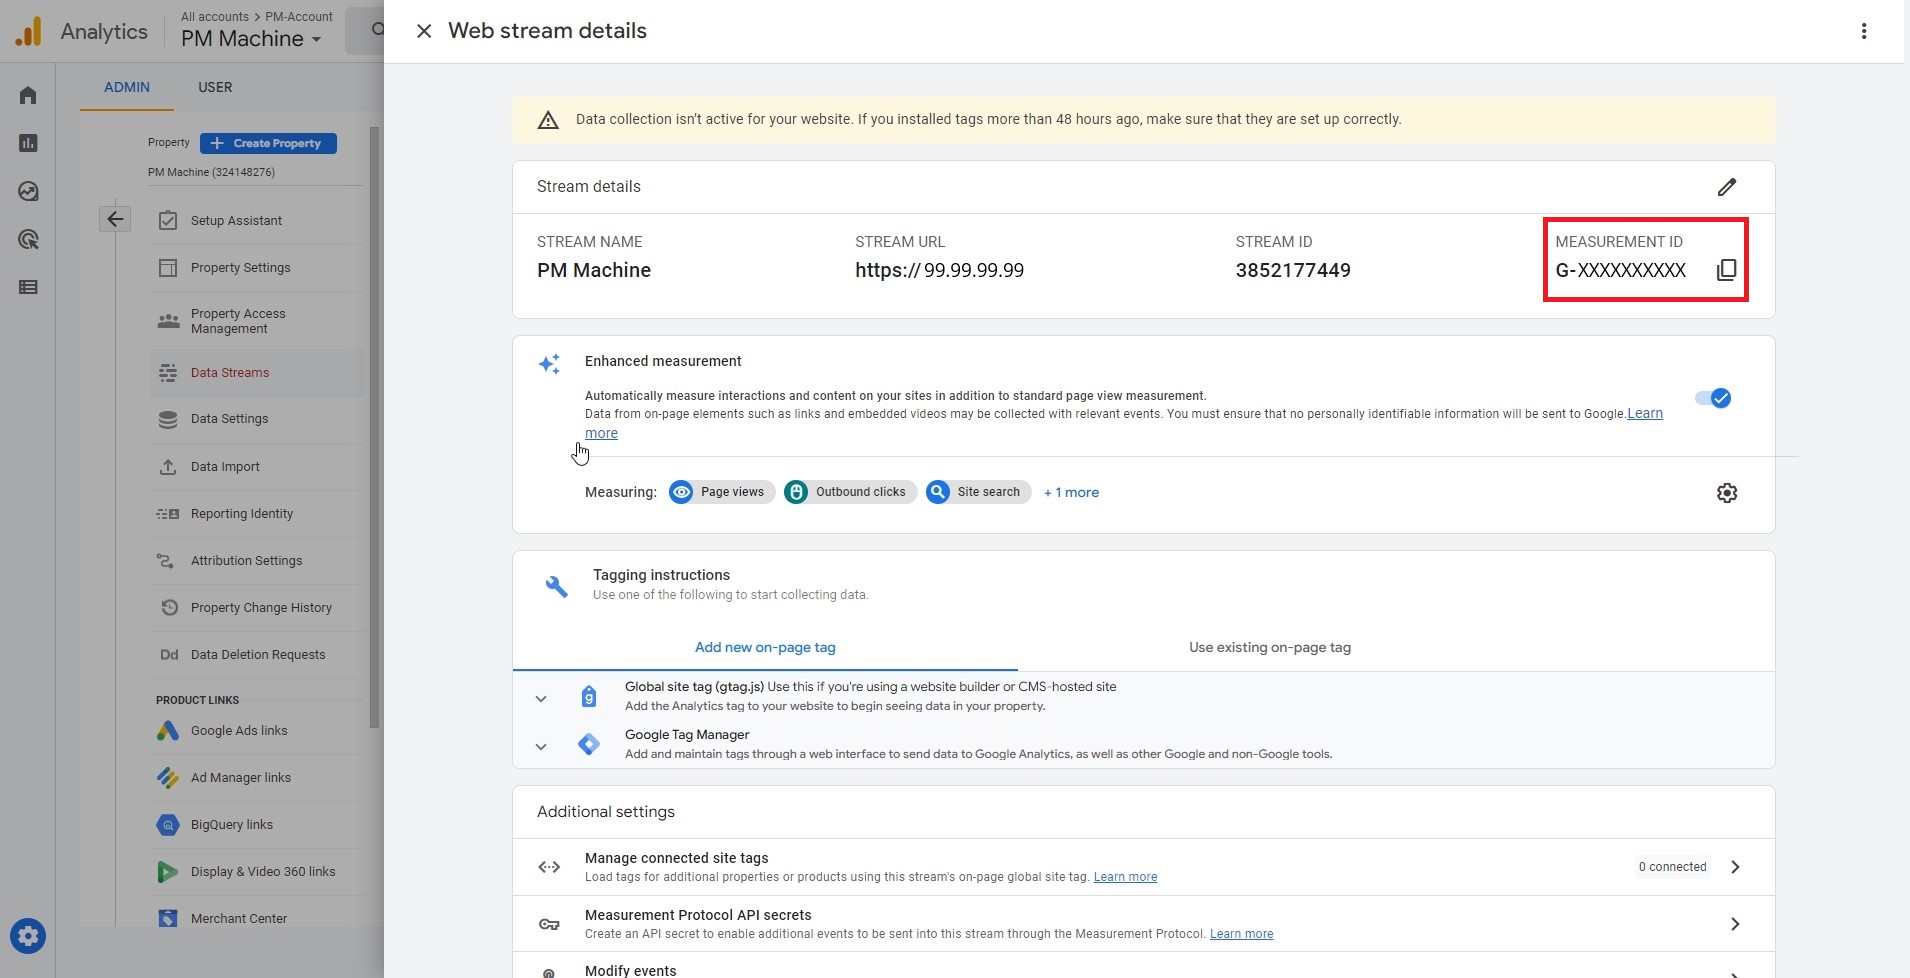
After creating the web stream, the “MEASUREMENT ID” will be displayed in the upper right corner of the screen. This identifier must be used on the MAM4PRO side so that it can send the metrics to Google Analytics:
¶ Google Tag Manager
-
Log in with your Google account on the Google Tag Manager page. After logging in, a page like this below should be displayed. Click on the tree points button at the top right of the page and on the “Create Container” option:
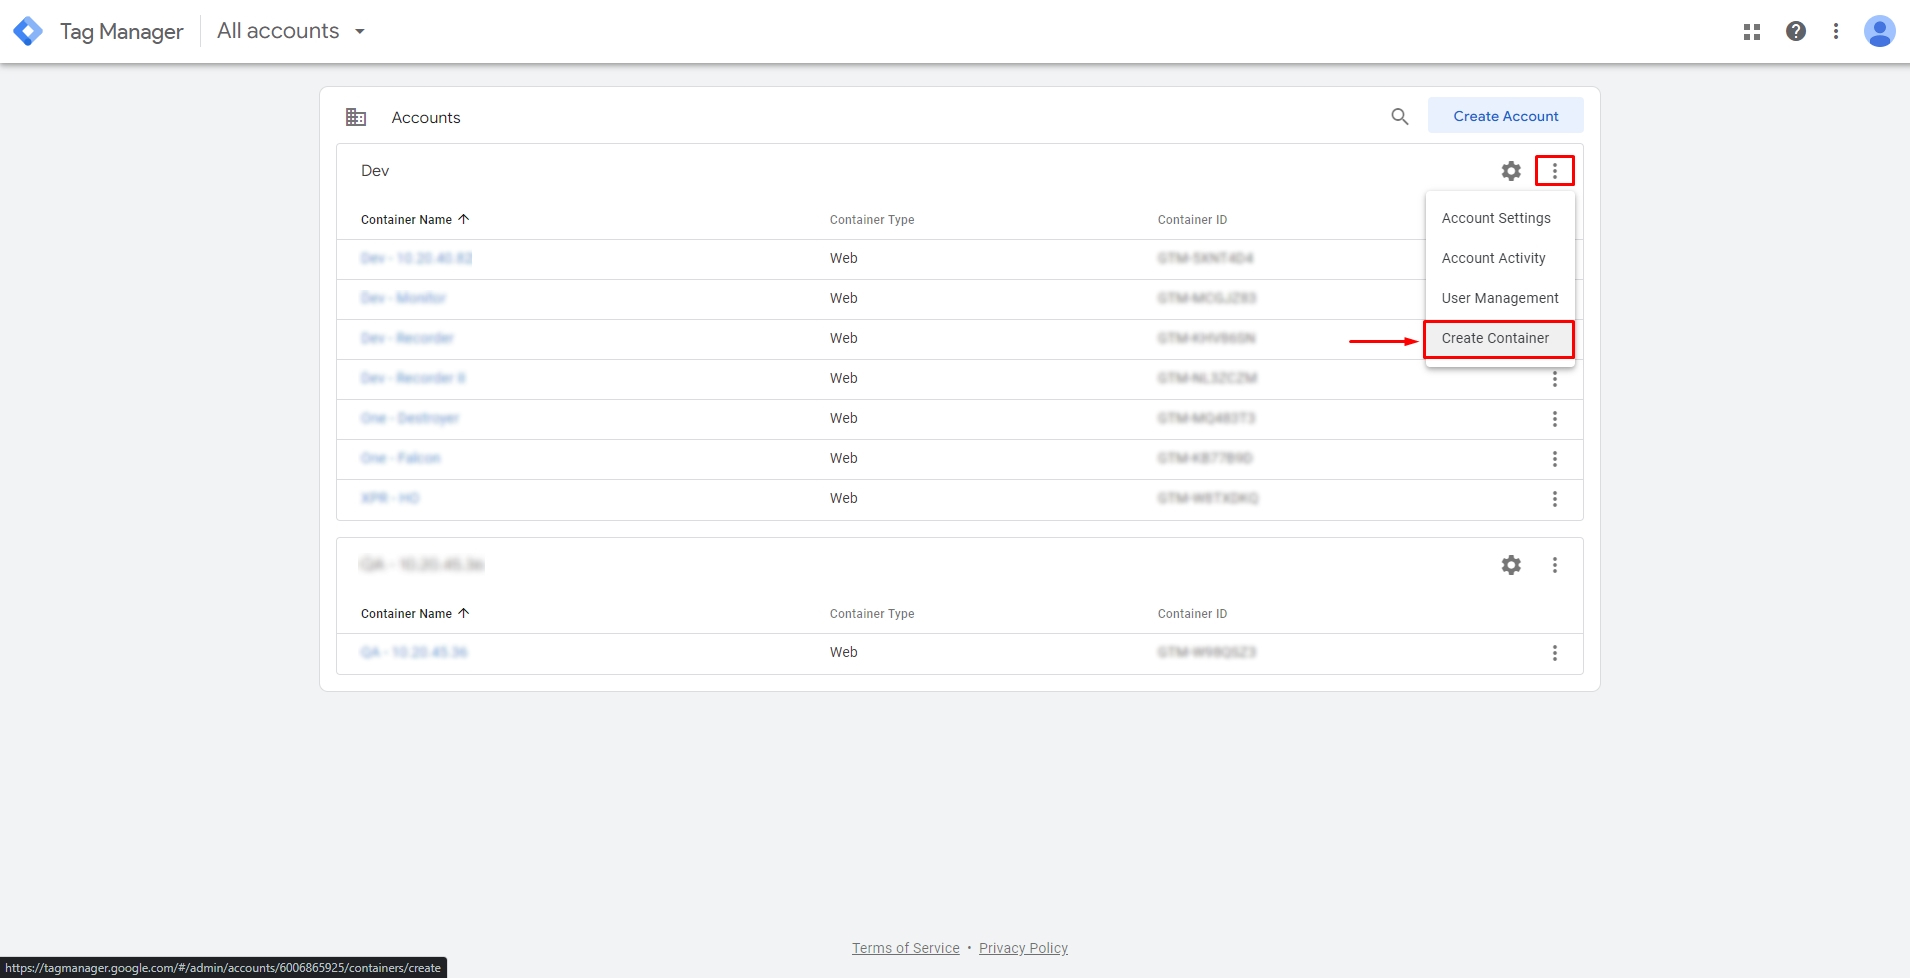
-
Give the container a name and choose the target platform:
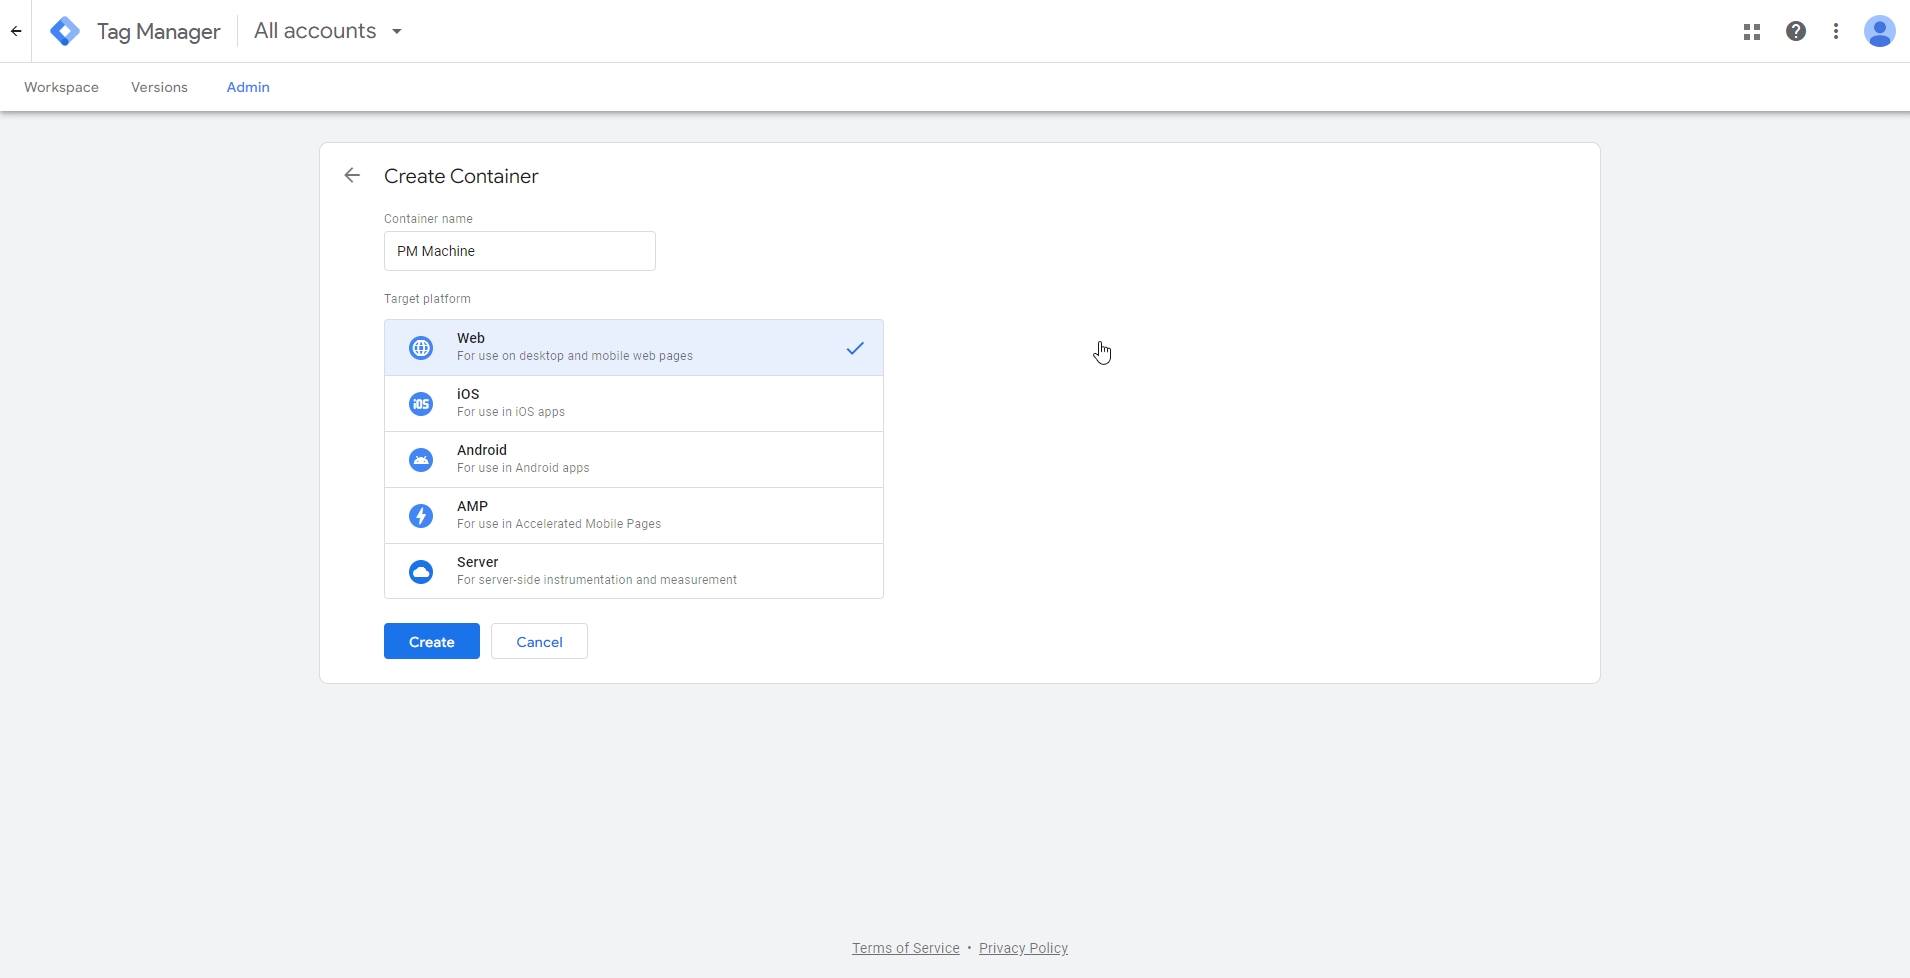
-
After that, a page like the image below should be displayed and the Google Tag Manager ID should be saved for later addition on the MAM4PRO side:
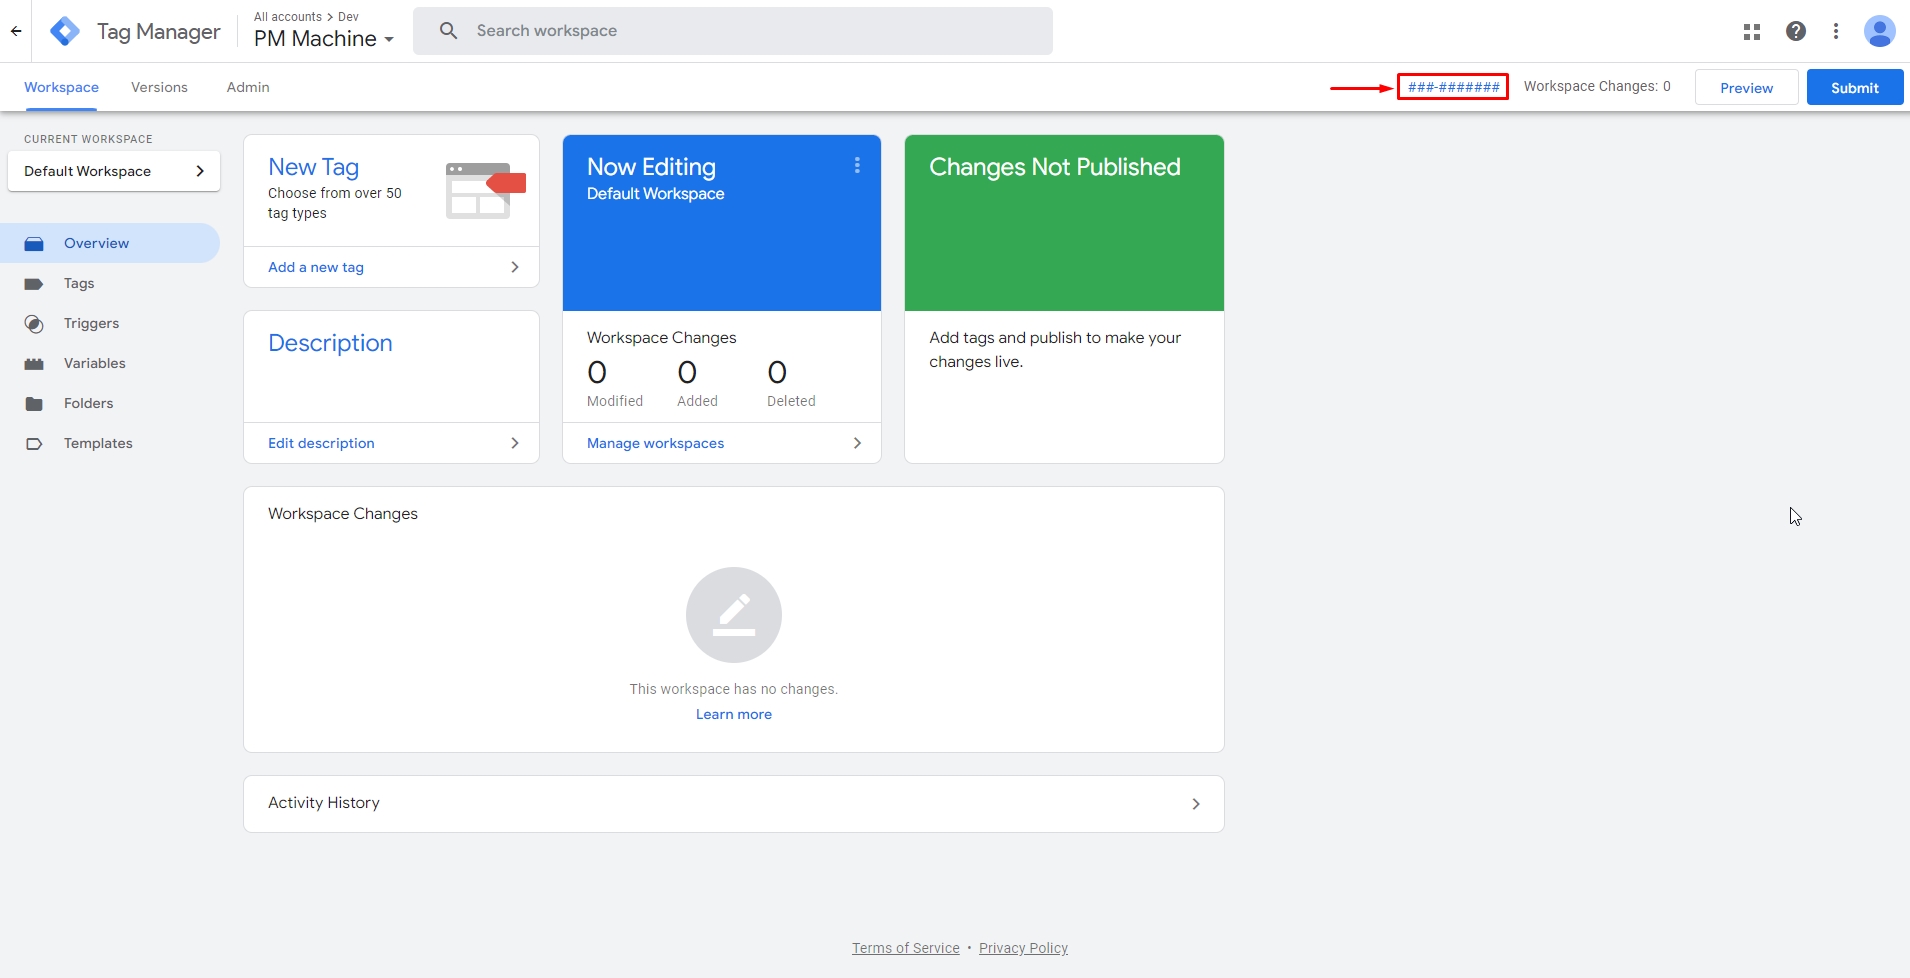
-
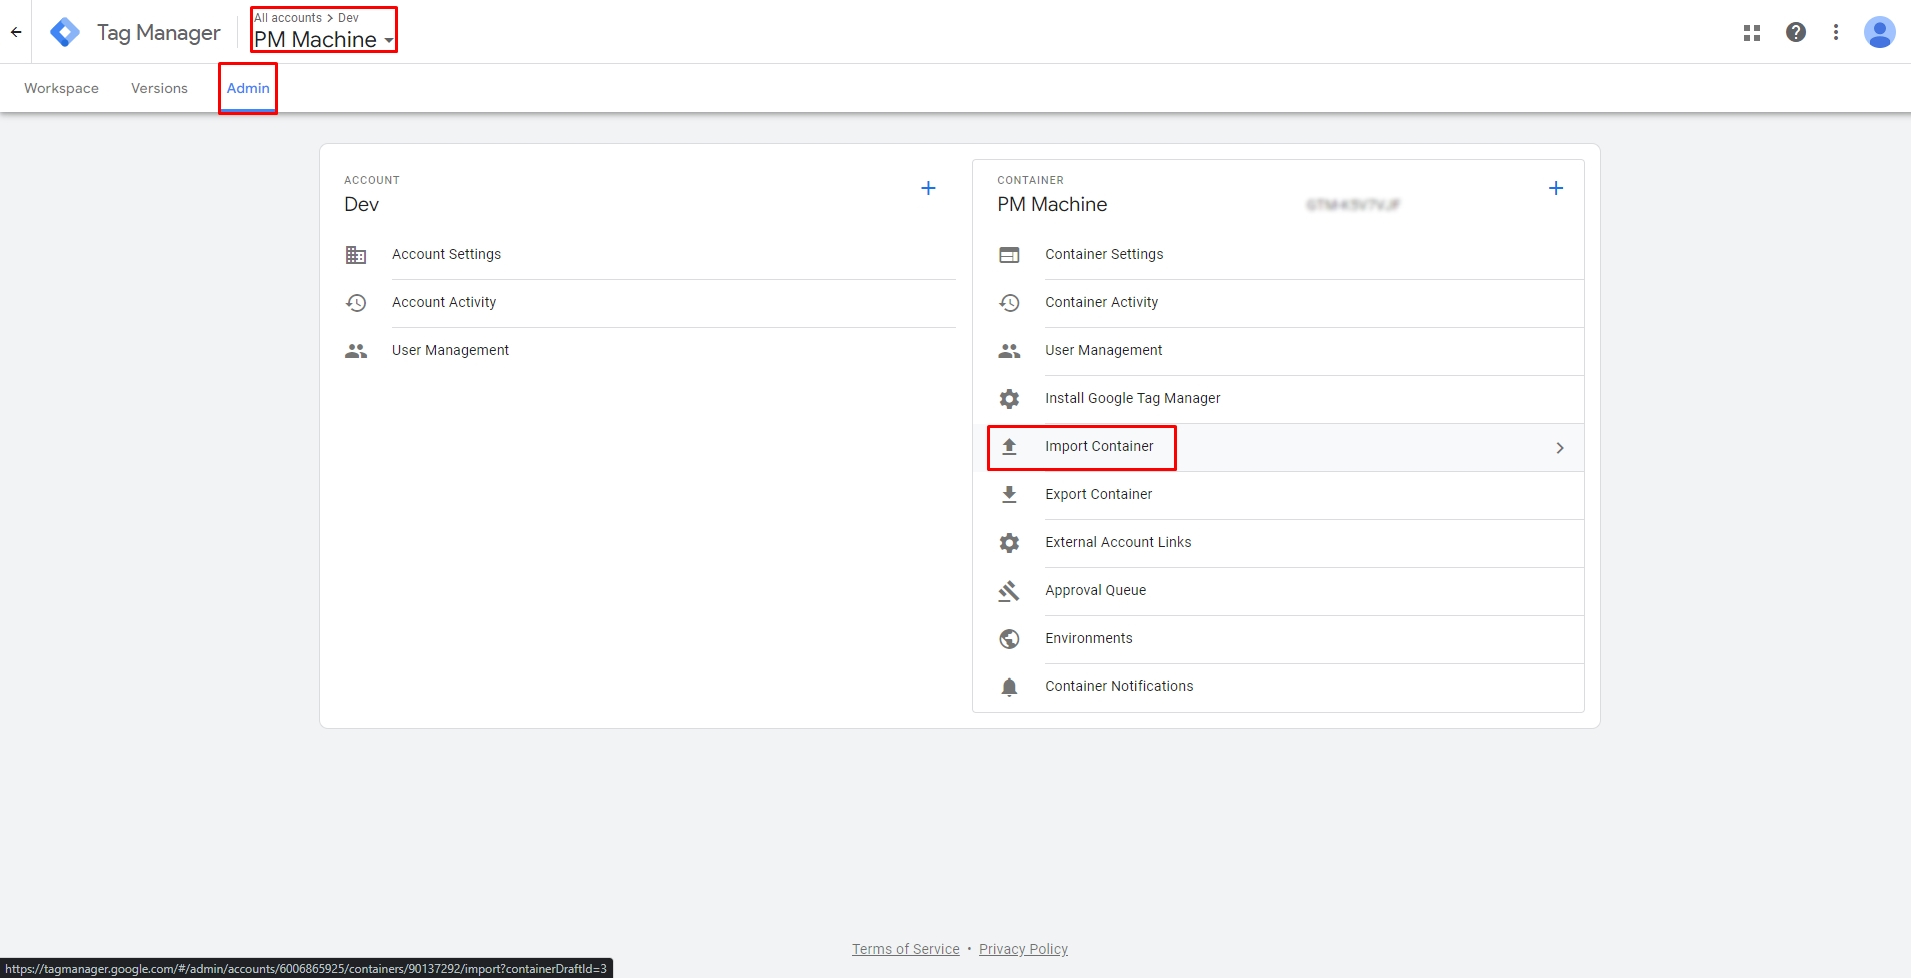
To import the MOG container, access the “Admin” area and click on “Import Container”:
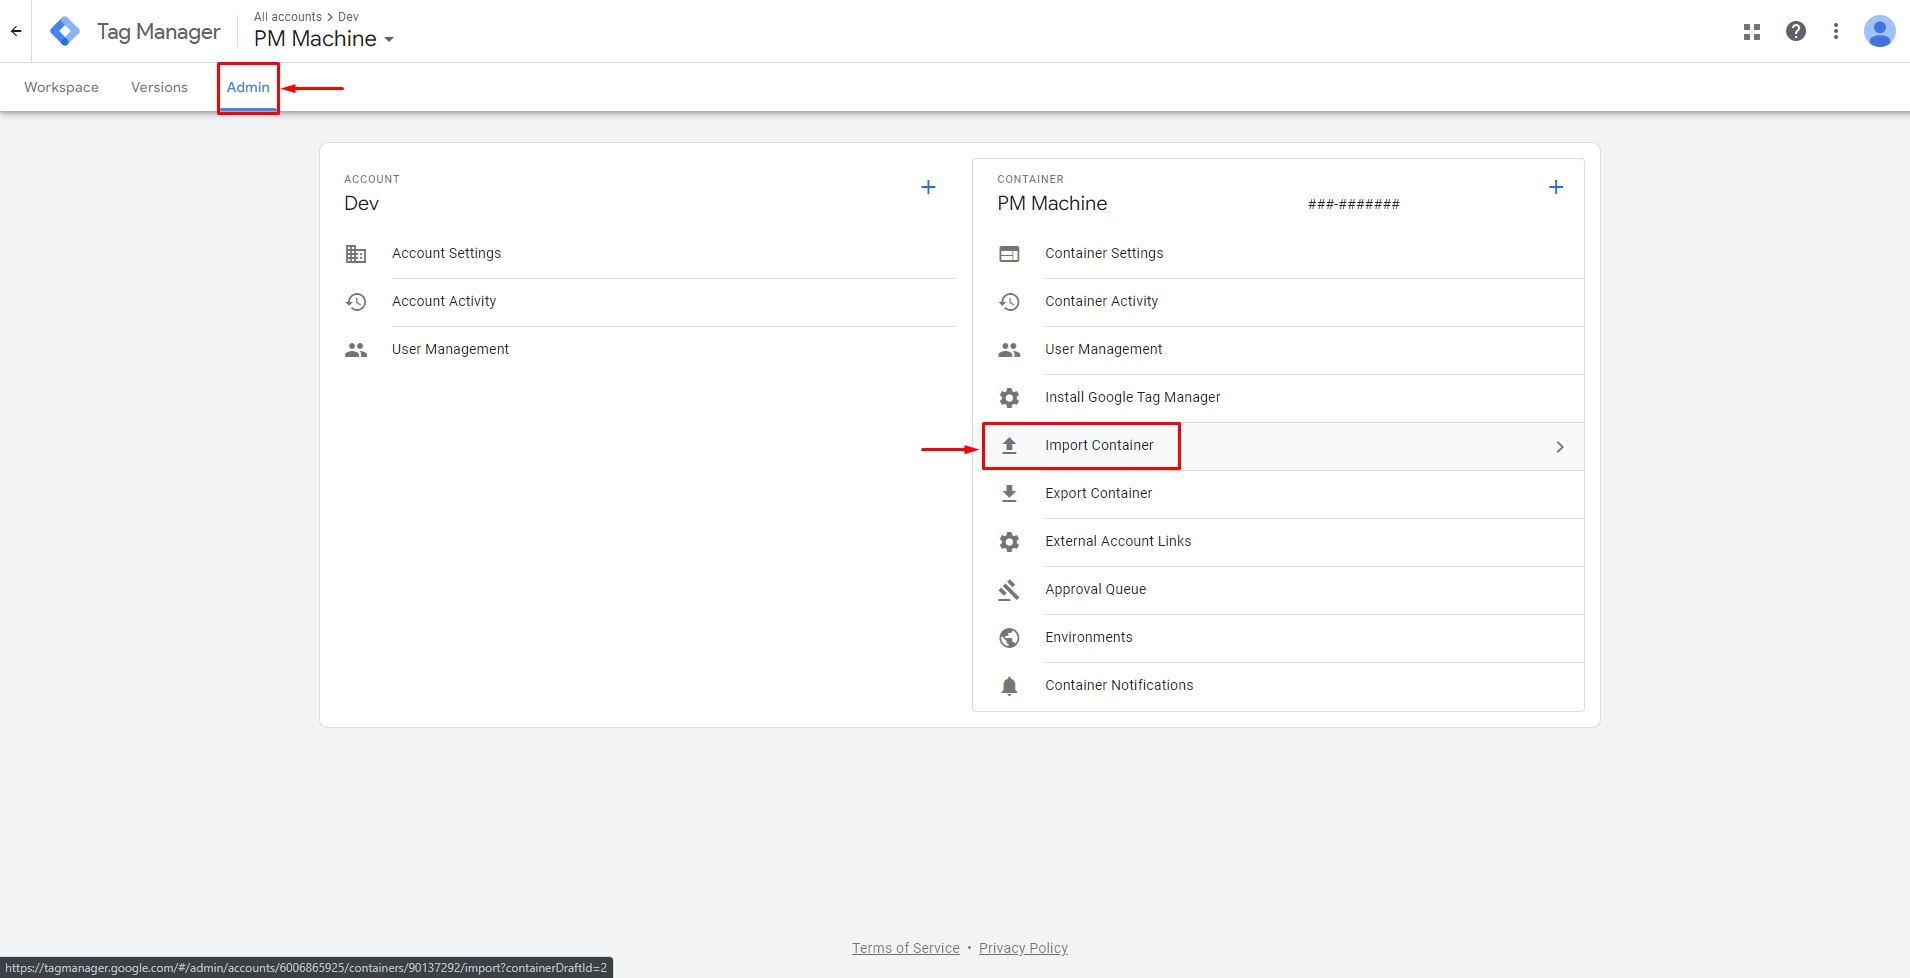
-
Click the “Choose container file” button and select the “GTM.json” file provided by MOG. In the “Choose workspace” area, click on the “Existing” button and select the “Default Workspace” option:
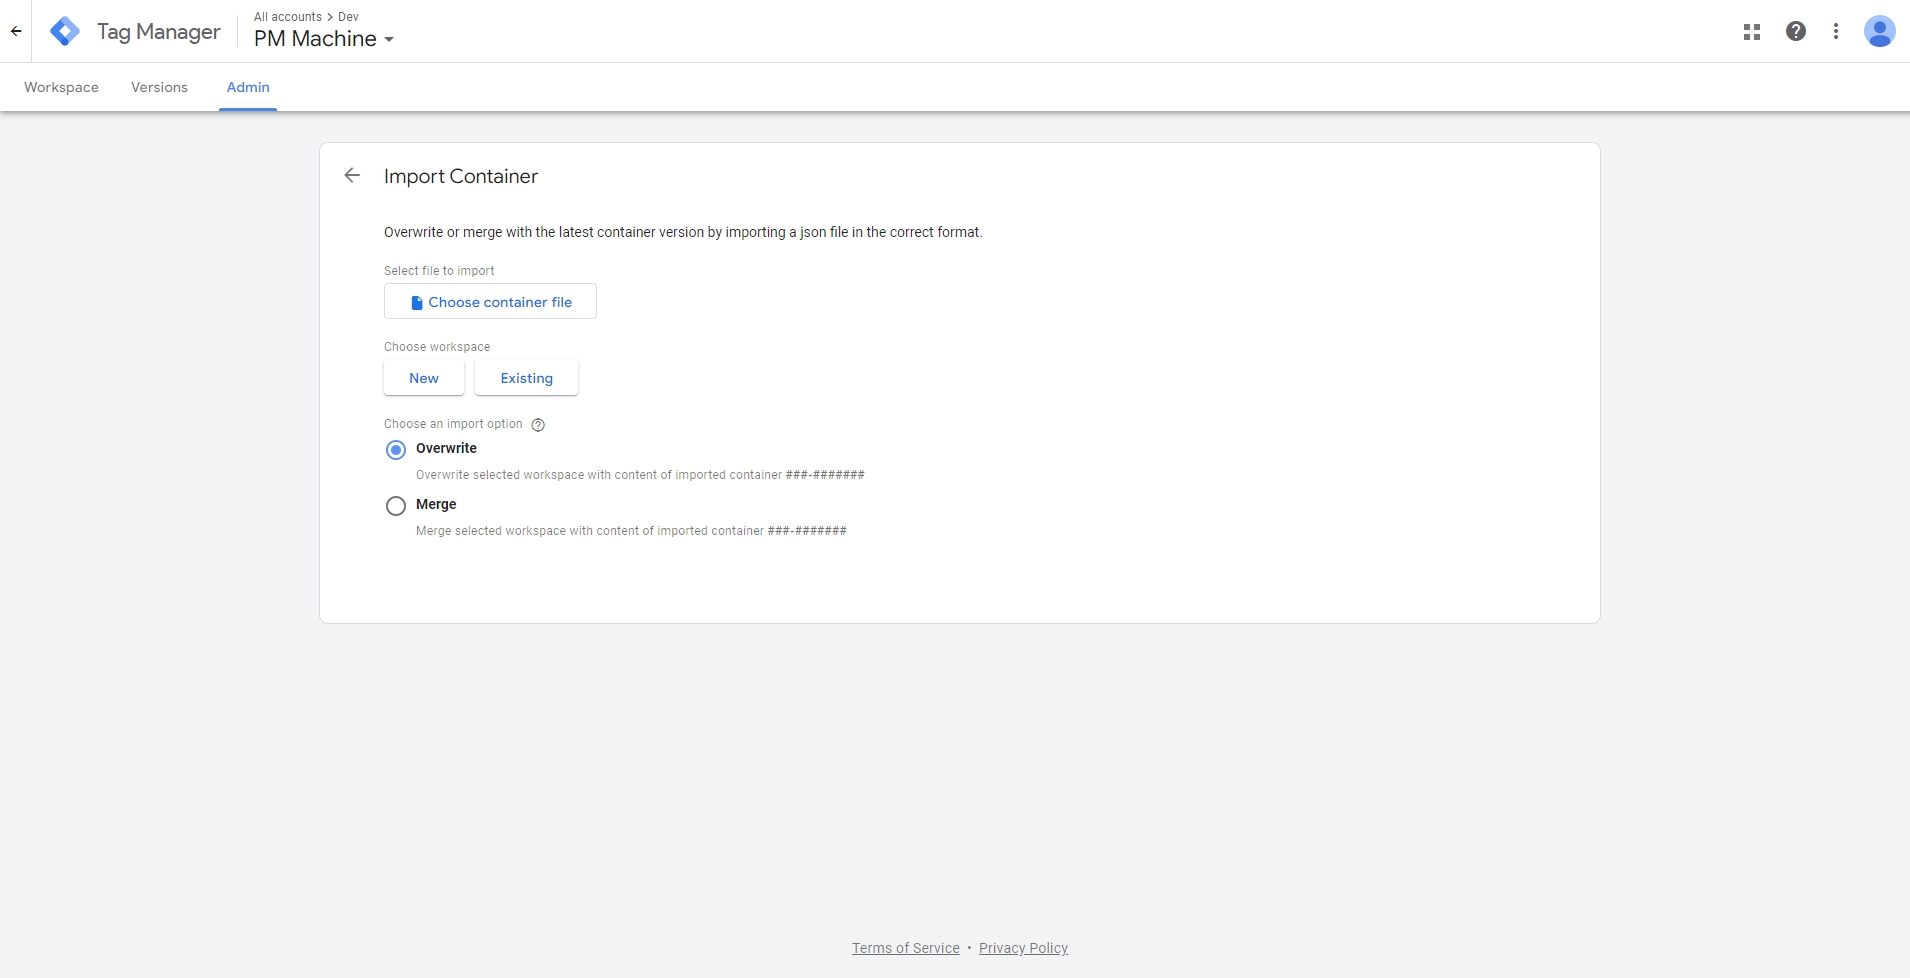
-
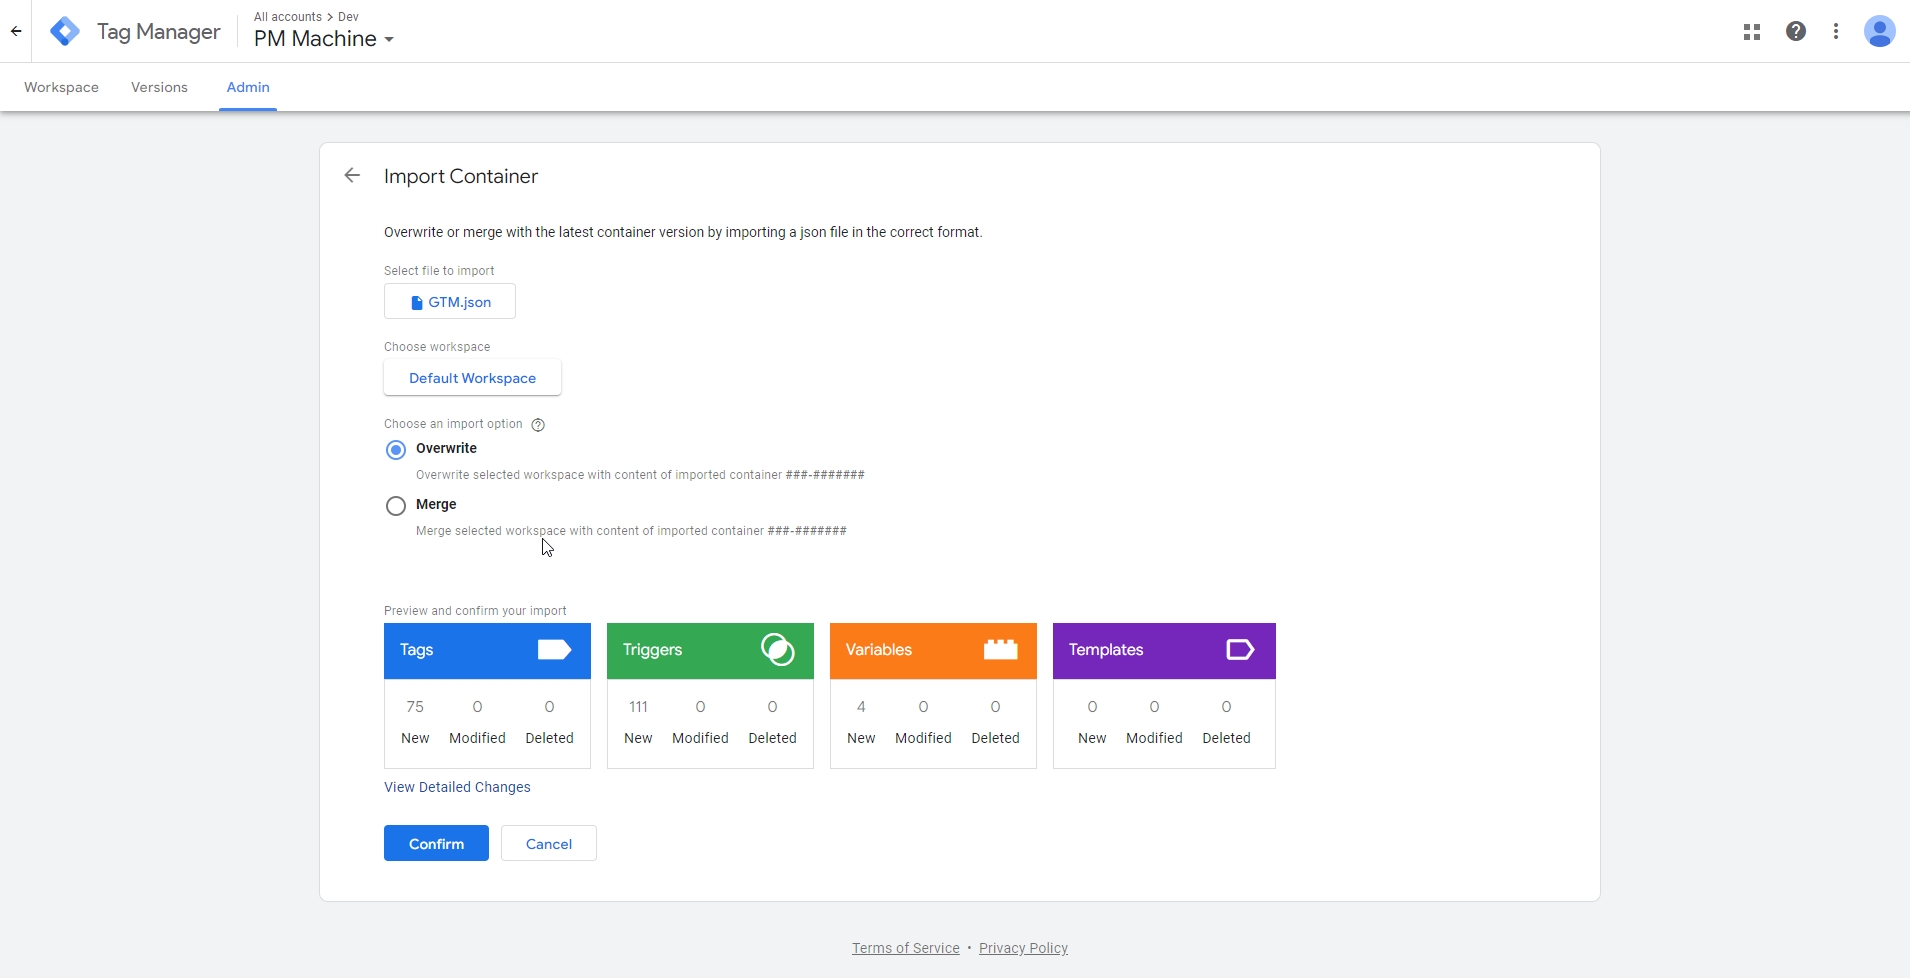
A preview of what will be imported will appear. Click the “Confirm” button to finish the import:
-
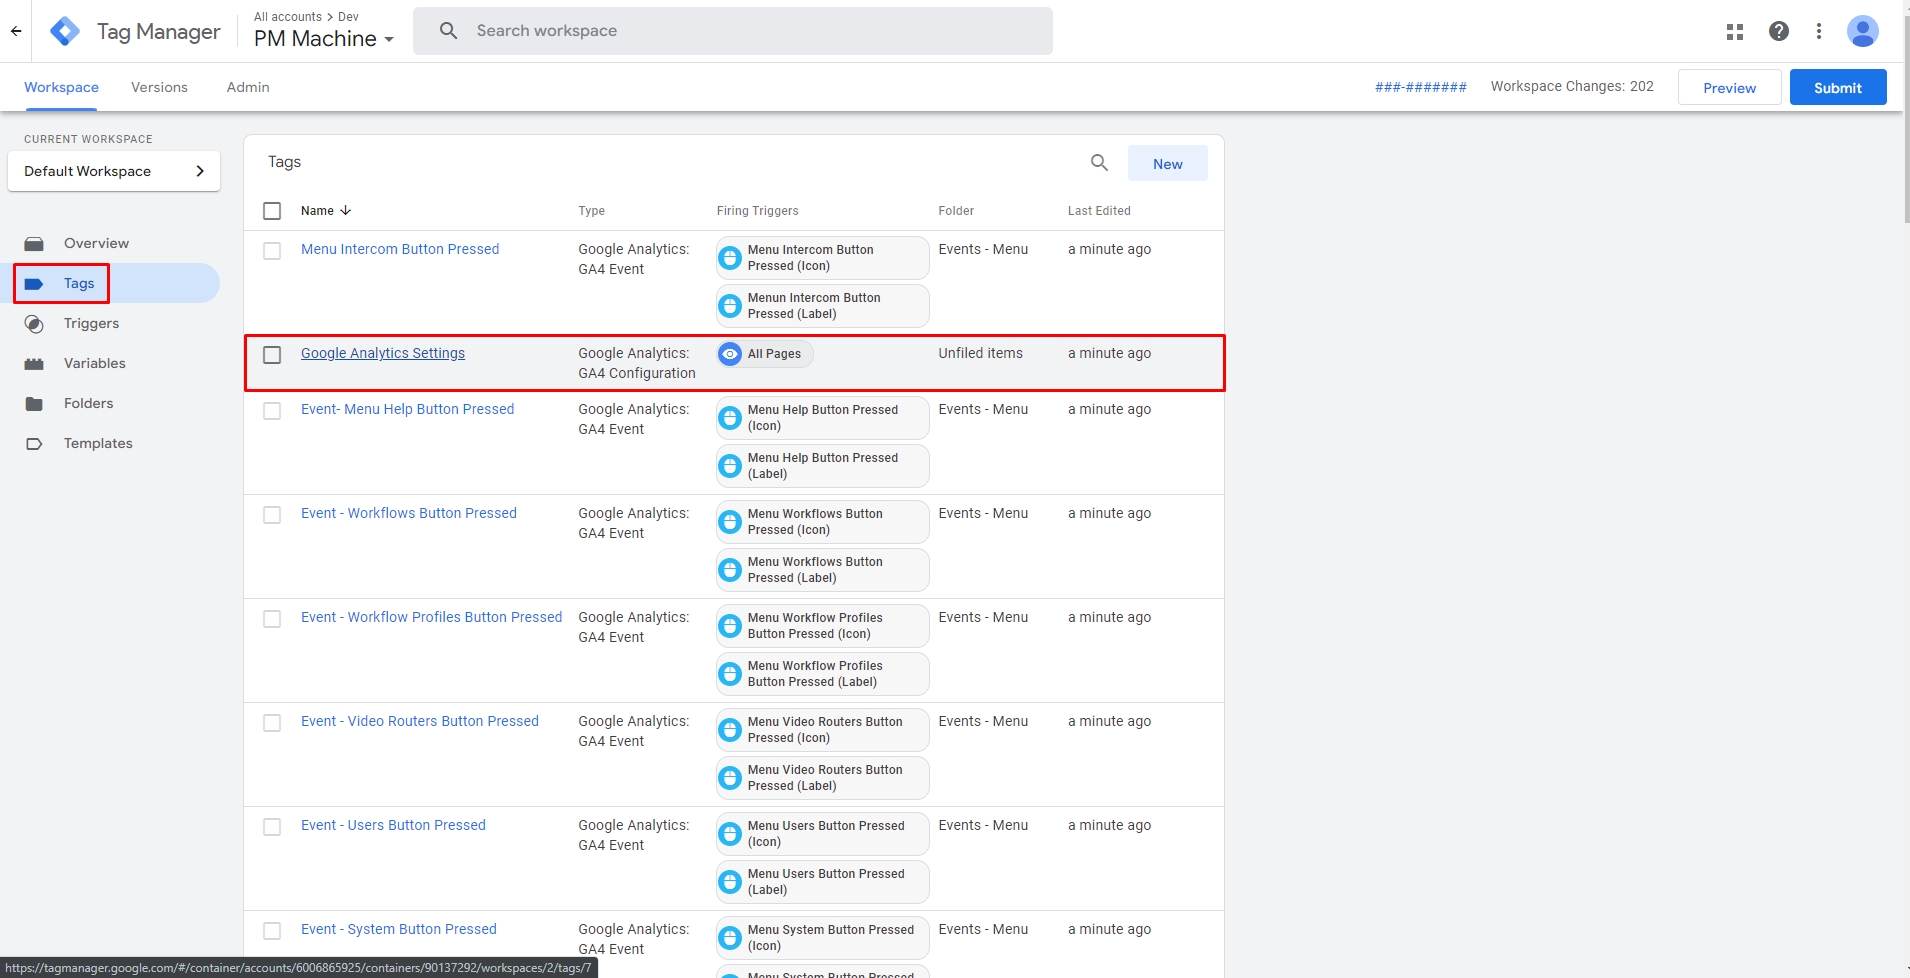
To integrate Google Analytics with Tag Manager, access the “Tags” tab and click the “Google Analytics Settings” item:
-
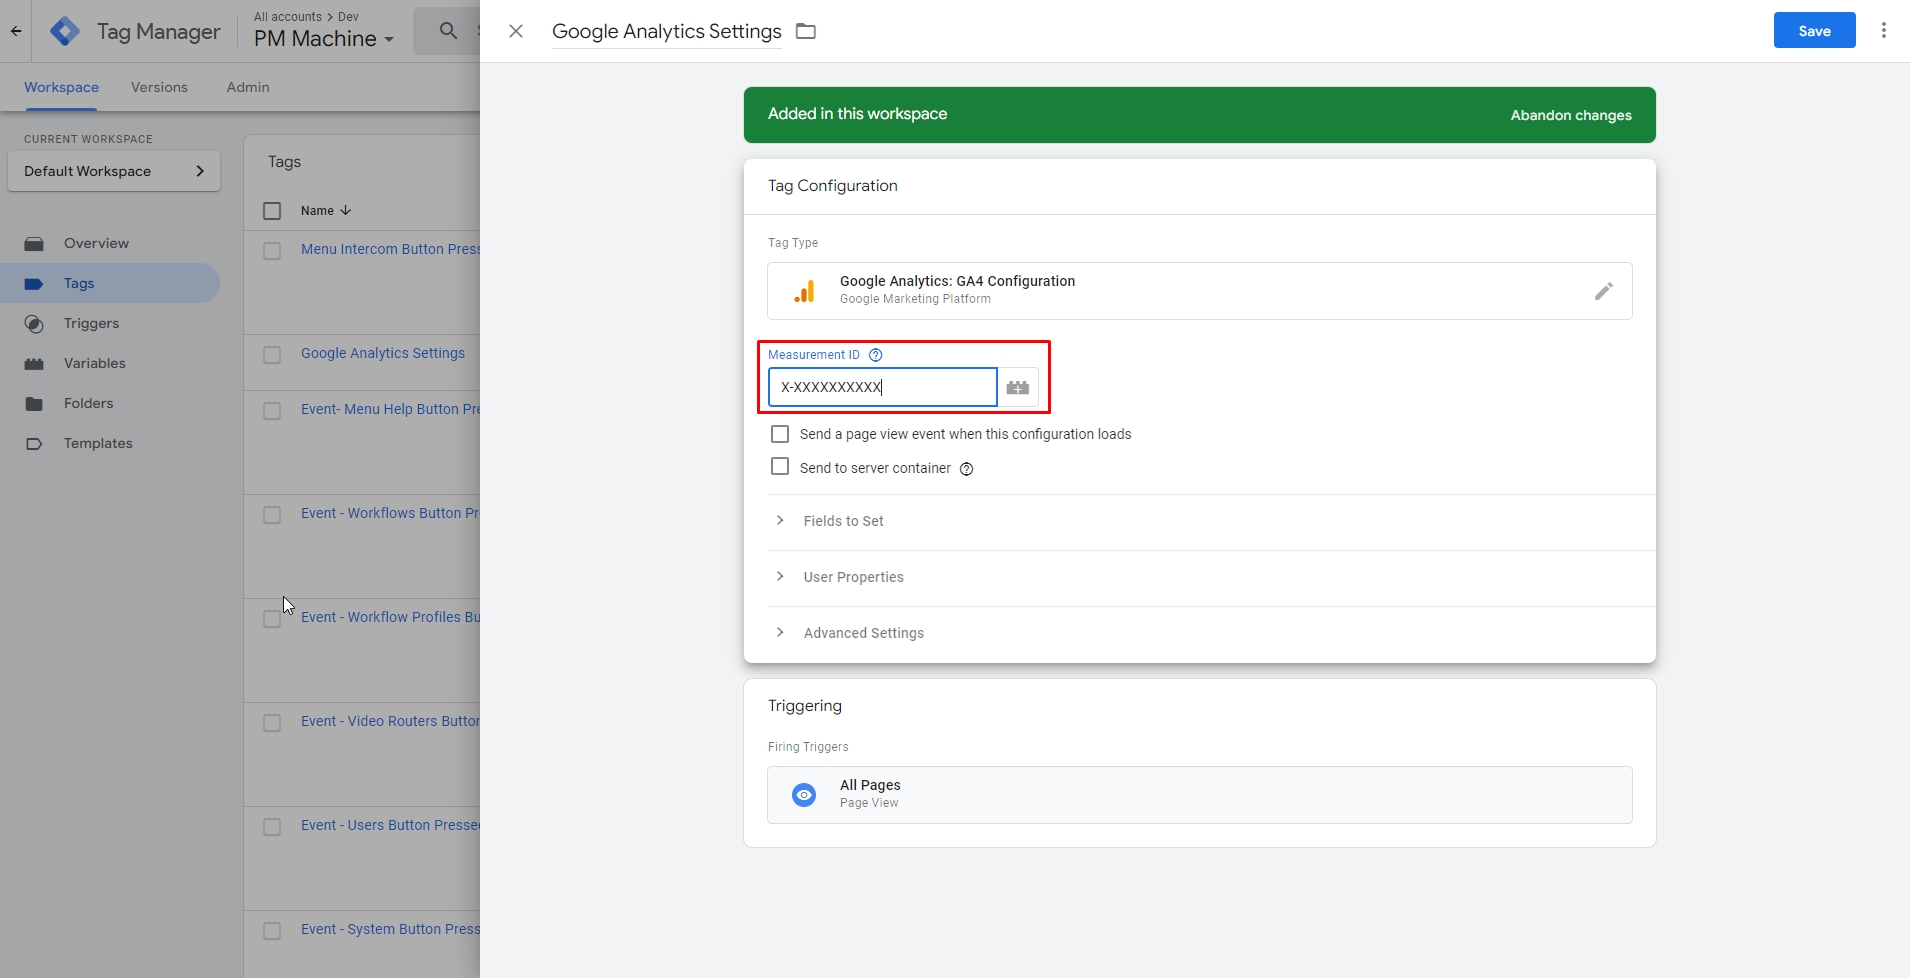
In the “Measurement ID” field, enter the ID obtained in step 9 of the Google Analytics section and click “Save”:
-
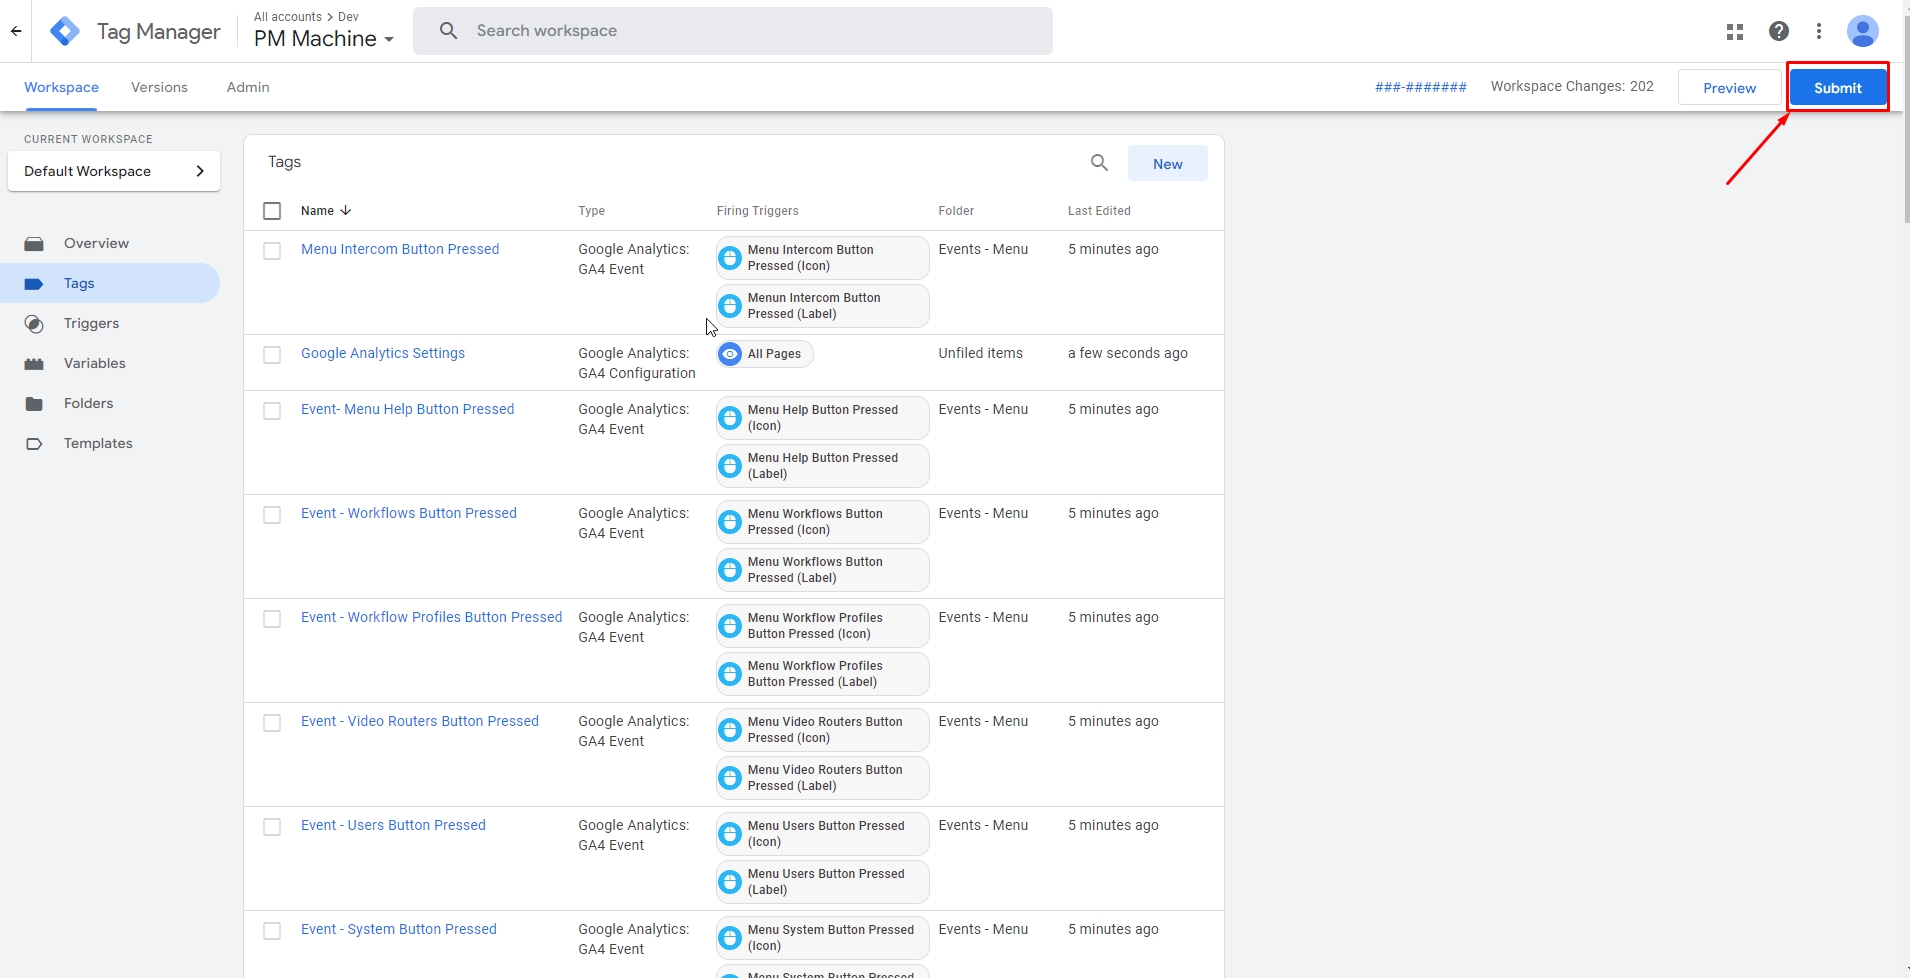
After that, click the “Submit” button:
-
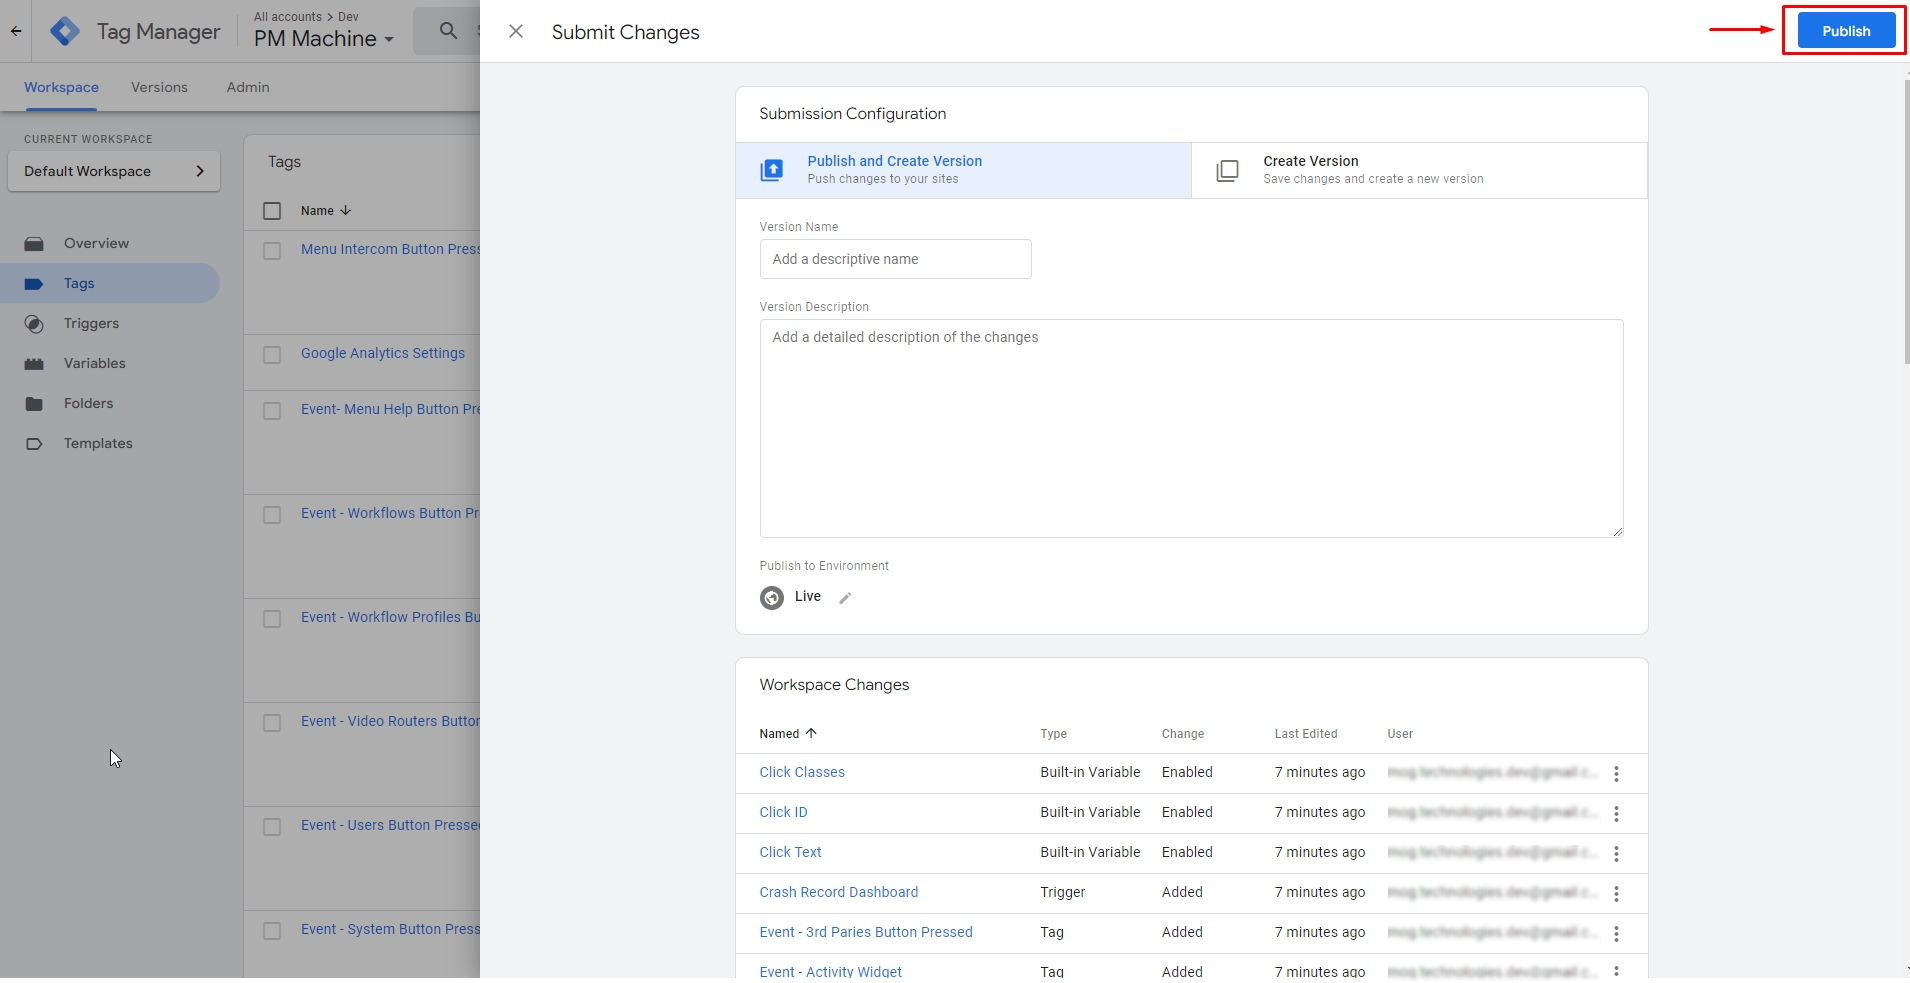
To finish, if applicable, fill in the fields for the version to be saved and click “Publish”:
To update a Container in Google Tag Manager to include new events, access the admin area of the instance to be updated and follow the steps of the current session from 4 until the end:
¶ Checking MAM4PRO Metrics
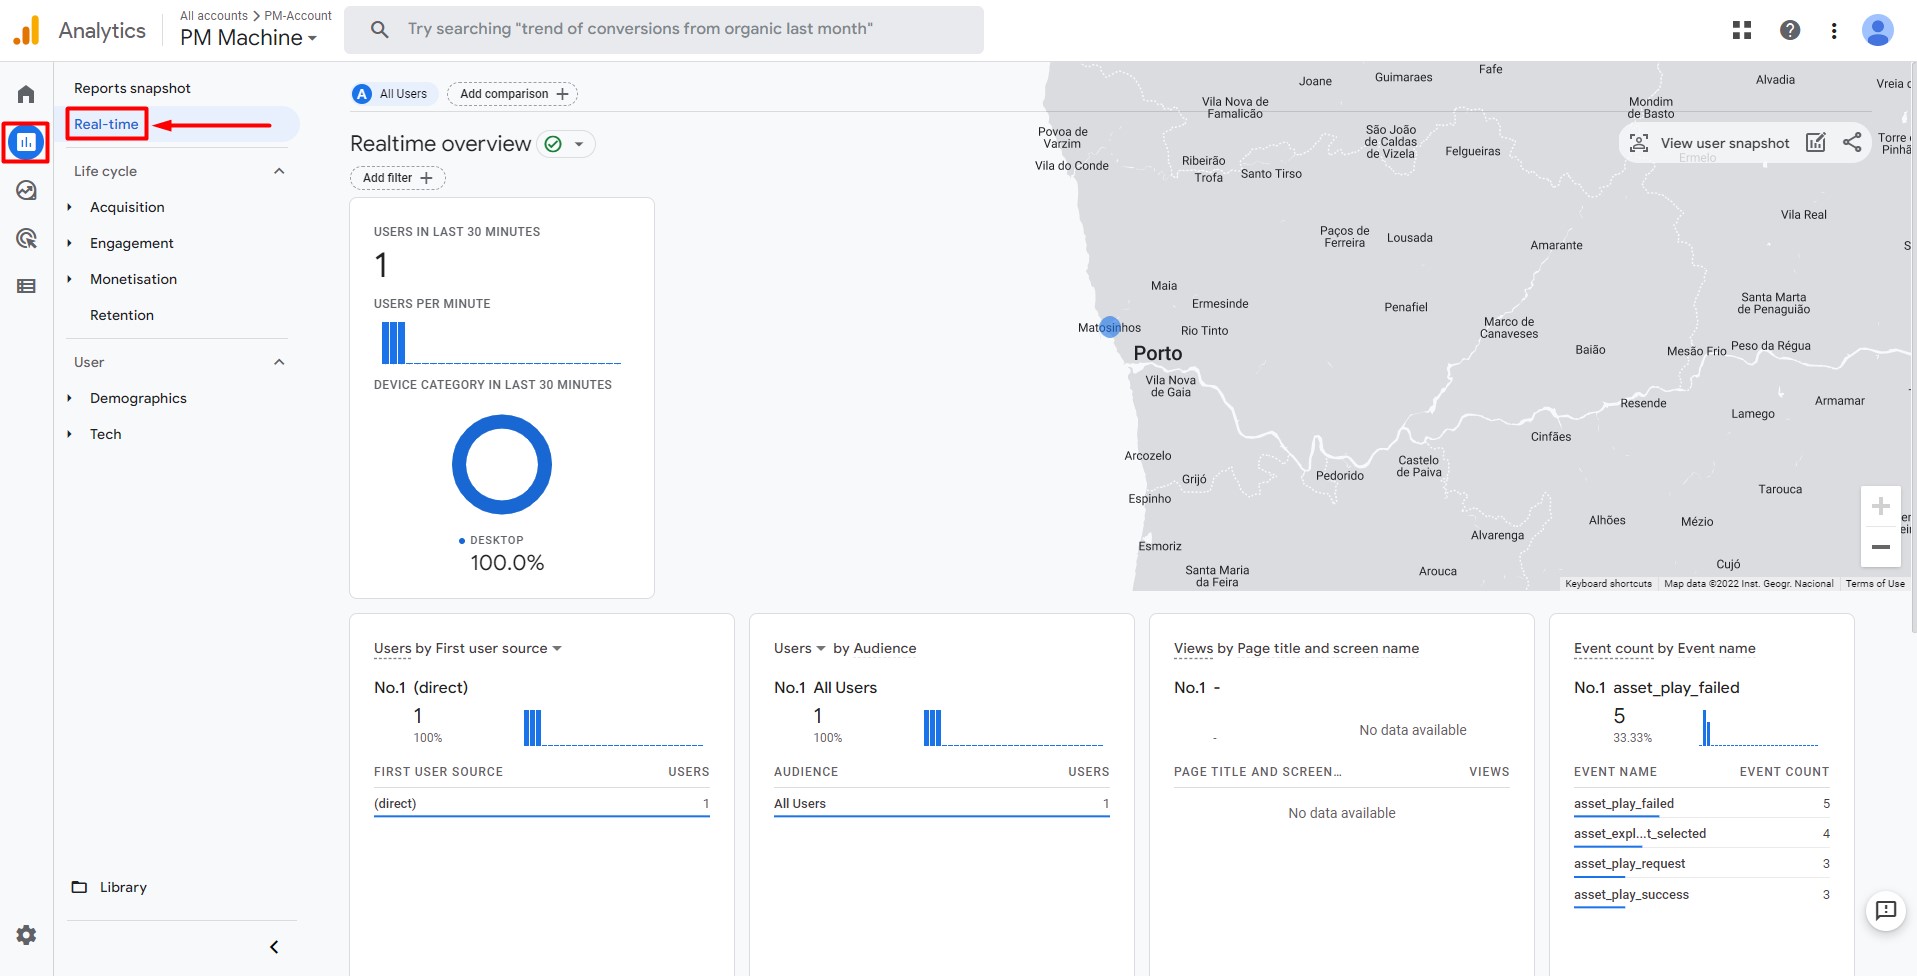
After configuring the analytics, you can check the metrics by accessing Google Analytics, navigating to the “Report” tab, and clicking on the “Real Time” option:
¶ XML Transformation
In the “XML TRANSFORMATION” tab, add and choose an XSLT file for the output XML to be customized. The available settings are:
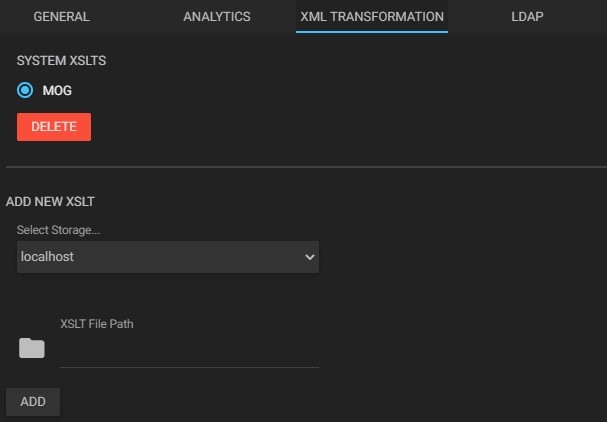
- System XSLTs: select from the available XSLTs configurations;
- Add new XSLT: add a new XSLT file.
a. Select storage: choose the storage where to search for the XSLT file. The available storages here are those configured in chapter “Adding Storage”
b. XSLT file path: enter the folder path containing the intended XSLT file;
c. Click the “Add” button to include the template in the “XSLTS System” section.
¶ LDAP
In the “LDAP” tab, configure your authentication using the LDAP protocol. The available settings are:
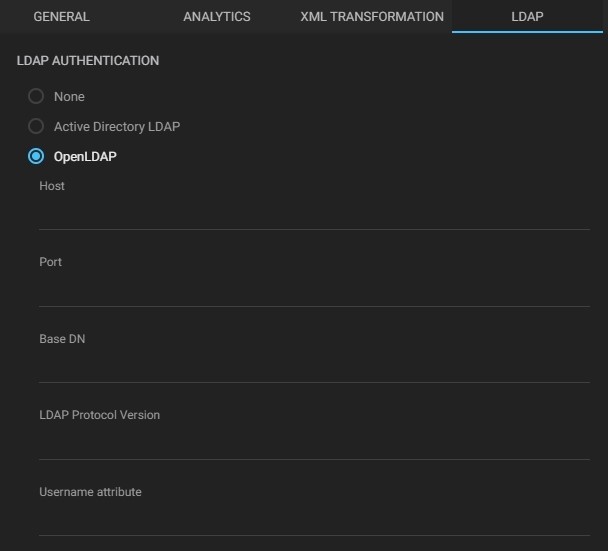
- Active directory LDAP
a. Domain: enter the domain name. - OpenLDAP
a. Host: enter the LDAP server host;
b. Port: enter the LDAP server port;
c. Base DN: enter the starting point that the LDAP server will use when searching for user authentication in your directory;
d. LDAP protocol version: enter the version of the LDAP protocol being used;
e. Username attribute: enter the username attribute that should match the username used at the login prompt.
¶ SMTP
In the “SMTP” tab, configure your SMTP (Simple Mail Transfer Protocol) server to be able receive system notifications by e-mail. The available settings are:
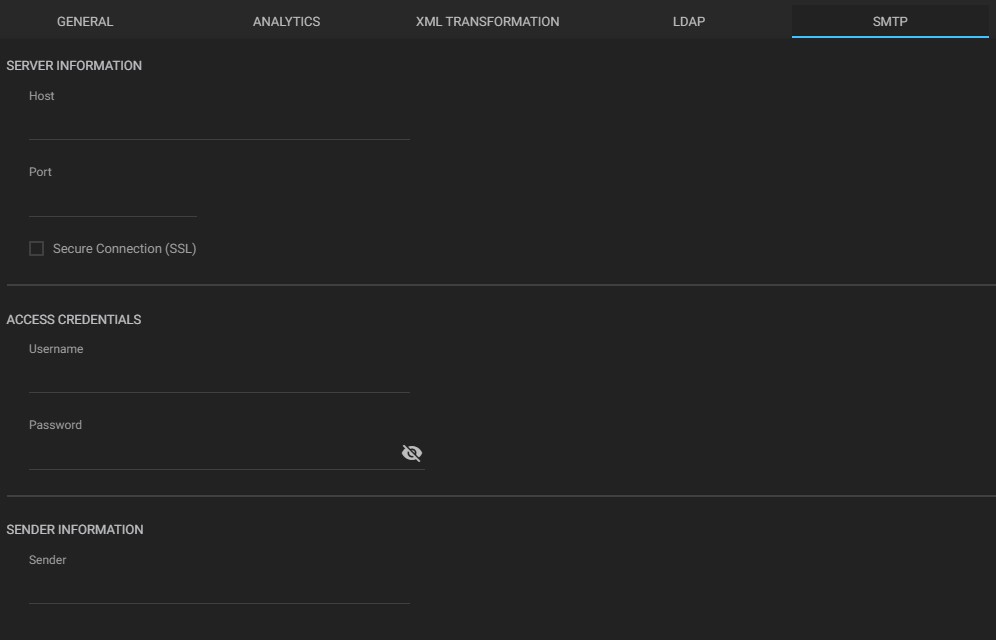
- Host: enter the SMTP server host address;
- Port: enter the SMTP server port;
- Secure connection (SSL): check this box if your connection to SMTP server is made by SSL;
- Username: enter the SMTP server user name;
- Password: enter the SMTP server password;
- Sender: enter the SMTP server sender email.
After configuring the SMTP server, set the users who will receive the emails. For more information, please check the Adding Users page.