¶ Configuring Live Streams
Tip: a valid URL starts with http:// or https://
- Click the “Live Streaming” tab in the navigation menu (left of the screen);

- In the content toolbar click the “Create” button (top right corner of the screen) to create a new live stream;

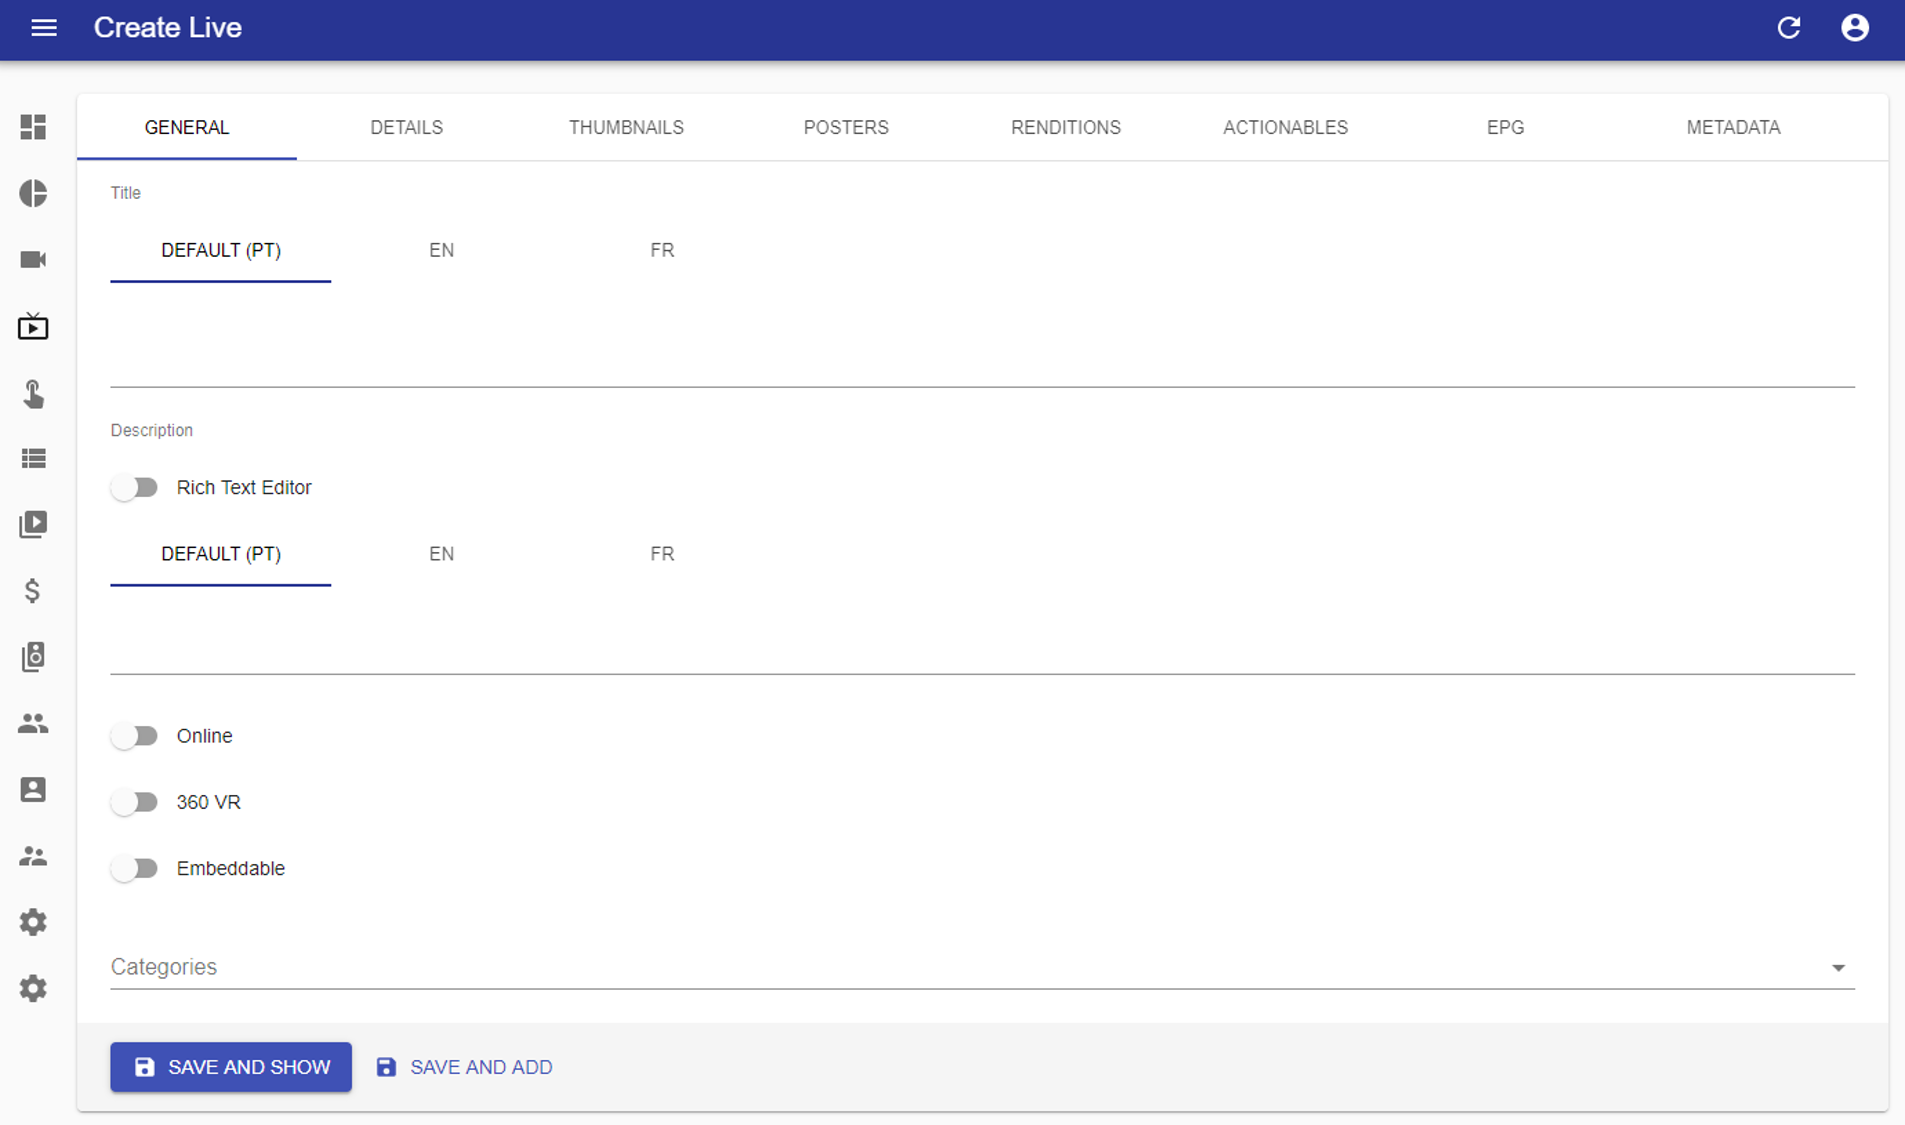
- In the "GENERAL" tab only the "Title" and "Description" fields are required;

- Title: for each configured language, enter the title for the Live stream;
- Description: for each configured language, enter the Live stream description. A synopsis of the content that will be presented;
- Rich text editor: by enabling this option you can add rich text formatting to the description;
- Online: check this option for the Live stream to be published and available to the end user;
- 360 VR: check this option to enable 360 VR Live streams;
- Embeddable: check this option to allow Live stream to be embedded in a third-party website;
- Categories: click and select to assign one or more categories to the Live stream.
- [OPTIONAL] In the "DETAILS" tab set the start and end date and time of the live stream;

- Start: enter the start date and time for the Live stream. Even when online it will only be displayed after the start date and time;
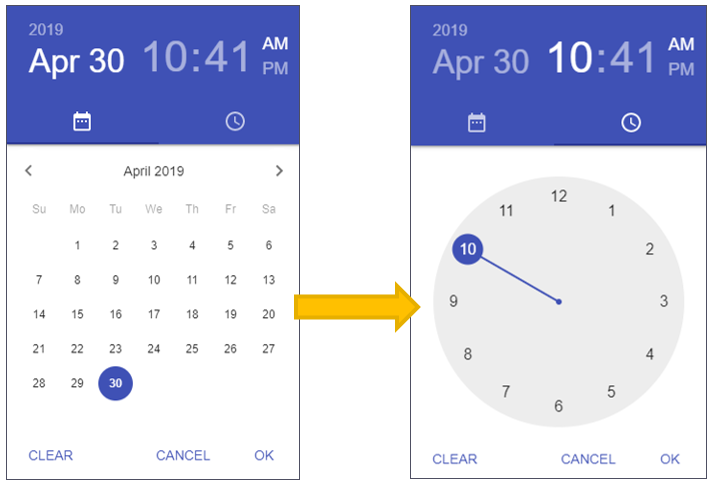
Clicking "Start" will display a calendar for start date selection. After selecting the date, the calendar will be changed to choose the start time. After the selections click the "OK" button in the calendar (pictures below).

- End: enter Live end date and time. Even when online, it will only be displayed until End date and time;
- Follow the same steps as Start (above) to select the Live stream end date and time.
- Preview: by clicking here, a list of previously created items will be displayed to choose what will be the preview for the current Live. Preview only accept one item;
- Require Parental Pin: enable this option to flag contents that should be protected with a parental PIN. Click to activate this option.
- Start: enter the start date and time for the Live stream. Even when online it will only be displayed after the start date and time;
- [OPTIONAL] In the “THUMBNAILS” tab you can add images to serve as the thumbnails displayable with the live stream in the frontend;
- Follow the same procedures as described in chapter "VODs > Create", step 5.
- [OPTIONAL] In the “POSTERS” tab, you can add images to serve as posters displayable with the live streams in the frontend;
- Follow the same procedures as described in chapter "VODs > Create", step 5.
- In the “RENDITIONS” tab, enter the URL for Live default in the “Default Rendition” field;
- Follow the same procedures as described in chapter "VODs > Create", step 8.
- [OPTIONAL] In the "ACTIONABLES" tab assign one or more previously created Actionables to be triggered along with the Live stream;

- Actionables: clicking on this field a list with the created actionables will appear for selection.
- [OPTIONAL] On the "EPG" tab configure the Electronic Program Guide for the live stream channel;
It is possible to choose to automatically complete EPG programs through a periodic background process or to configure them manually.
For the automatic filling process, only the "Channel ID" and "EPG Source Name" fields must be filled. For the manual process, follow the instructions from step "c" explained below.

- Channel ID: enter the channel ID for Live. It must match the identification set in the EPG source;
- EPG Source Name: select the EPG previously created on the EPG Sources module;
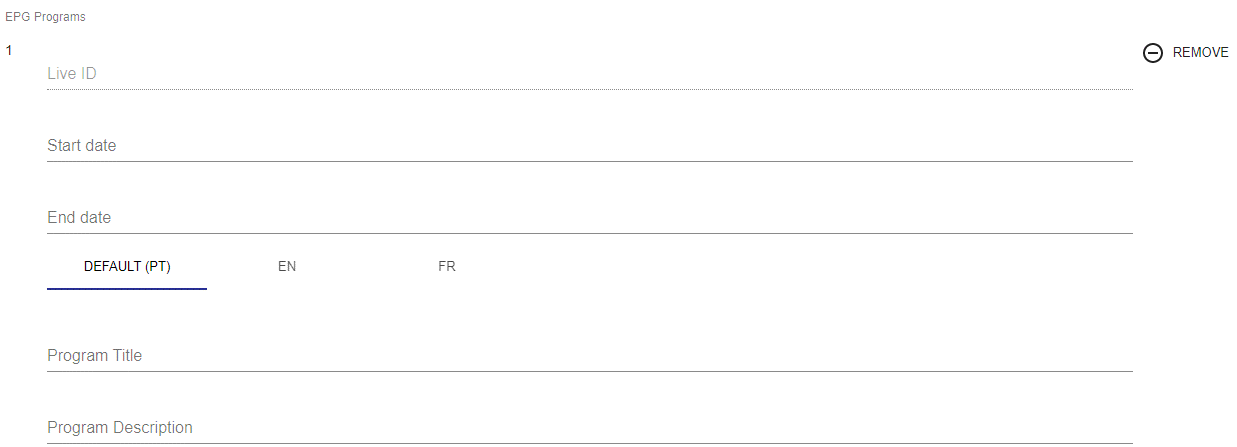
- If you want to add EPG programs manually, click the "ADD" button (below the "EPG Programs" field).


- Start date: program start date and time;
Clicking "Start" will display a calendar for start date selection. After selecting the date, the calendar will be changed to choose the start time. After the selections click the "OK" button in the calendar (pictures below).

- End date: program end date and time;
Follow the same steps as Start (above) to select the program end date and time.
- Program Title: for each configured language, enter the title for the program;
- Program Description: for each configured language, enter the program description;
- If you want to delete a program, click the "REMOVE" button (to the right of the "Live ID" field).
- Start date: program start date and time;
- [OPTIONAL] In the "METADATA" tab fill in the video metadata;
- Follow the same procedures as described in chapter "VODs > Create", step 10.
- Click "SAVE AND SHOW" to save and go to the preview of the created item, or "SAVE AND ADD" to save and continue adding more items.