¶ Automatic Jobs
Revision date: 13/sep/2024
Software version: 2024.07.00
The Automatic Jobs widget gives you the ability to streamline and automate repetitive tasks, significantly reducing the need for manual intervention. By setting up automatic jobs, workflows can be triggered based on specific conditions, ensuring consistent and efficient processing of tasks without operator oversight. This automation not only saves time and effort but also minimizes human error, enhances productivity, and ensures the timely execution of jobs, especially in complex systems where numerous assets need to be managed. Overall, automatic jobs enable a more efficient, reliable, and scalable workflow management process.
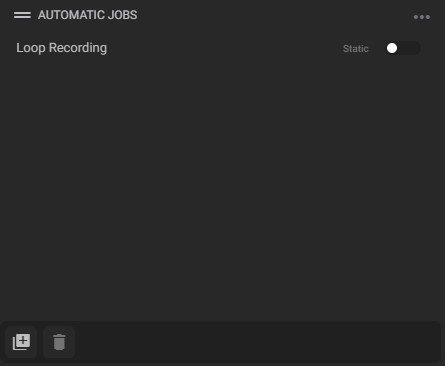
To create a new automatic job, click the icon in the bottom-left corner. A form will appear, allowing you to configure the job settings:
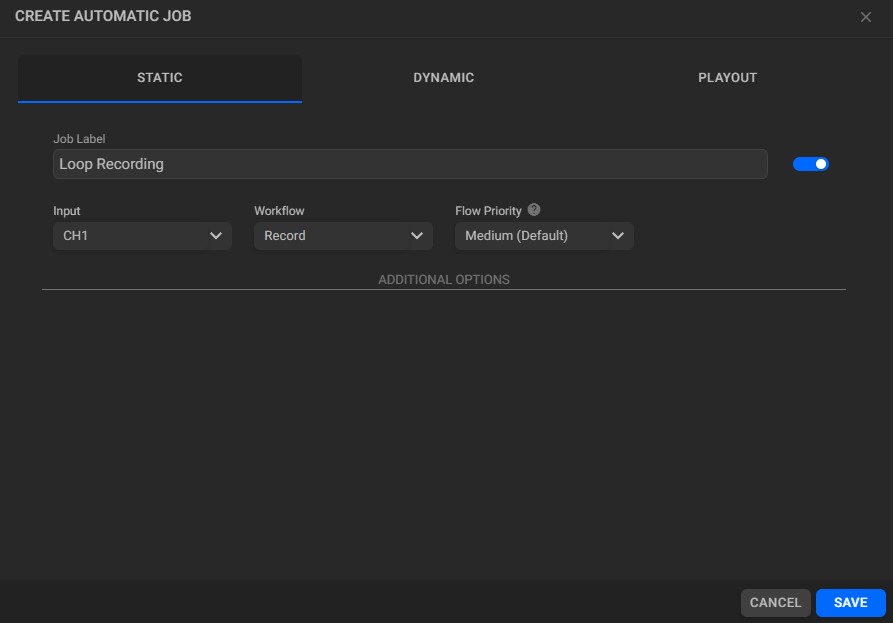
The first step involves selecting from the Static, Dynamic, and Playout tabs, each offering different options for job creation.
Static jobs follow a single, predefined workflow for the given input, dynamic jobs run varying workflows based on specified metadata fields, and playout jobs are triggered when a new asset is detected in the specified input, using the selected player service.
¶ Static Type
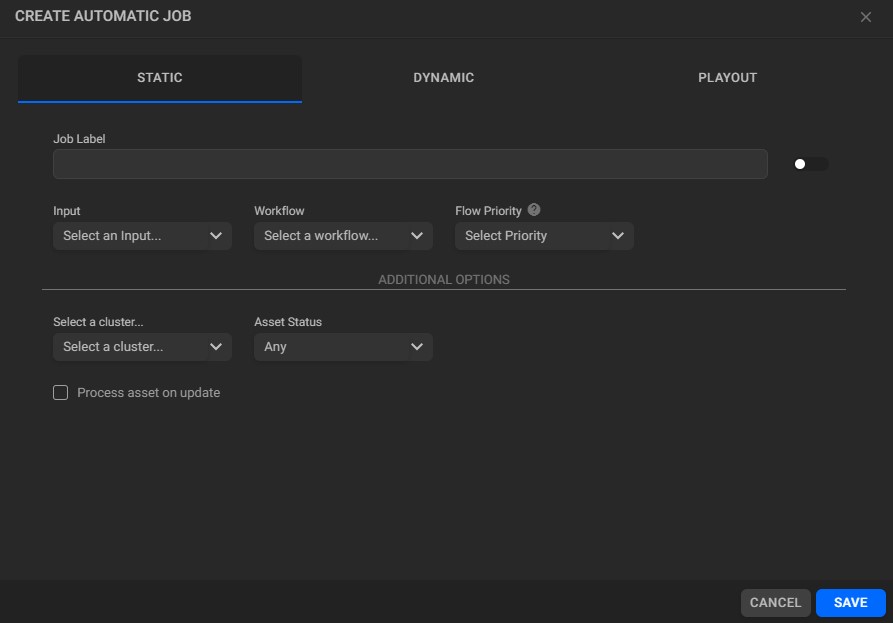
A static automatic job provides the following configuration options:
-
Job Label: enter the name of the new automatic job;
-
 Enable/Disable toggle button: disabled by default, click this button to enable the job immediately after saving it. When enabled, the additional configuration options below will appear:
-
Ignore processed: ignores only files that have already been processed in the selected location;
-
Ignore all: ignores all existing assets in the location;
-
Process all: processes all past and future assets in the location;
-
Date: check this box to enable the date input, allowing you to specify a creation date. Only assets created after this date will be processed.
-
-
-
Input: select a video input. Available options are displayed based on the input type;
Note: when configuring a collection, you can set it to automatically generate proxies whenever an asset is added. As a result, when running a deletion workflow on collection inputs, only the assets' high-resolution files will be deleted, while their proxies will be retained.
-
Workflow: choose a workflow. Available options are displayed based on the input type;
Note: when working with assets from a Collection, you can use the system’s default “MOG proxy” workflow to schedule proxy generation. For more information on Collections, please refer to this page.
-
Cluster (Optional): select from the available clusters;
-
Asset status: filter assets based on the "Asset Status" metadata field;
-
Flow priority: use this setting to choose between Low, Medium (default), High or Critical levels for operations.
To better understand its behavior, let’s imagine that you have some ingest jobs running at medium priority and you start new jobs at critical priority. In this case, the lowest priority assets that started transcoding will complete the job, but the rest will remain on hold until the critical assets have successfully performed the operation.
Please check this quick guide, to better understand how it works.
-
Process asset on update: check this option to reprocess an asset if it is updated after the initial processing;
-
Run on metadata update: check this option to run an automatic job when any of the selected metadata fields are updated. This setting is only available if "Process Asset on Update" is checked.
¶ Dynamic Type
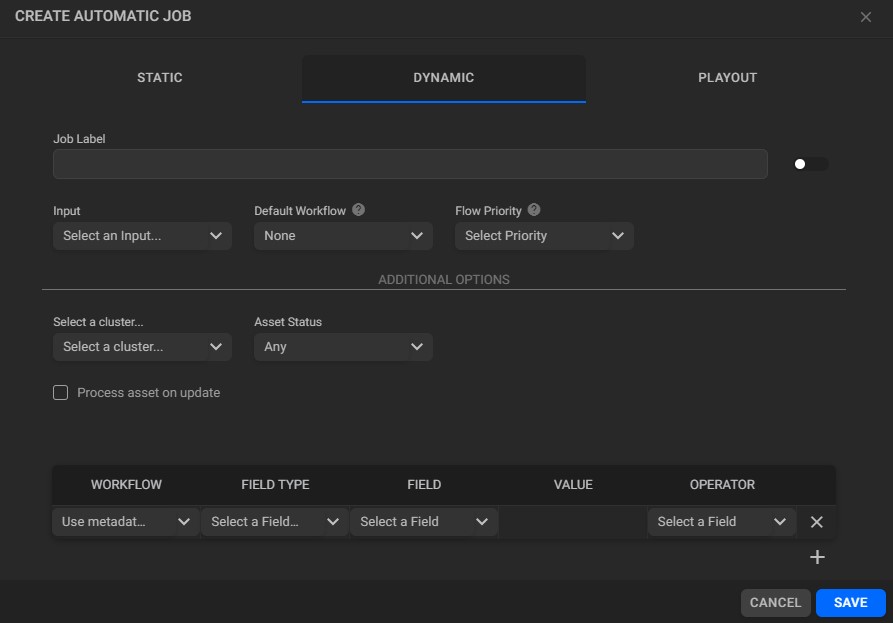
A dynamic automatic job presents the following options:
-
Job Label: enter the name of the new automatic job;
-
 Enable/Disable toggle button: disabled by default, click this button to enable the job immediately after saving it. When enabled, the additional configuration options below will appear:
-
Ignore processed: ignores only files that have already been processed in the selected location;
-
Ignore all: ignores all existing assets in the location;
-
Process all: processes all past and future assets in the location;
-
Date: check this box to enable the date input, allowing you to specify a creation date. Only assets created after this date will be processed.
-
-
-
Input: select a video input. Available options are displayed based on the input type;
Note: when configuring a collection, you can set it to automatically generate proxies whenever an asset is added. As a result, when running a deletion workflow on collection inputs, only the assets' high-resolution files will be deleted, while their proxies will be retained.
-
Cluster (Optional): select from the available clusters;
-
Asset status: filter assets based on the "Asset Status" metadata field;
-
Default workflow: select the workflow that will be executed for assets that don't match the metadata configured in the fields below;
-
Flow priority: use this setting to choose between Low, Medium (default), High or Critical levels for operations.
To better understand its behavior, let’s imagine that you have some ingest jobs running at medium priority and you start new jobs at critical priority. In this case, the lowest priority assets that started transcoding will complete the job, but the rest will remain on hold until the critical assets have successfully performed the operation.
Please check this quick guide, to better understand how it works.
-
Process asset on update: check this option to reprocess an asset if it is updated after the initial processing;
-
Workflow: choose the workflow to run for assets that attend the selected metadata;
-
Field type: select the metadata field type;
-
Field: select the metadata field;
-
Value: enter the value of the metadata field to be validated.
For fields that use date as a value, three options will be displayed for defining it:
-
 Manual: enter the date manually;
 -
 Calendar: the value can be entered manually, taking into account the mask displayed (mm/dd/yyyy hh:mm), or it can be selected by clicking on the calendar icon on the right, making it possible to choose the date and time;
 -
 Age: for this type of filter, you will be asked to enter a numerical value and select the measurement unit, which could be days, weeks, months, or years.
Note: the age field is only available for copy, move, and archive workflows.
-
-
Operator: select comparison operator for automatic job triggering;
-
Remove filter button: click to remove the selected filter;
-
Add filter button: click to add a new filter.
¶ Playout Type
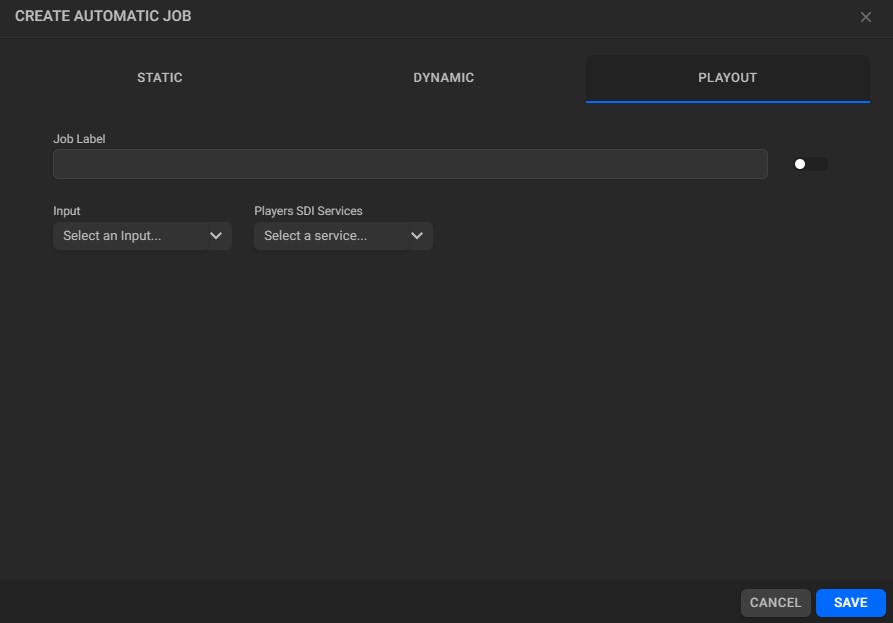
A playout job presents the following options:
-
Job Label: enter the name of the new automatic job;
-
 Enable/Disable toggle button: disabled by default, click this button to enable the job immediately, so every time a new asset is detected in the input, it will be reproduced using the selected service;
 -
Input: select a video input. Available options are displayed based on the input type;
-
Player SDI Services: click to select a service for video playout.