¶ Face Recognition
Revision date: 26/jul/2024
Software version: 2024.07.00_49e8015c_rc1
The compatible products with this feature are MAM4PRO, mDECK, and mCODER.
In the production and post-production environment, time is key, especially when it comes to identifying multiple people in your content.
With that in mind, we’re happy to share a work-saving tool to maximize your productivity with little to no effort: our Face Recognition workflow, powered by cutting-edge AI technology.
Let’s see how to take advantage of it:
Video Tutorial Instructions
Step-by-step Instructions
¶ Preparation
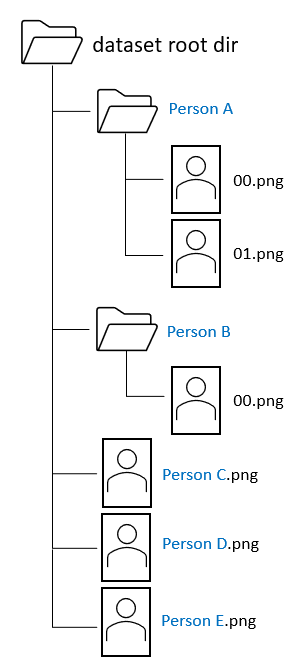
For our products to correctly identify faces in a piece of media, you must properly indicate it. To do that, you must first establish a dataset from which our solutions will be able to read information.
There are two ways of doing this: by creating a single folder in your desired storage location with multiple pictures of all the faces you wish to detect; or by creating multiple sub-folders under a single folder, each one dedicated to each face you wish to detect.
In the first approach, the pictures must have the person’s name. In the second one, the folders also need to have the person’s name, meanwhile the pictures can be named as you wish.
¶ Procedure
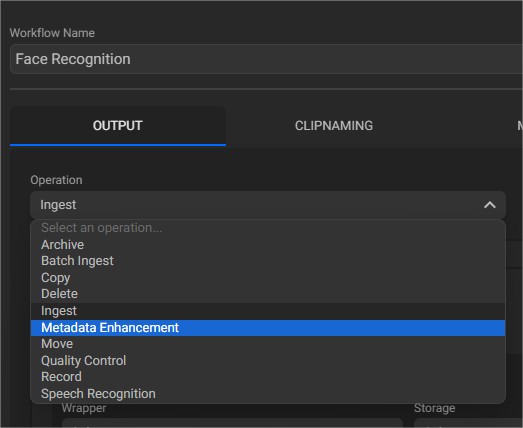
After you have created an Input directed towards the location your target media is stored in, you’ll need to add a “Metadata Enhancement” workflow.
Go to “Workflow Profiles” and create a new workflow. Select the type of operation as “Metadata Enhancement”, and check the option “Face Recognition”:
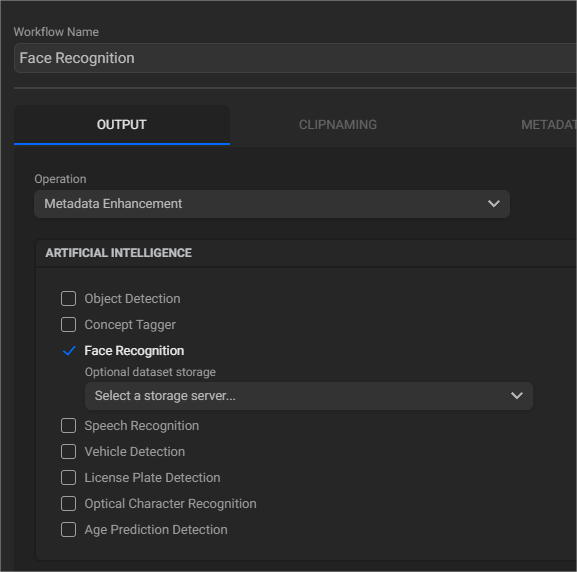
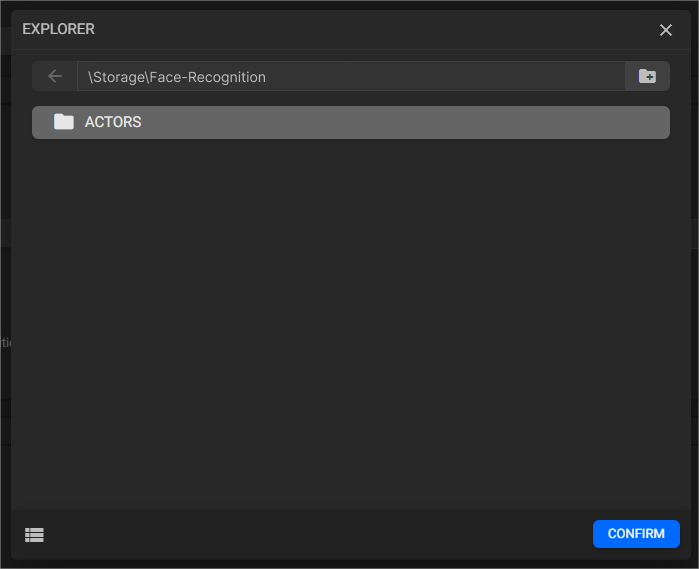
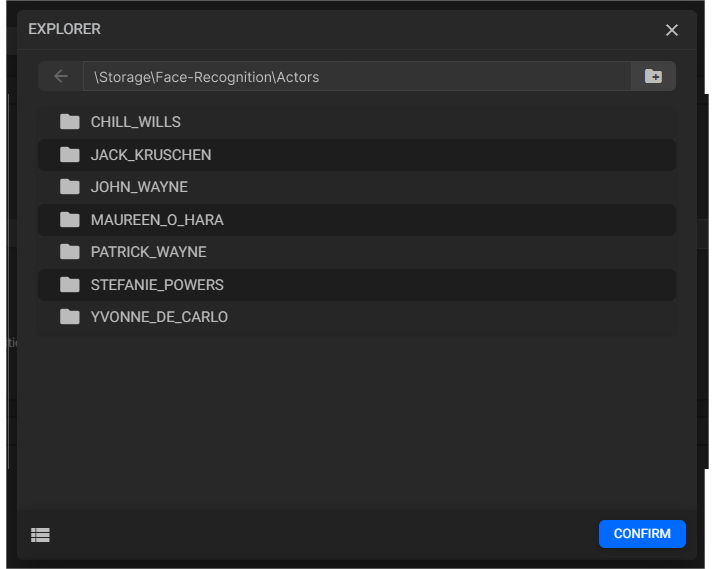
You must select a storage server to feed MAM4PRO the necessary dataset, as mentioned above. Select the folder in which your data is located, either in pictures or sub-folders, the latter being our case:
Save this configuration. Back to your Rough Cut Dashboard, search for the newly added Input on the “Asset Browser” widget, and click on it to begin indexing media:
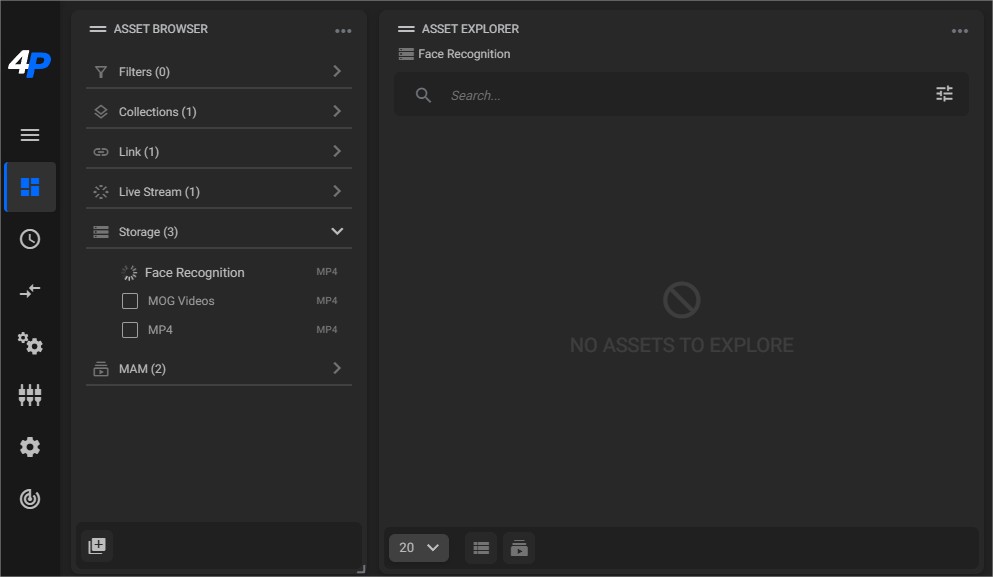
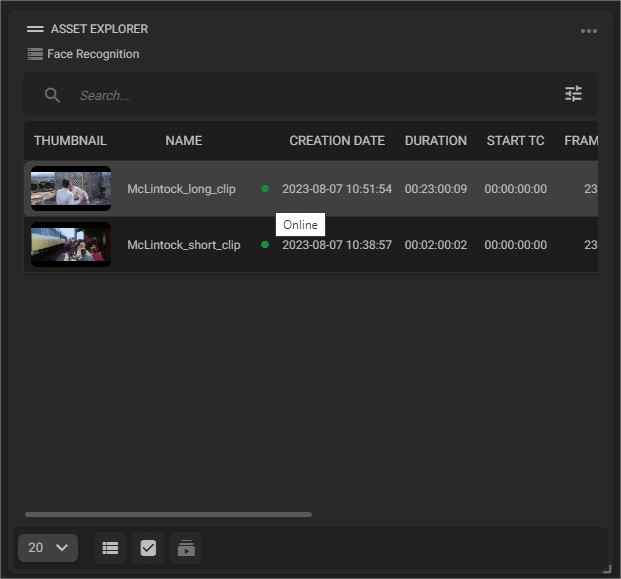
Now, your assets should appear on the “Asset Explorer” widget. Choose your desired targets here:
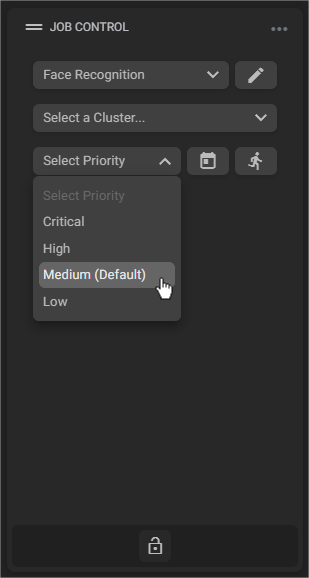
On “Job Control”, select the recently created workflow. If you want to, you can assign a priority level for this operation, under “Select Priority”:
Run the operation and wait for its conclusion. Then, before checking your results, make sure you have a “Markers” widget present in your Dashboard. It’s here, under the “Enhanced Metadata” tab, that results will appear:

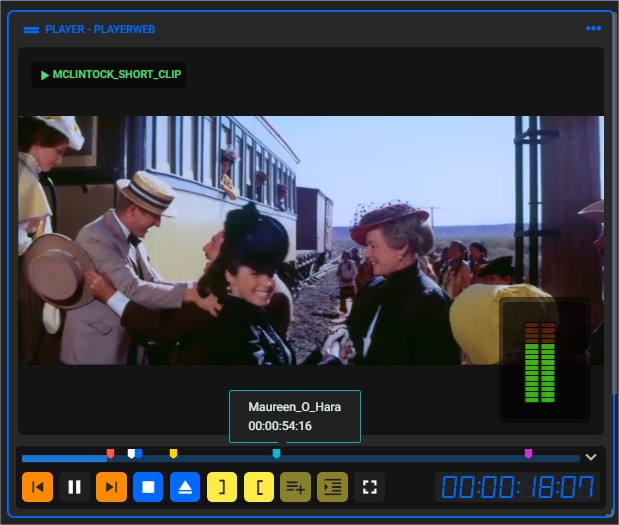
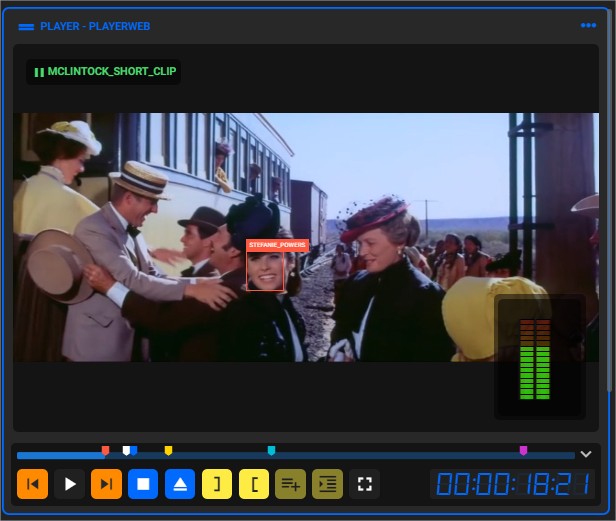
Now, all you must do is playback the processed asset! See that MAM4PRO has correctly detected the faces in the video, based on the information we gave it:
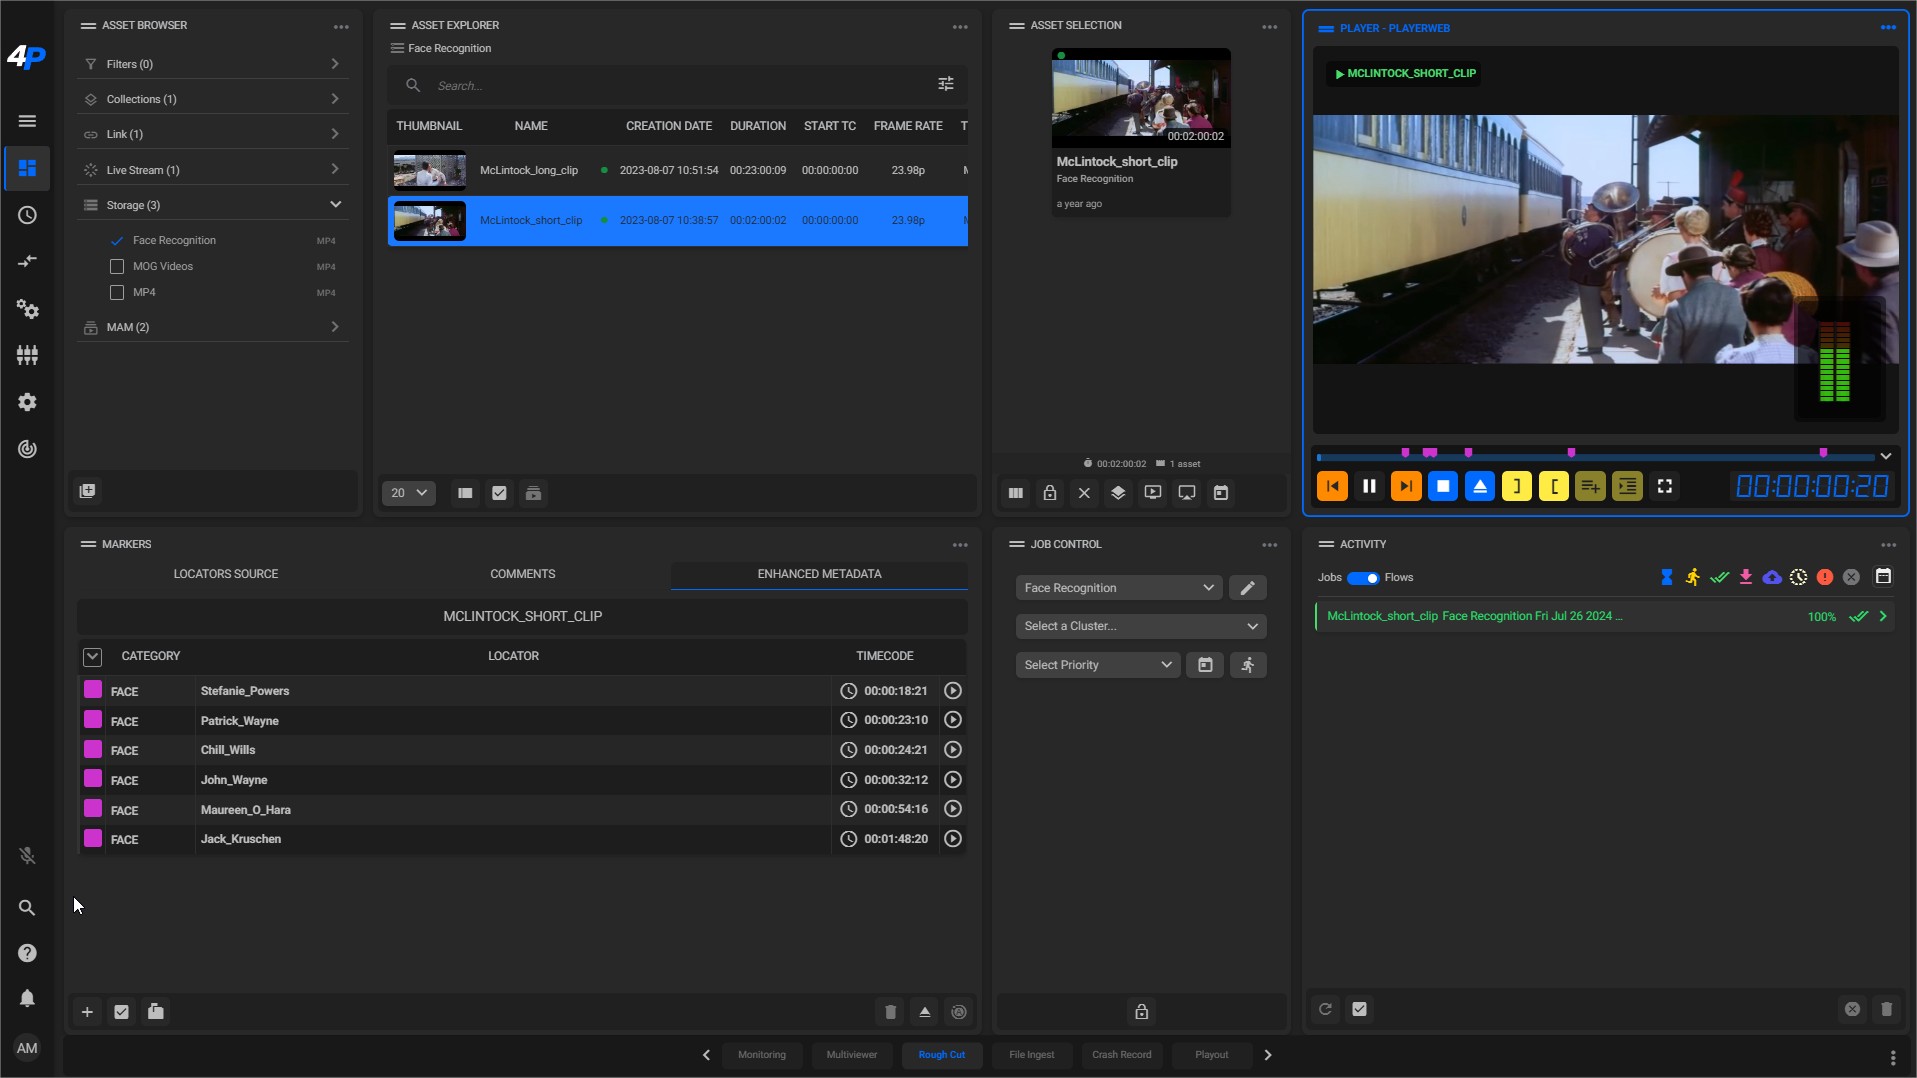
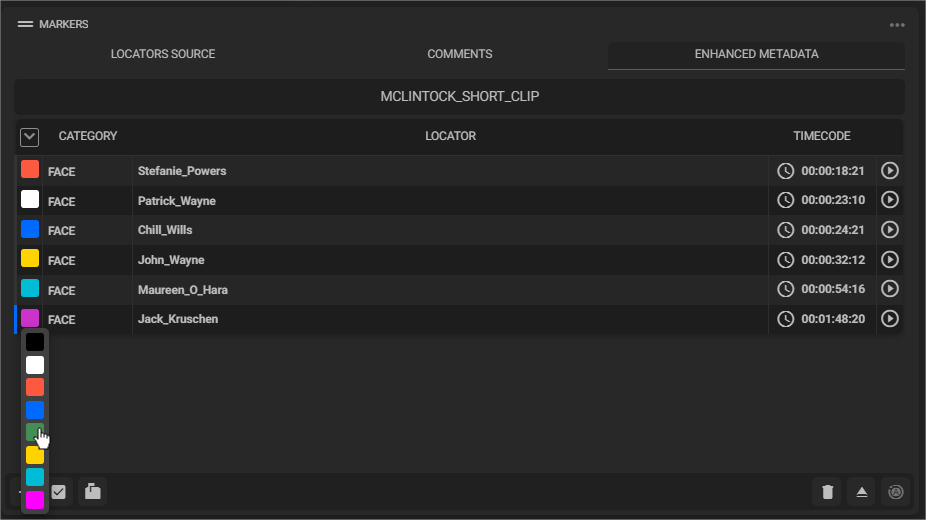
On the “Markers” widget, you can verify if the detected information is correct, as well as edit it according to your needs, changing each marker’s color, name, and even their timestamp:
Notice that you can also navigate the player’s timeline to find each marker, with its respective information:
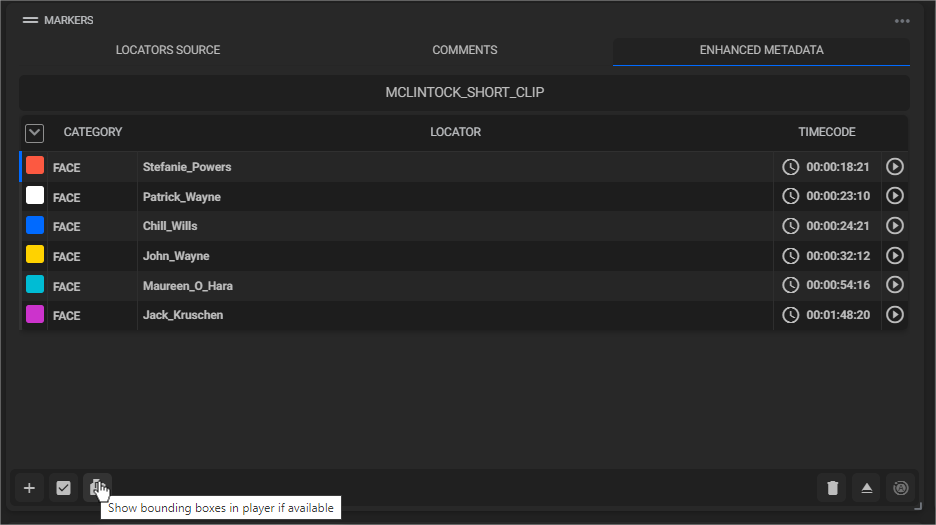
To enable or disable the player’s bounding boxes, you can click on the “Bounding boxes” icon on the “Markers” widget:
All of this detected information can be exported in an XML file.

