¶ Asset Metadata
Revision date: 30/sep/2024
Software version: 2024.08.00
Please note that the Metadata widget has been deprecated and replaced by the Job Metadata and Asset Metadata. The first allows you to configure output metadata when running flows and the second displays source metadata. If you are using an older version than 2024.07.00, we recommend visiting the Metadata widget page for further details and information.
The fields displayed in the Asset Metadata widget are organized into different tabs, which vary depending on the selected asset. You can reorder the tabs by dragging and dropping them into the positions that best suit your needs.
¶ Custom tab
The Custom tab allows you to view, edit, exclude, and add new metadata fields.
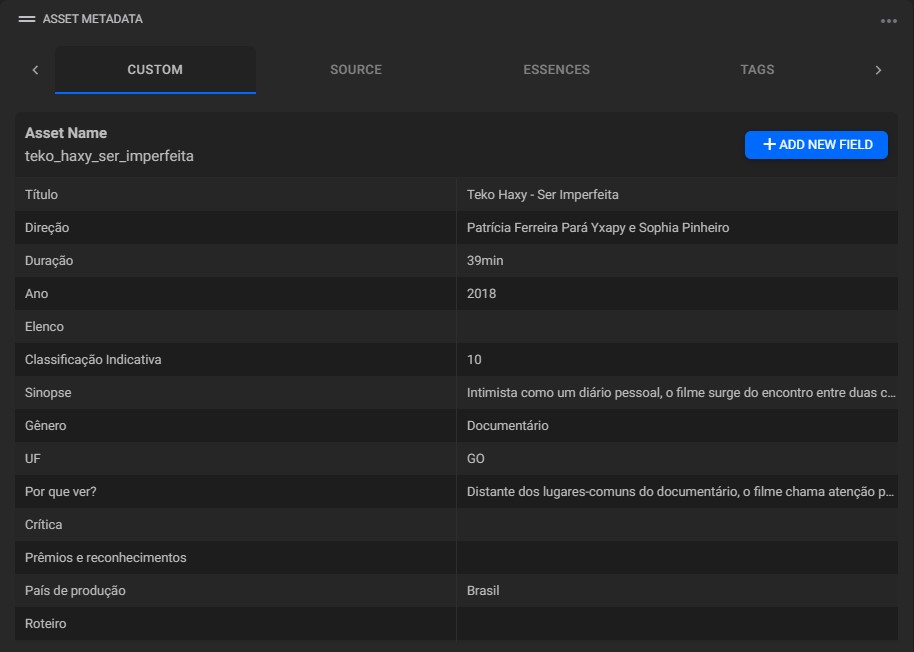
To add a new field, click the “Add New Field” button, complete the form, and click “Save”:
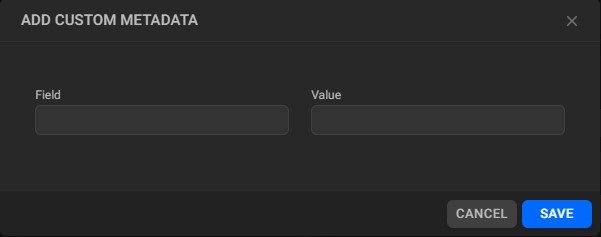
- Field: enter the name of the new metadata field;
- Value: enter the value of the new field;
To edit a metadata value, hover over the desired field value and click the “Edit” button  . To delete a metadata field, hover over the field name, click the “Delete” button
  , and confirm the deletion.
¶ Source tab
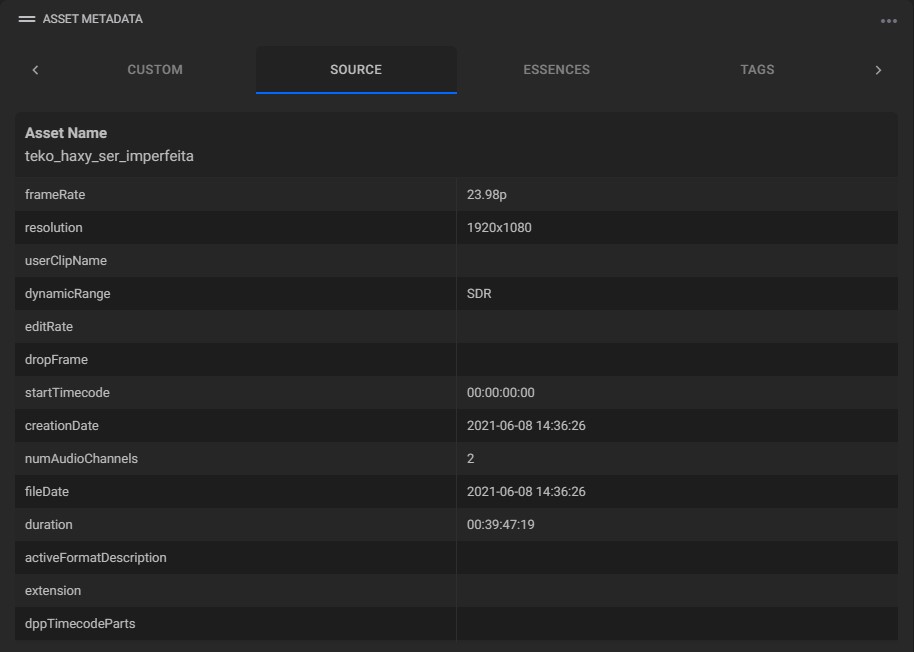
The Source tab displays the metadata from the source asset.
¶ Essences tab
The Essences tab shows files linked to the selected asset, such as Video, Audio, Proxy, Image, Thumbnail, Metadata, and Subtitles.
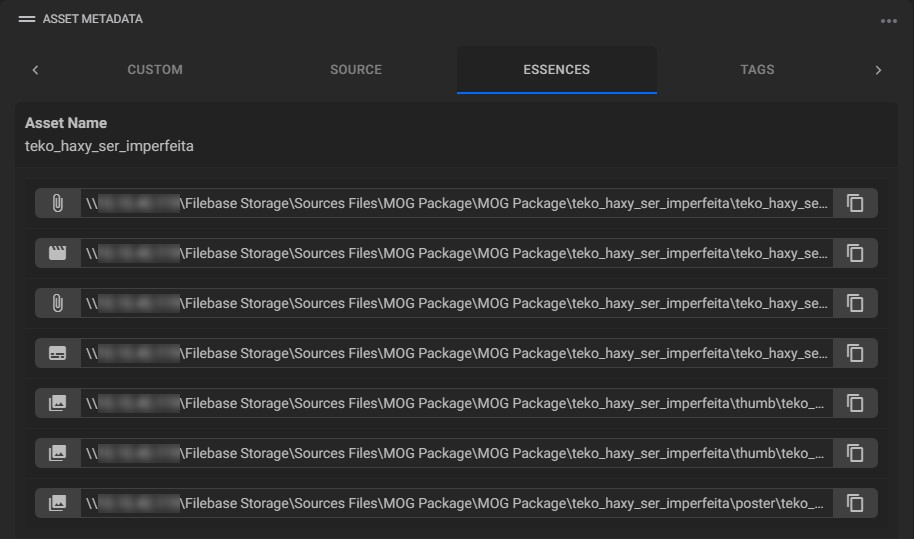
If the original high-resolution file is archived, its path is retained and marked with a red icon for future Disk-to-Disk Storage Manager needs.

¶ Tags tab
Use the Tags tab to manage asset tags, including adding, editing, and deleting them.

- To add a new tag, click the “Add New Tag” button and enter its value.
- To edit a tag, double-click the tag text and update the value.
- To delete a tag, hover over it and click the “Delete” button
 .
.
Notes:
- A predefined list of tags can be used. To find out how, see Widget Settings > Advanced tab sub-chapter, step 3;
- After running a metadata enhancement workflow with the “Concept Tagger” option active, the tags will be displayed here too.
¶ Widget Settings
Access the Settings window by clicking the “Options” menu in the widget’s upper right corner, then select “Settings.”
¶ Favorites tab
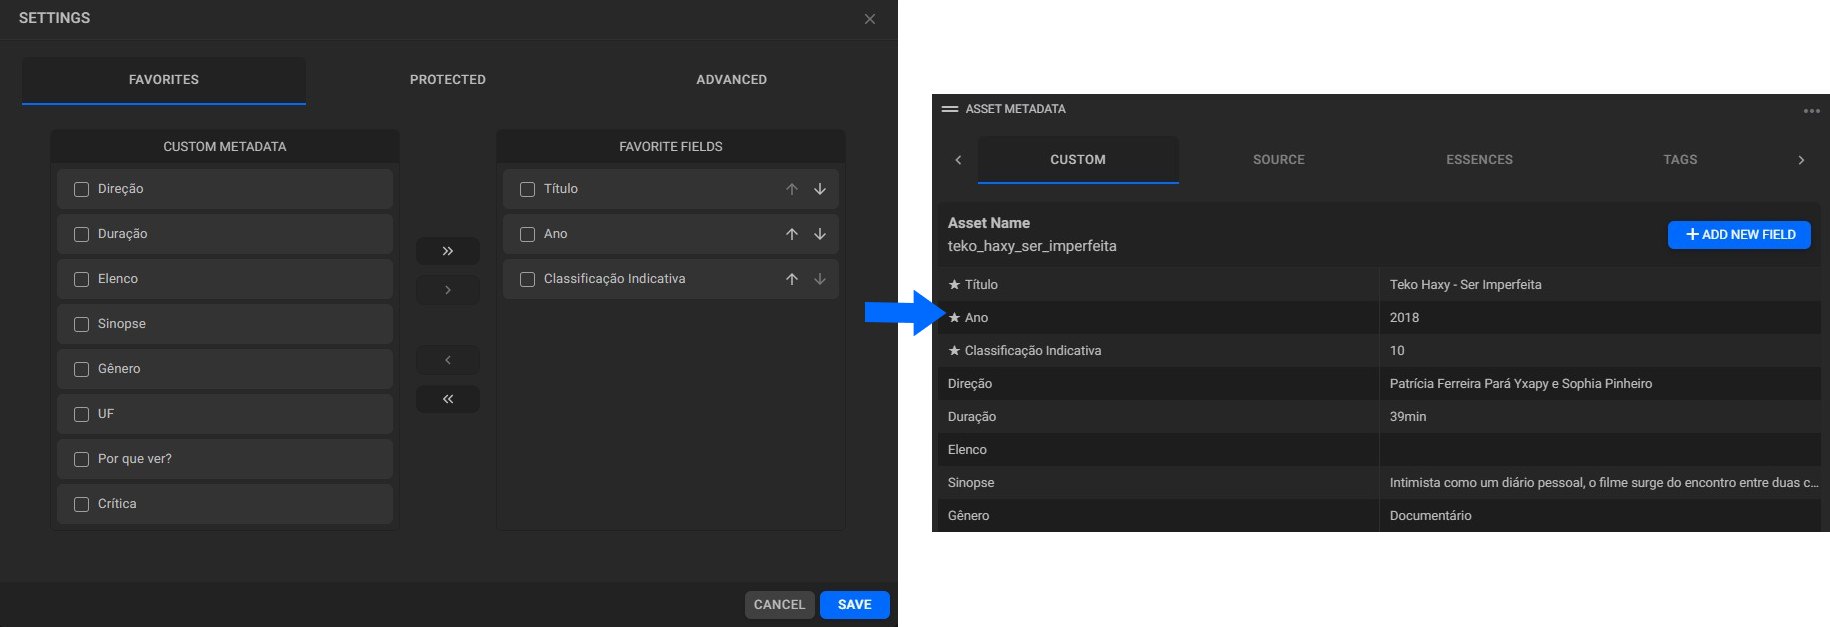
The Favorites tab allows you to mark custom metadata as favorites, positioning them above other metadata in the Custom tab. To do this, select the desired custom metadata in the left panel and use the center arrows to move them to the right panel. The center arrows can be used to edit the data that will be marked as favorite, while the right arrows enable you to rearrange the order of the data.
¶ Protected tab
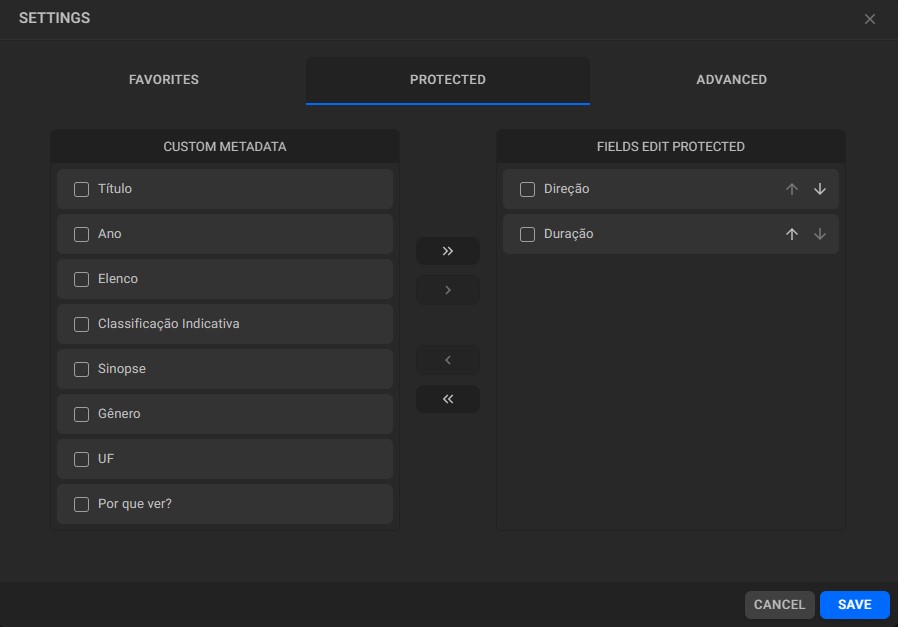
The Protected tab lets you select fields that cannot be edited in the Custom tab. To do this, select the desired custom metadata fields in the left panel and use the center arrows to move them to the right panel. The center arrows can be used to edit the fields that will be protected, while the right arrows enable you to rearrange the fields’ order.
¶ Advanced tab
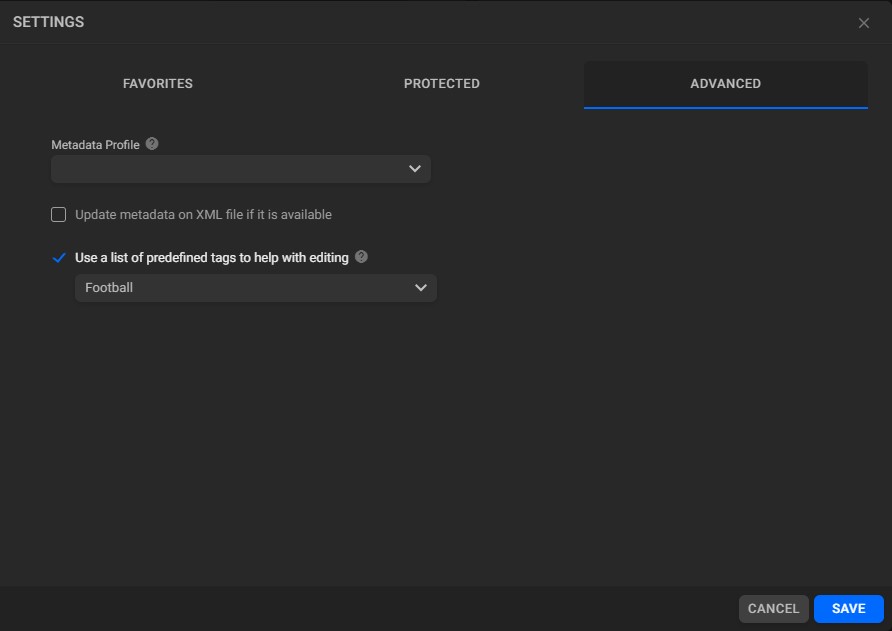
The Advanced tab contains additional settings relevant to the widget.
-
Metadata profile: when selecting a metadata profile, the fields configured in it will be available in the “Custom” tab to be filled in;
-
Update metadata on XML if it is available: check this box to update metadata on the corresponding XML file when updated in the interface;
-
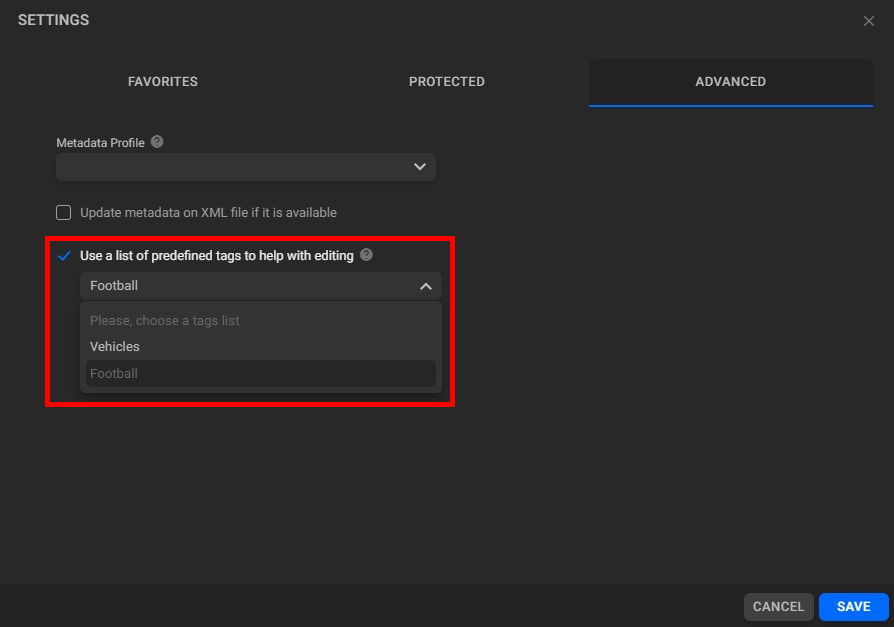
Use a list of predefined tags to help with editing: to facilitate tag editing, a JSON file of pre-configured tags can be created in
"C:\ProgramData\MOG\MAM4PRO\configs\mWeb\constants". The file should be named “assetTagsPresets.json” and may have categories, as shown below: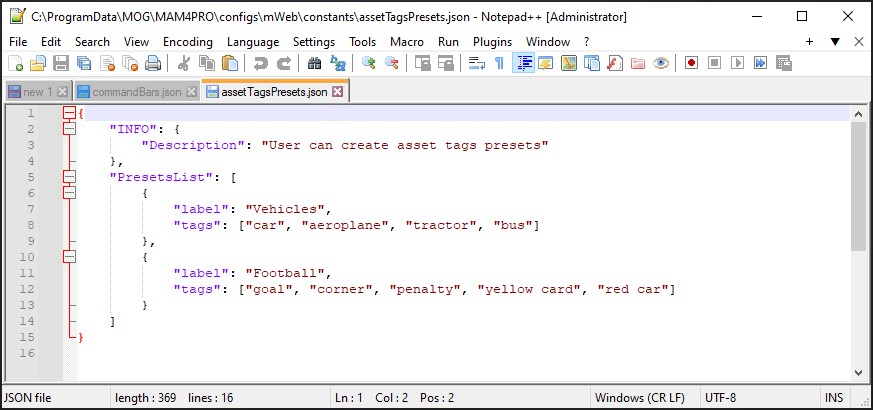
Once this list is created, select the “Use a list of predefined tags to help with editing” option and choose which category will be used in the Asset Metadata widget, as shown below:
After that, on the “Tags” tab, select the tags that will be associated with the asset:
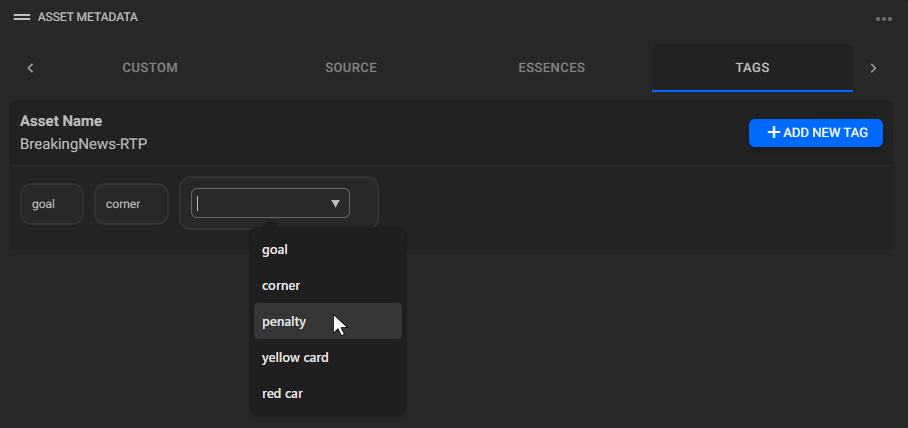
Note: before selecting an option, please clear the default tag name.